
We recommend going through all steps to ensure that all synchronization necessary for POS365 to operate has been set up correctly.
Part 1:
Download Business Central extension called 'POS ONE - POS365 BC Integration
Step 1:
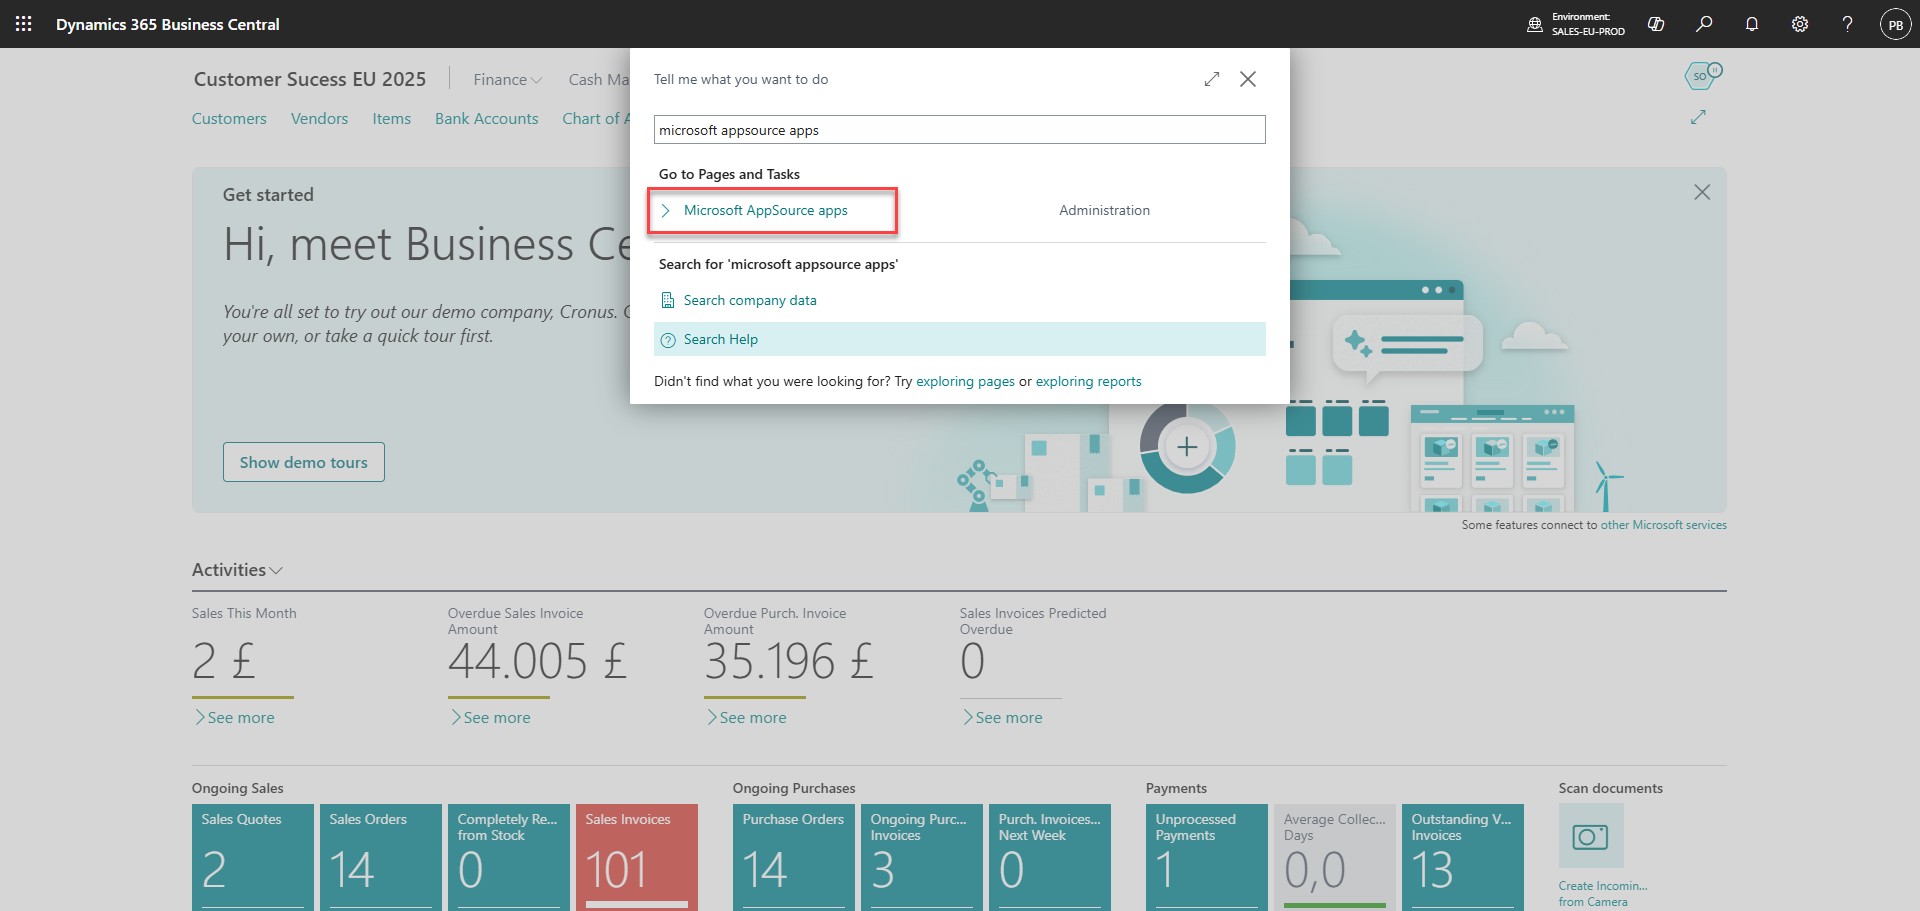
1) Click on 'Search'
2) Search for 'AppSource'
3) Click on 'Microsoft AppSource apps'
Step 2:
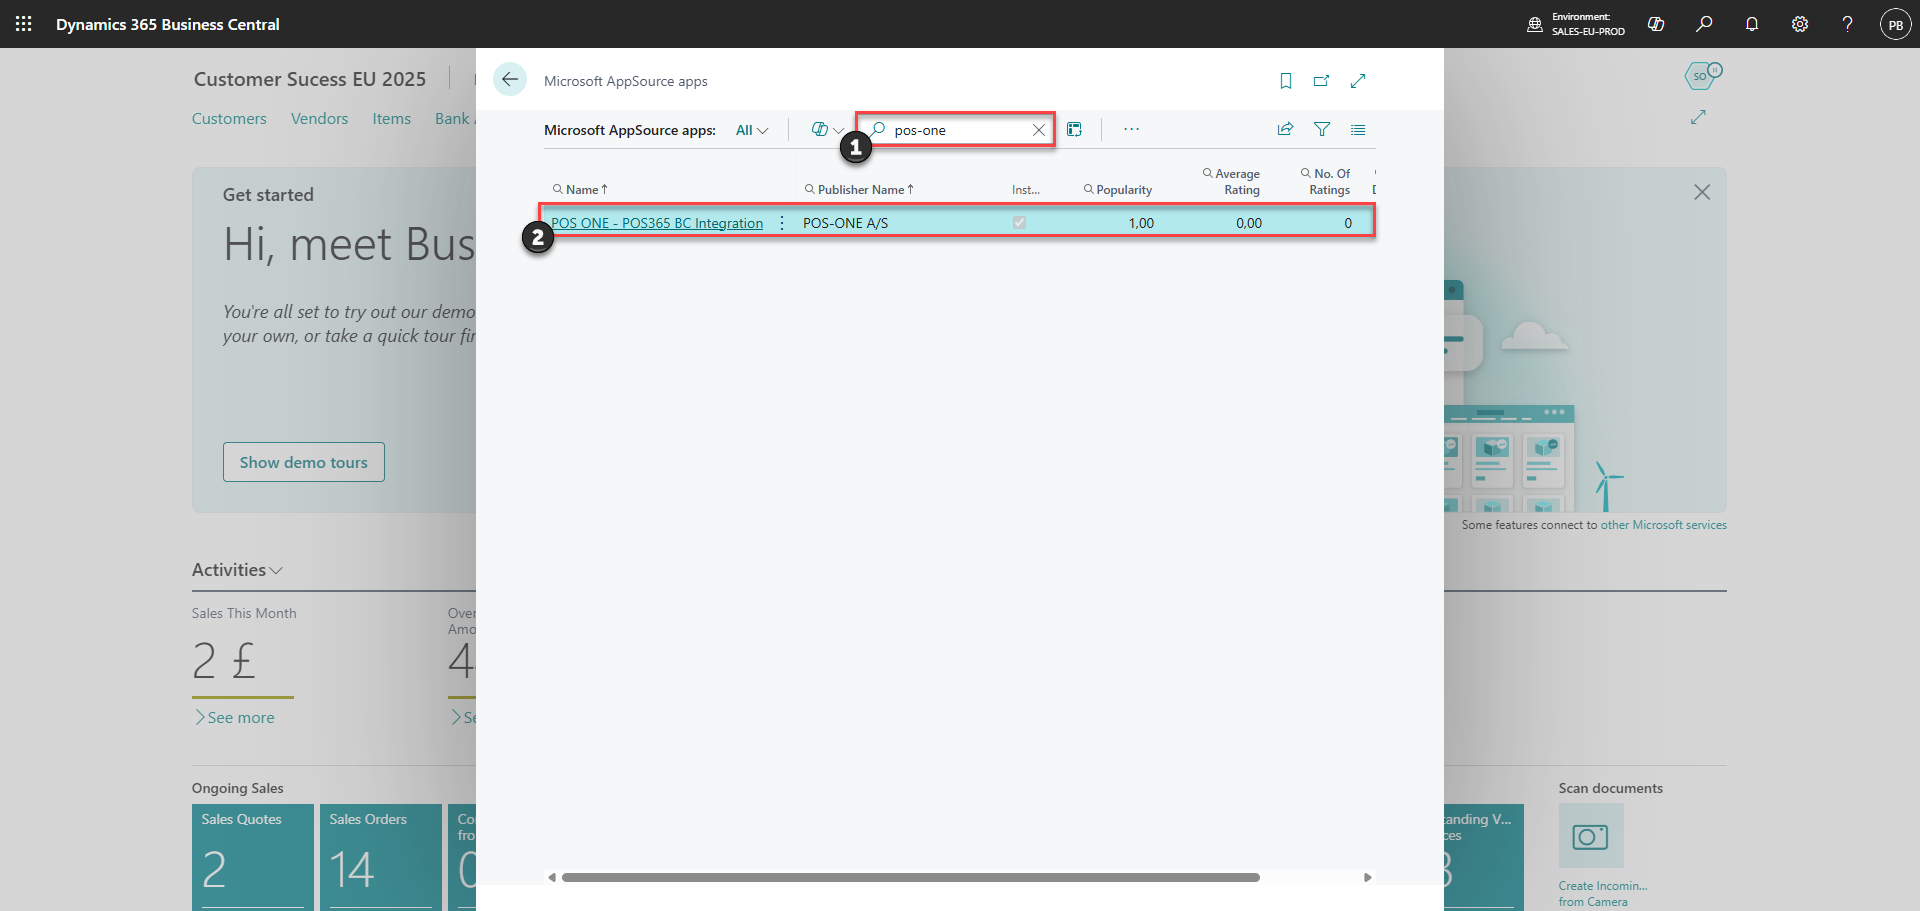
1) Search for 'POS-ONE'
2) Choose the extension called 'POS ONE - POS365 BC Integration'
Step 3:
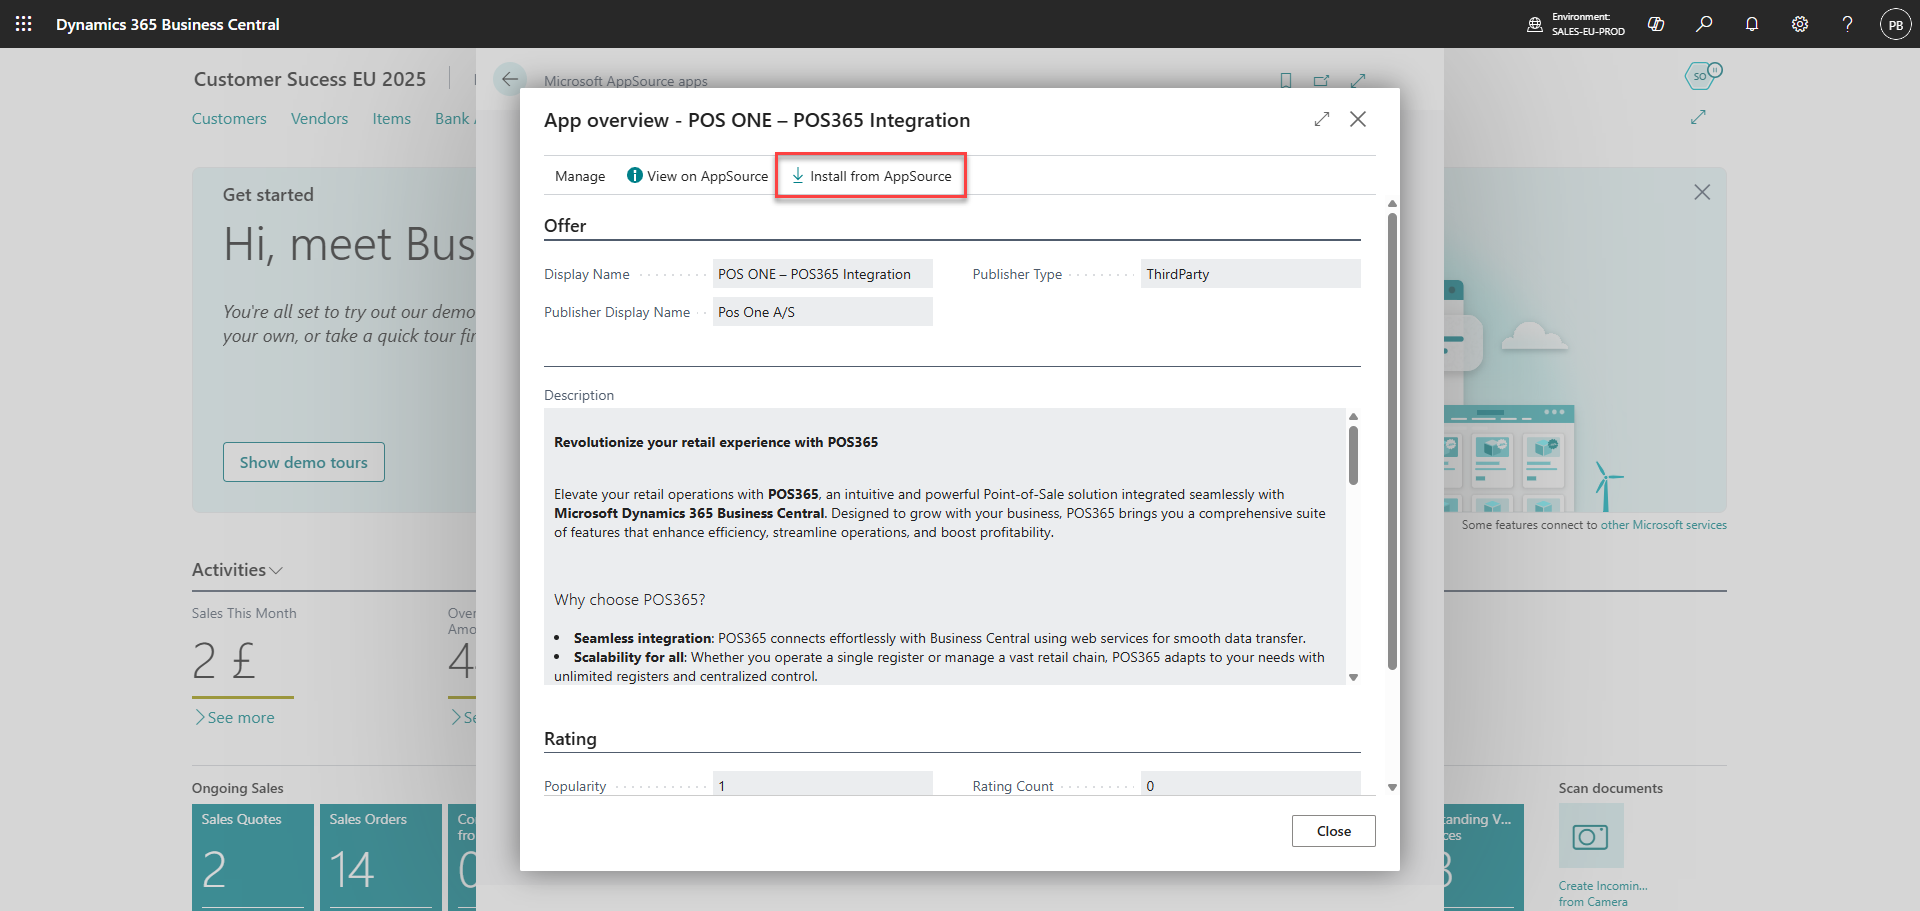
Click 'Install from AppSource'
Part 2:
Allow HttpClient requests for 'POS ONE - POS365 BC Integration' in the extension management
Step 1:
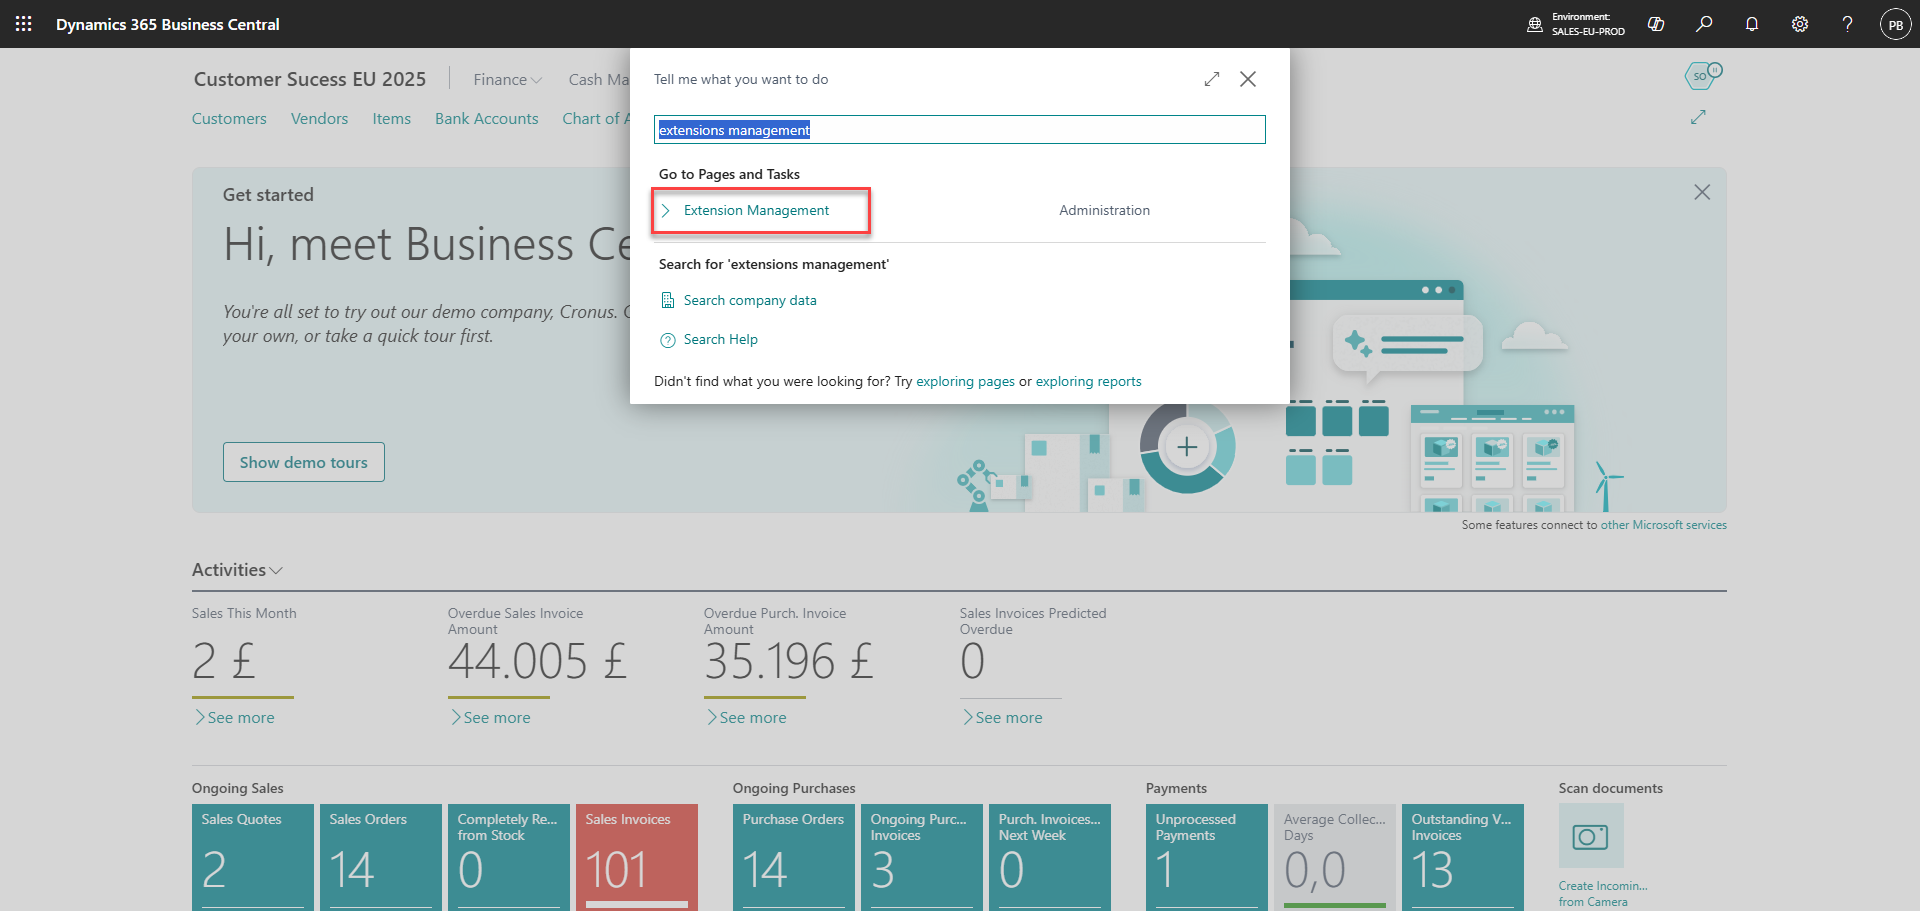
1) Click on 'Search'
2) Go to 'Extension Management'
Step 2:
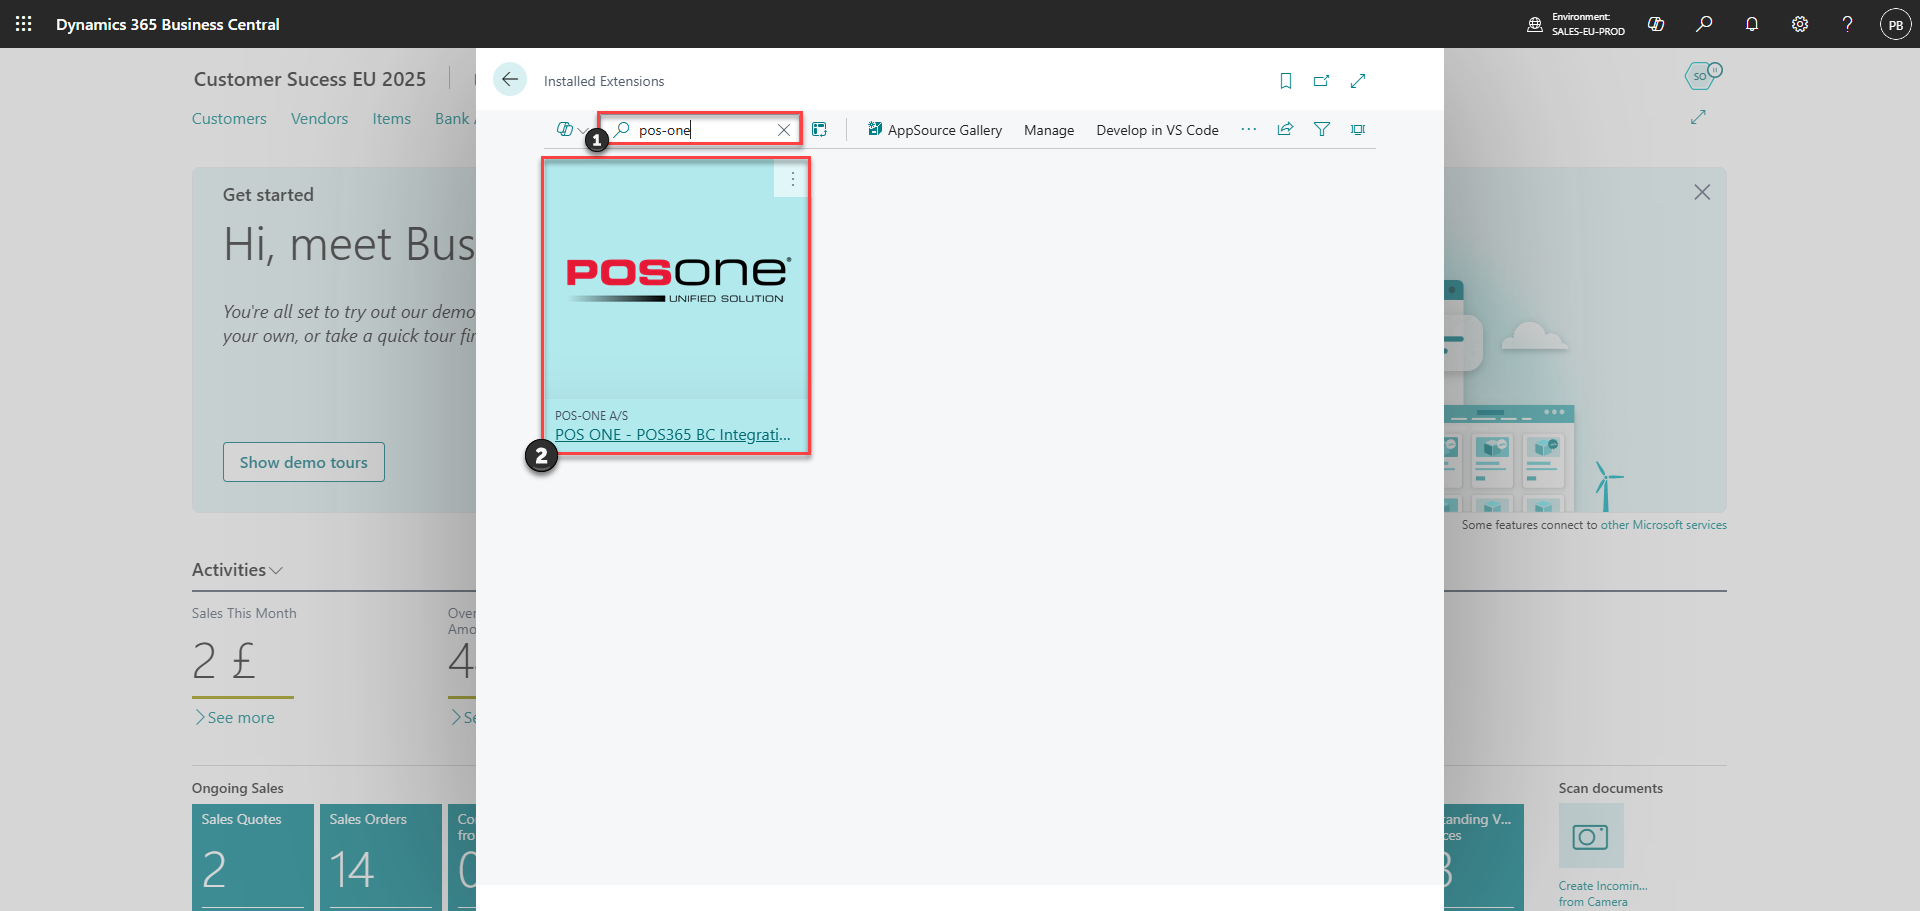
1) Search for 'POS-ONE'
2) Choose 'POS ONE - POS365 BC Integration'
Step 3:
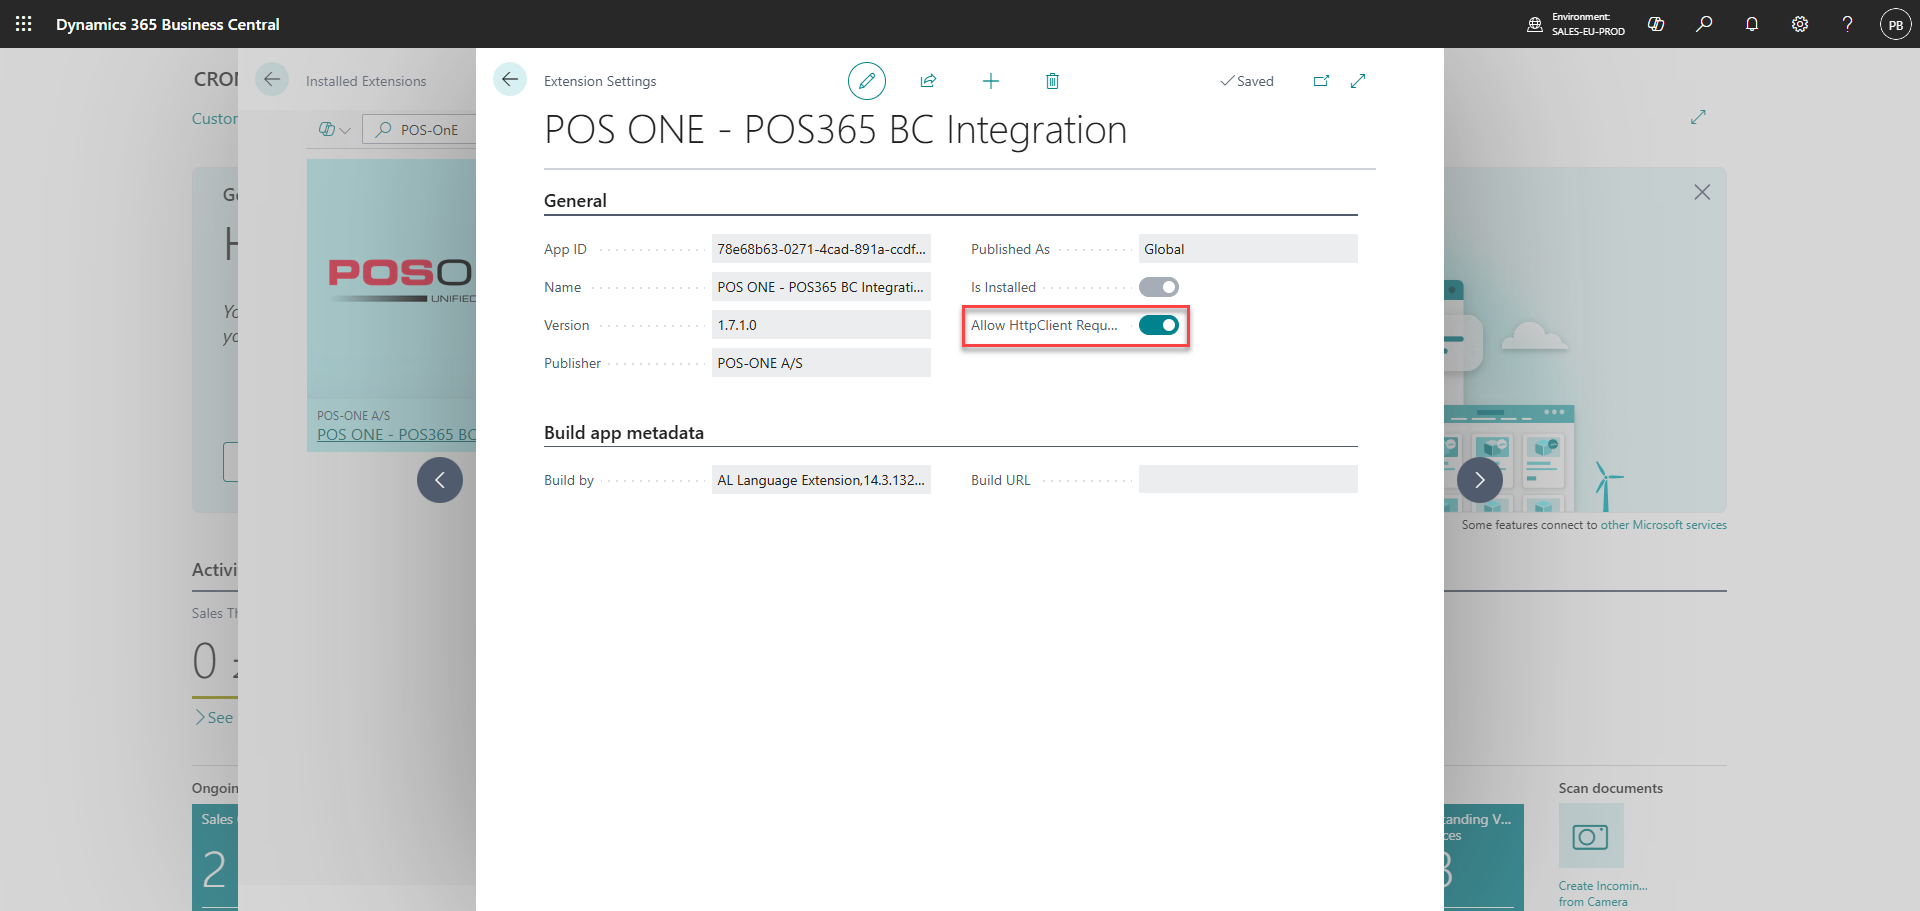 Toggle on 'allow HttpClient Requests'
Part 3:
Create a new 'Microsoft Entra Application' with the 'Client ID' from Azure, set state=enabled, and insert user permission sets 'PON ALL PERMISSIONS' and 'D365 FULL ACCESS'
Step 1:
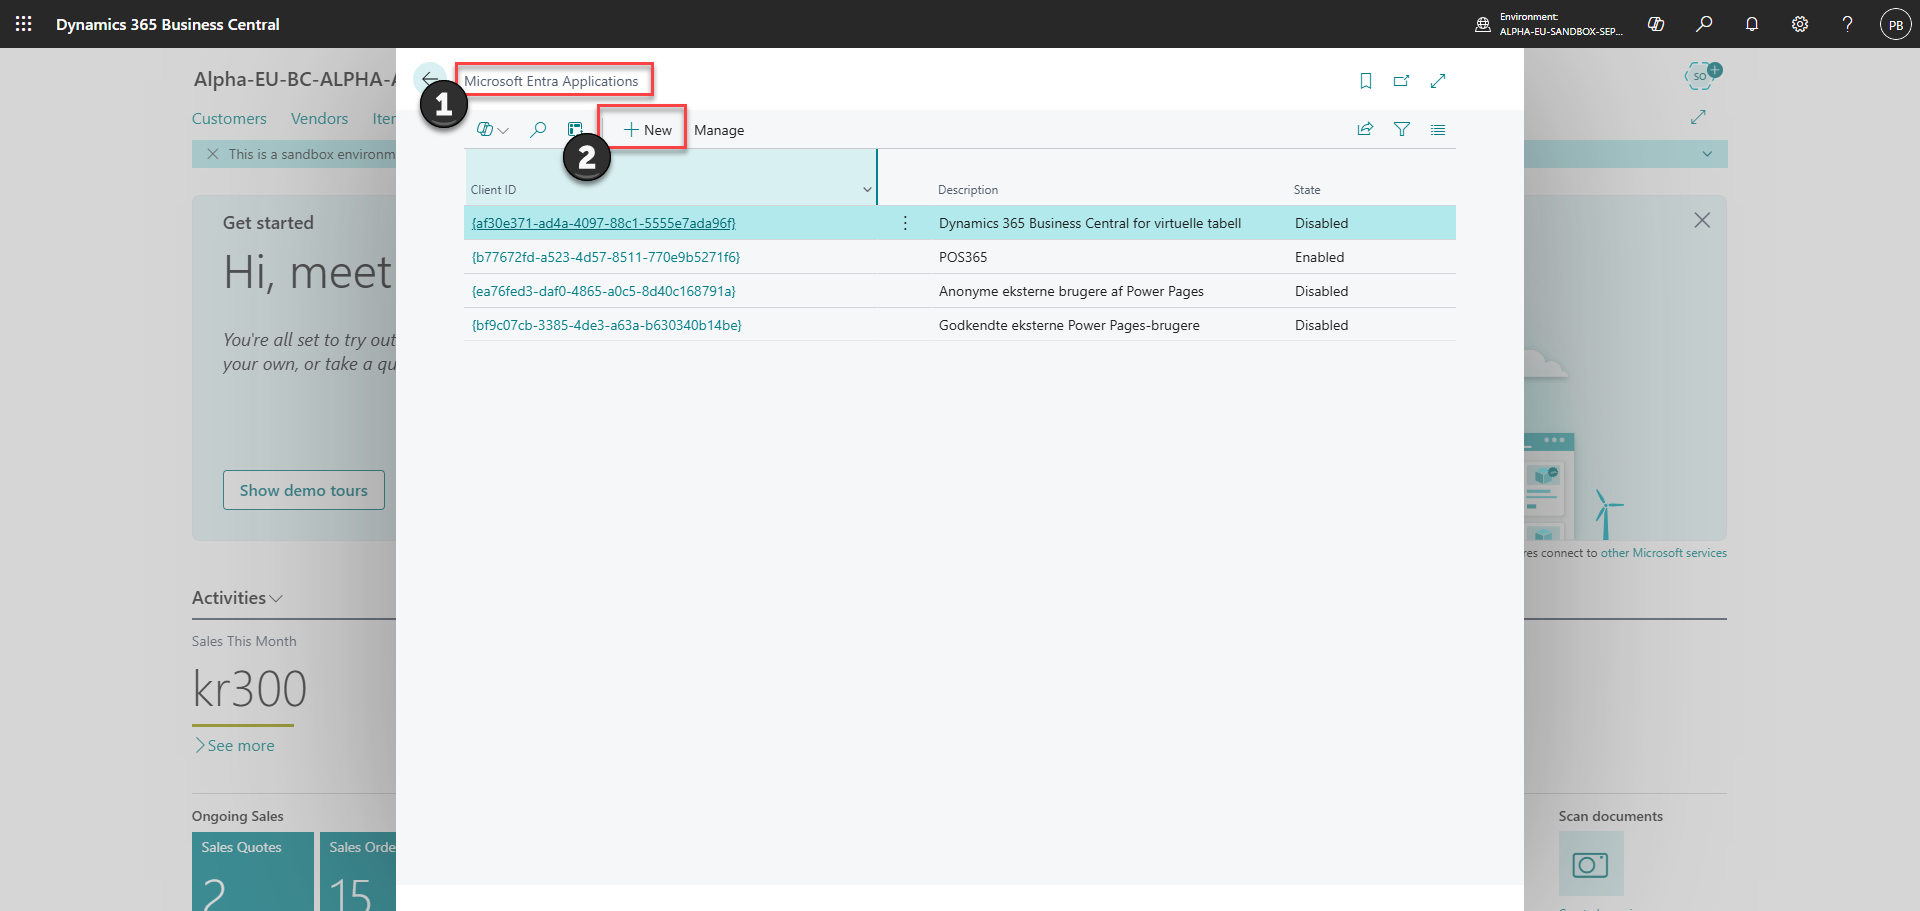
1) Go to 'Microsoft Entra Applications'
2) Click 'New'
Step 2:
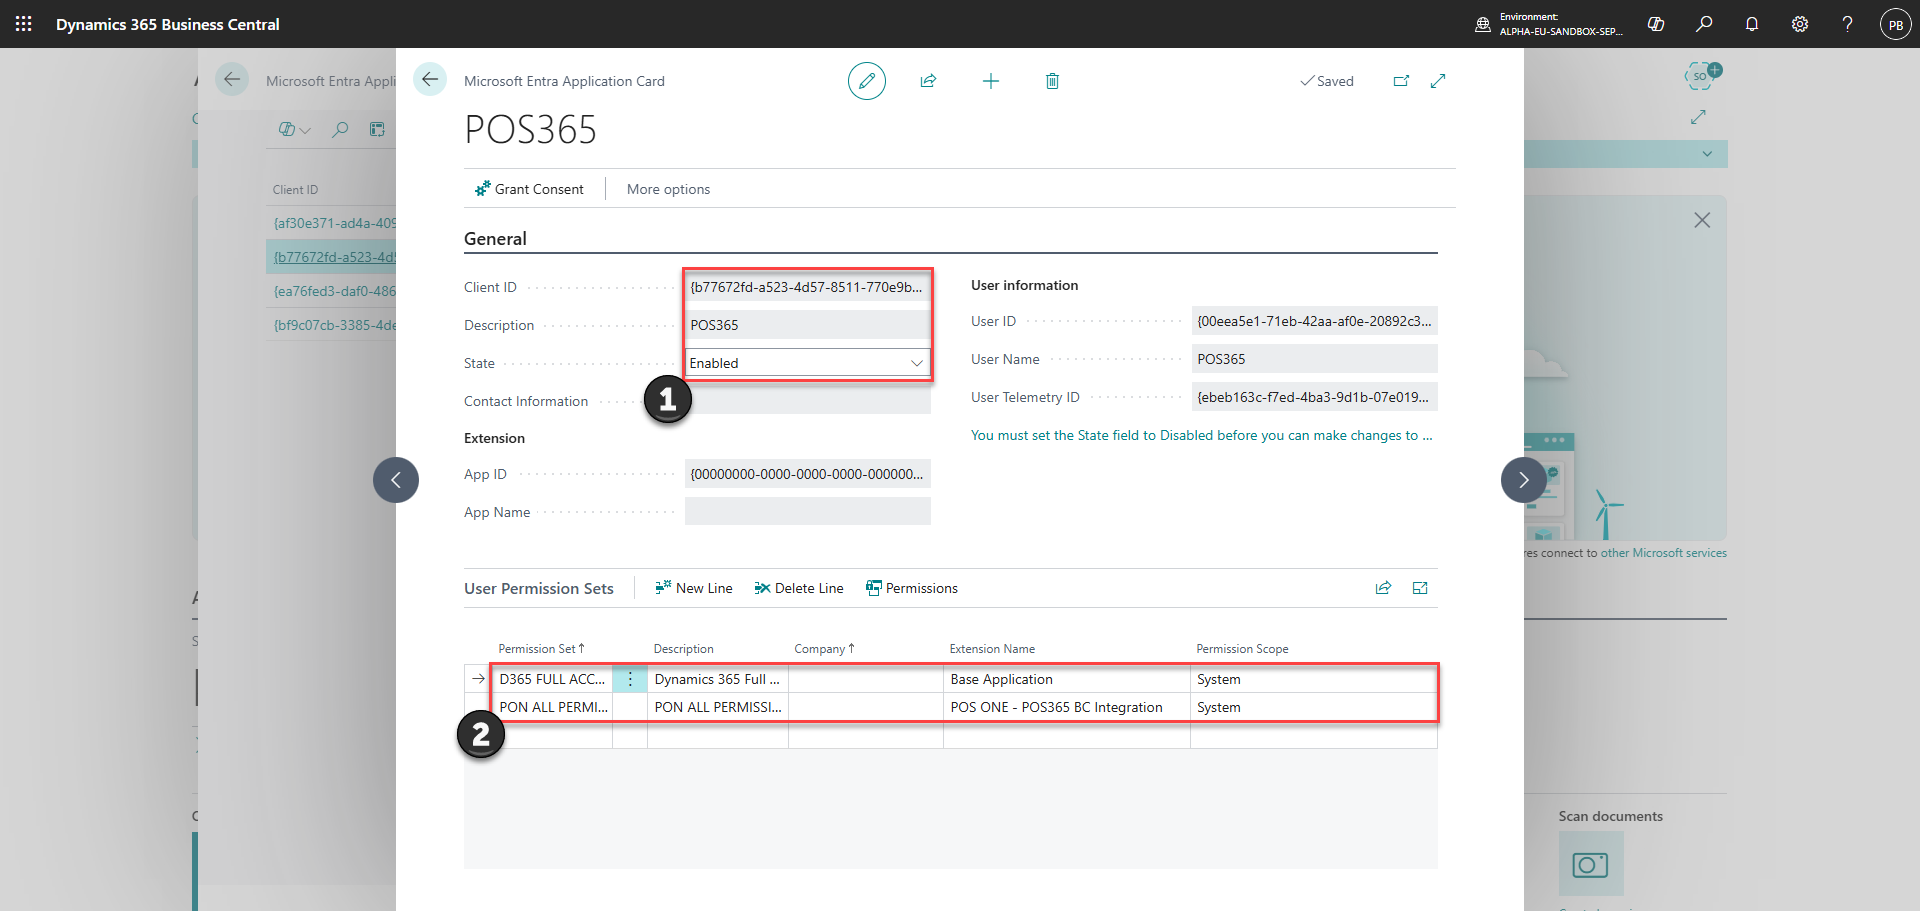
1) Fill in information
- Add Client ID from Azure
- Set description to 'POS365'
- Set 'State = Enabled'
2) Set 'User Permission Sets'
- PON ALL PERMISSIONS
- D365 FULL ACCESS
Part 4:
Open 'item categories' and mark the checkbox 'On POS' for the item categories you want to be displayed on the POS
Step 1:
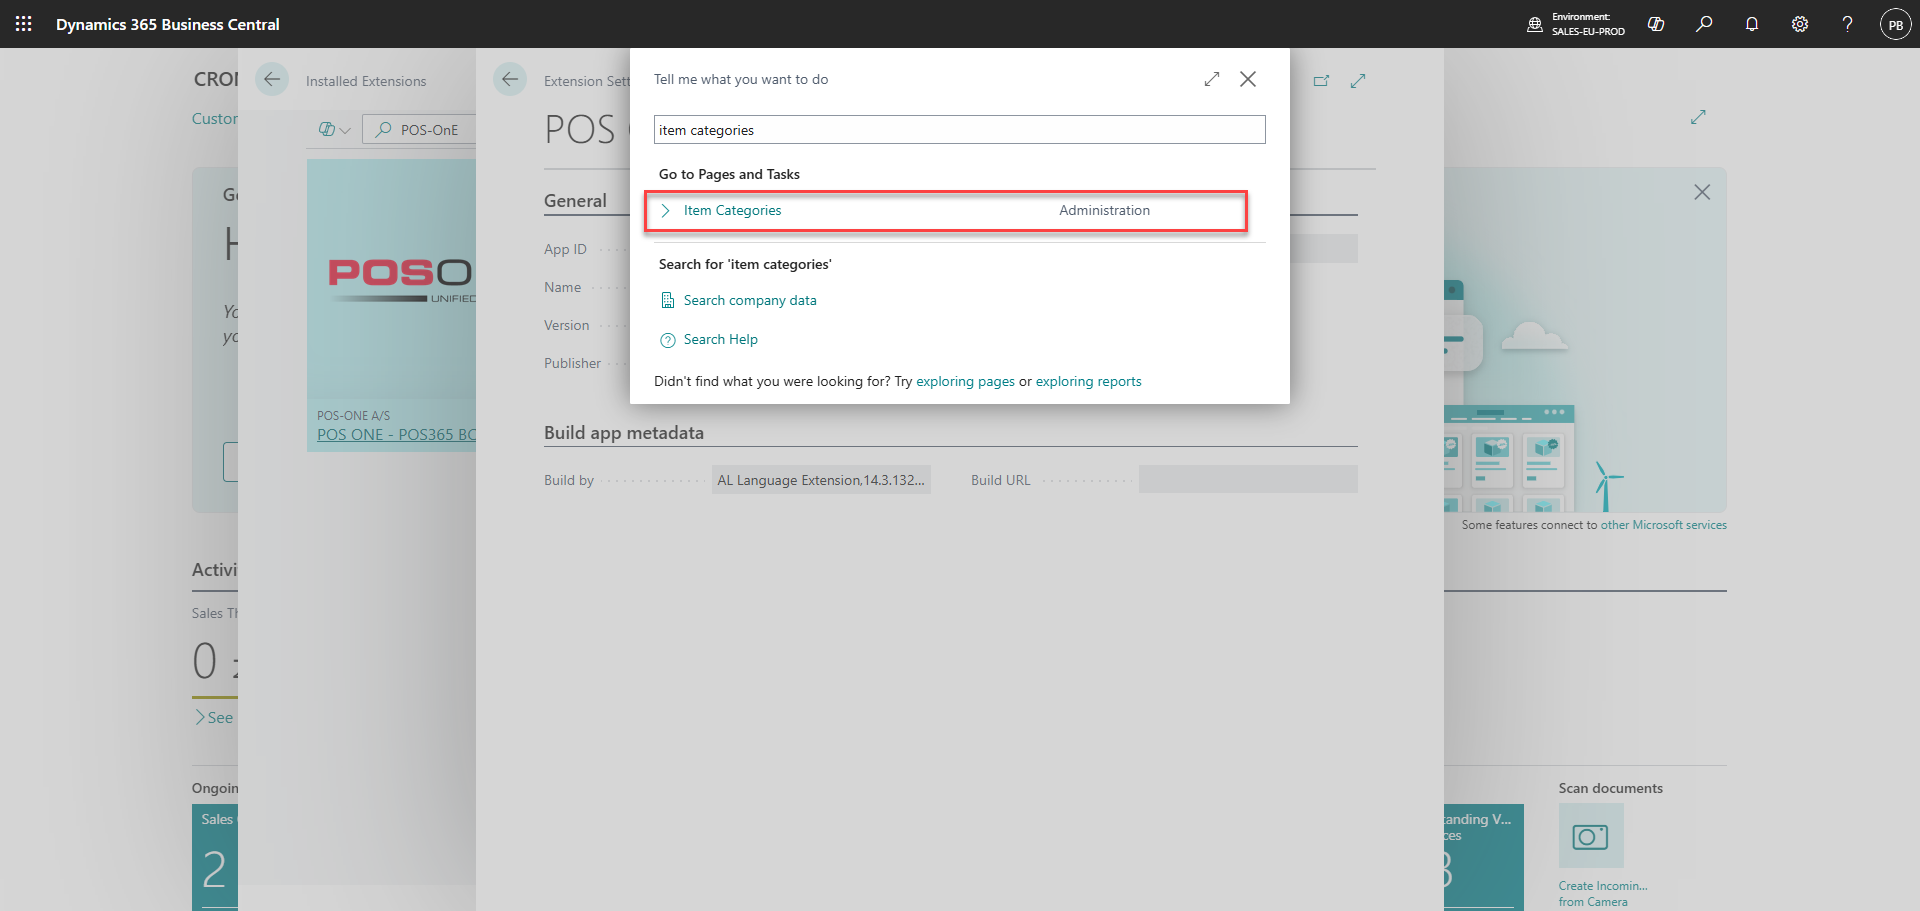
Search for 'Item categories'
Step 2:
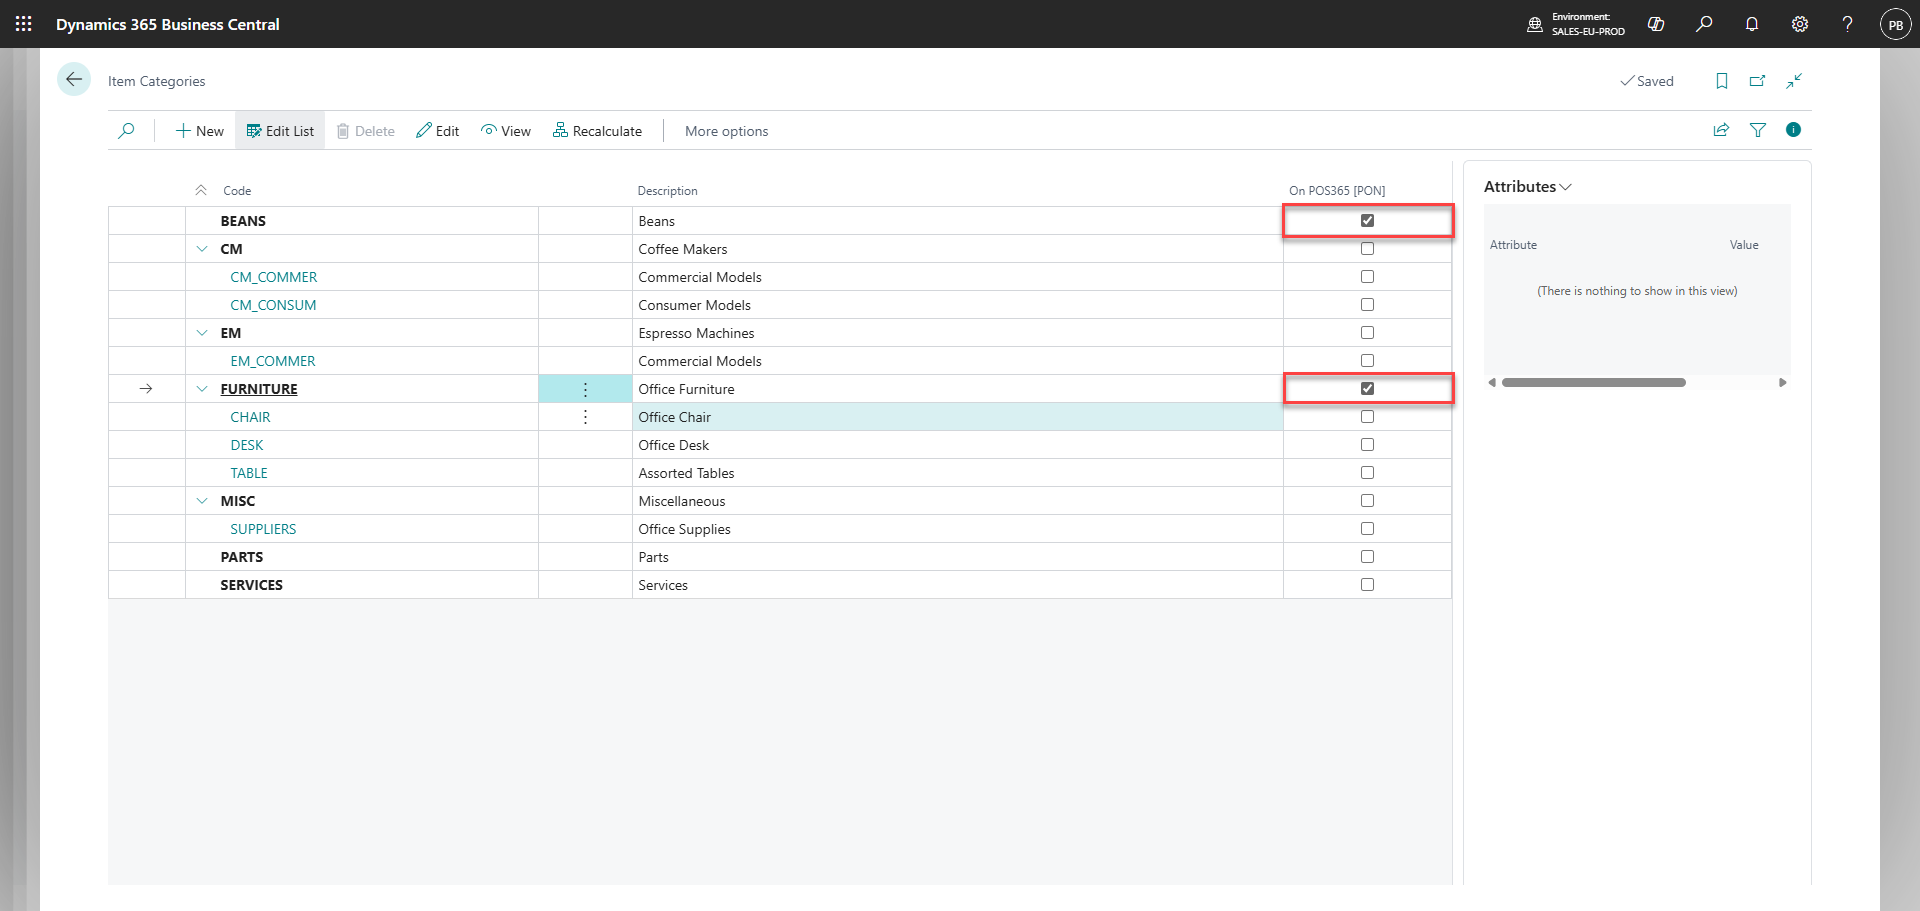
Set 'On POS365 [PON]' to true for the item categories you want to show on the POS
Part 5:
Go to 'Customer Posting Groups', scroll all the way to the right and check the checkbox 'On POS' to true for all groups
Step 1:
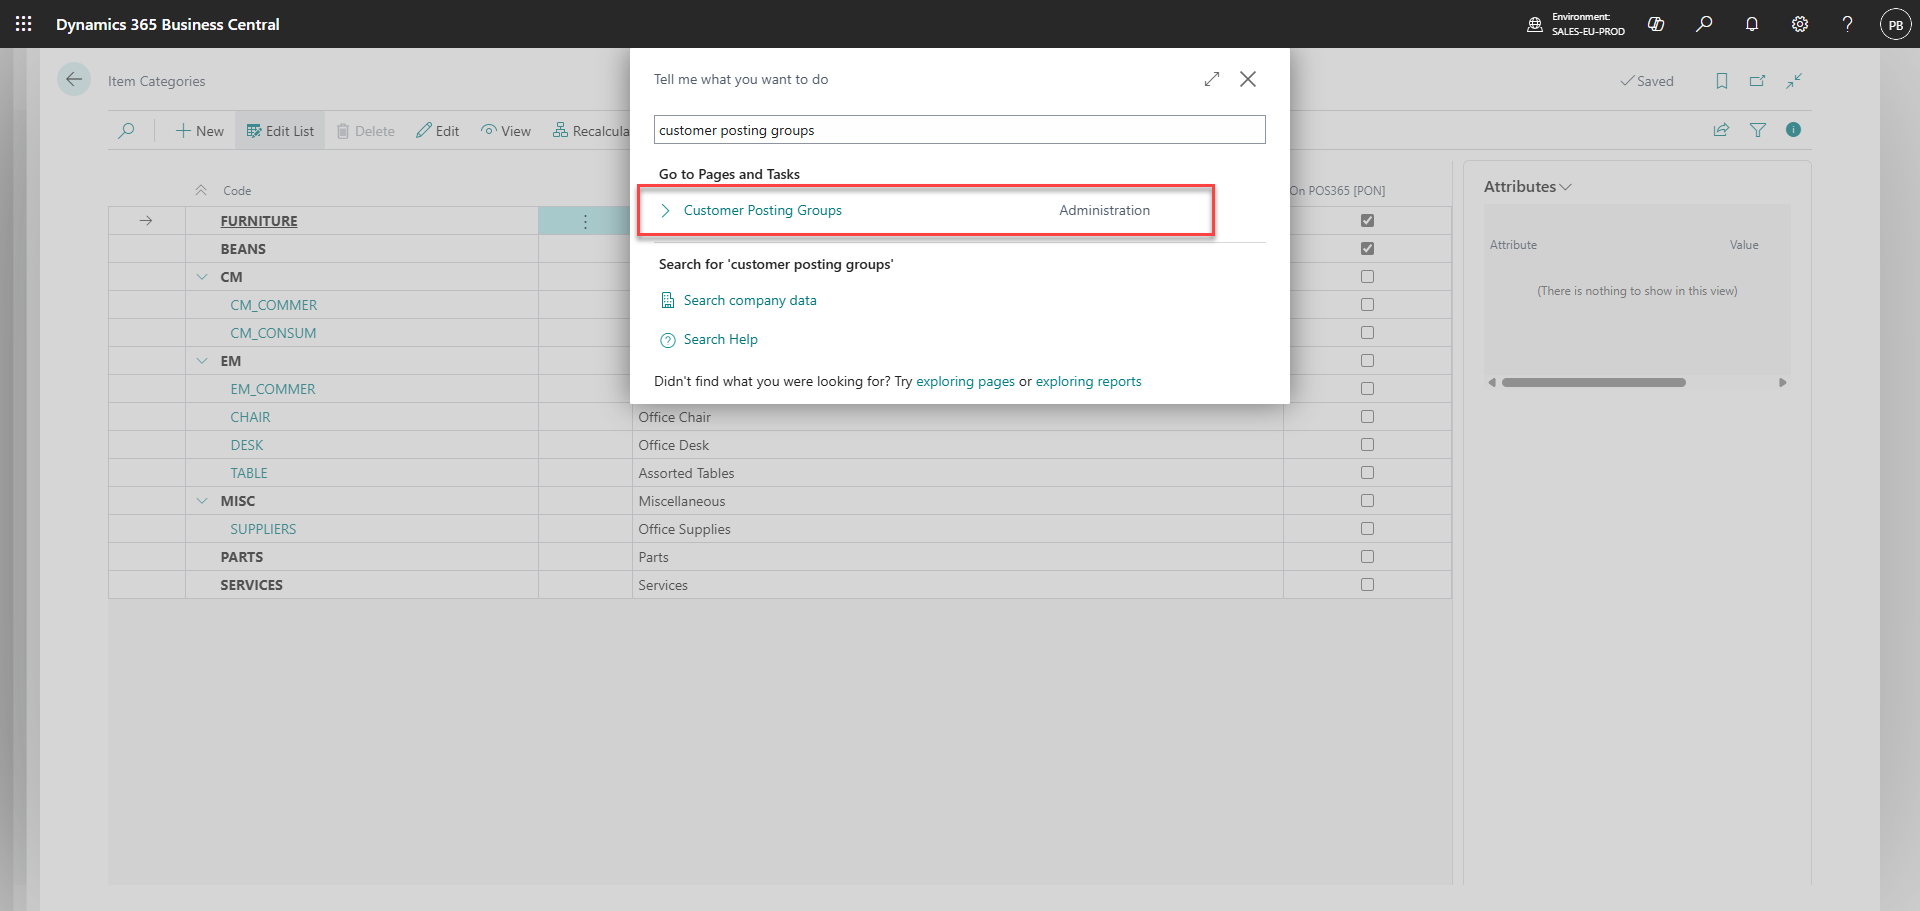
Search for 'Customer posting groups'
Step 2:
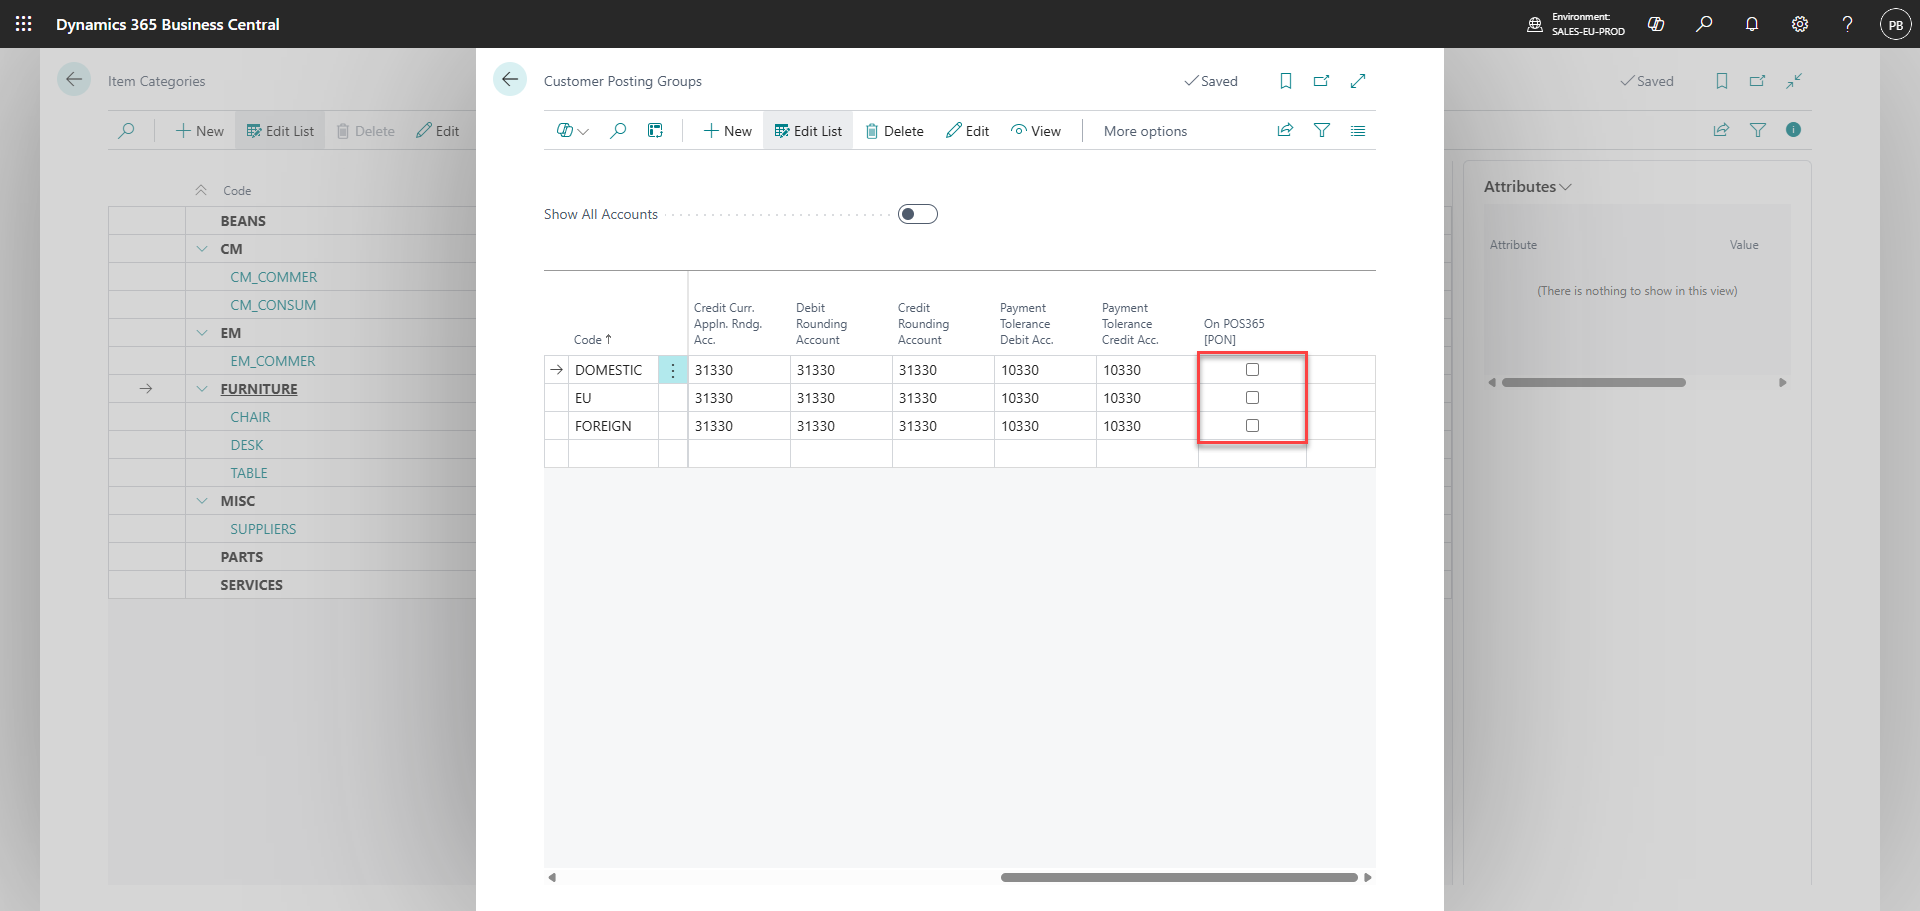
Set 'On POS365 [PON]' to true for all customer posting groups
Part 6:
Create a POS currency and set a starting date. Set the 'exchange rate amount' and 'relational exchange rate amount' to 100. Scroll to the right and set up 'denominations', 'rounding', 'cash account' and 'bank account'. Check the 'On POS' checkbox.
Step 1
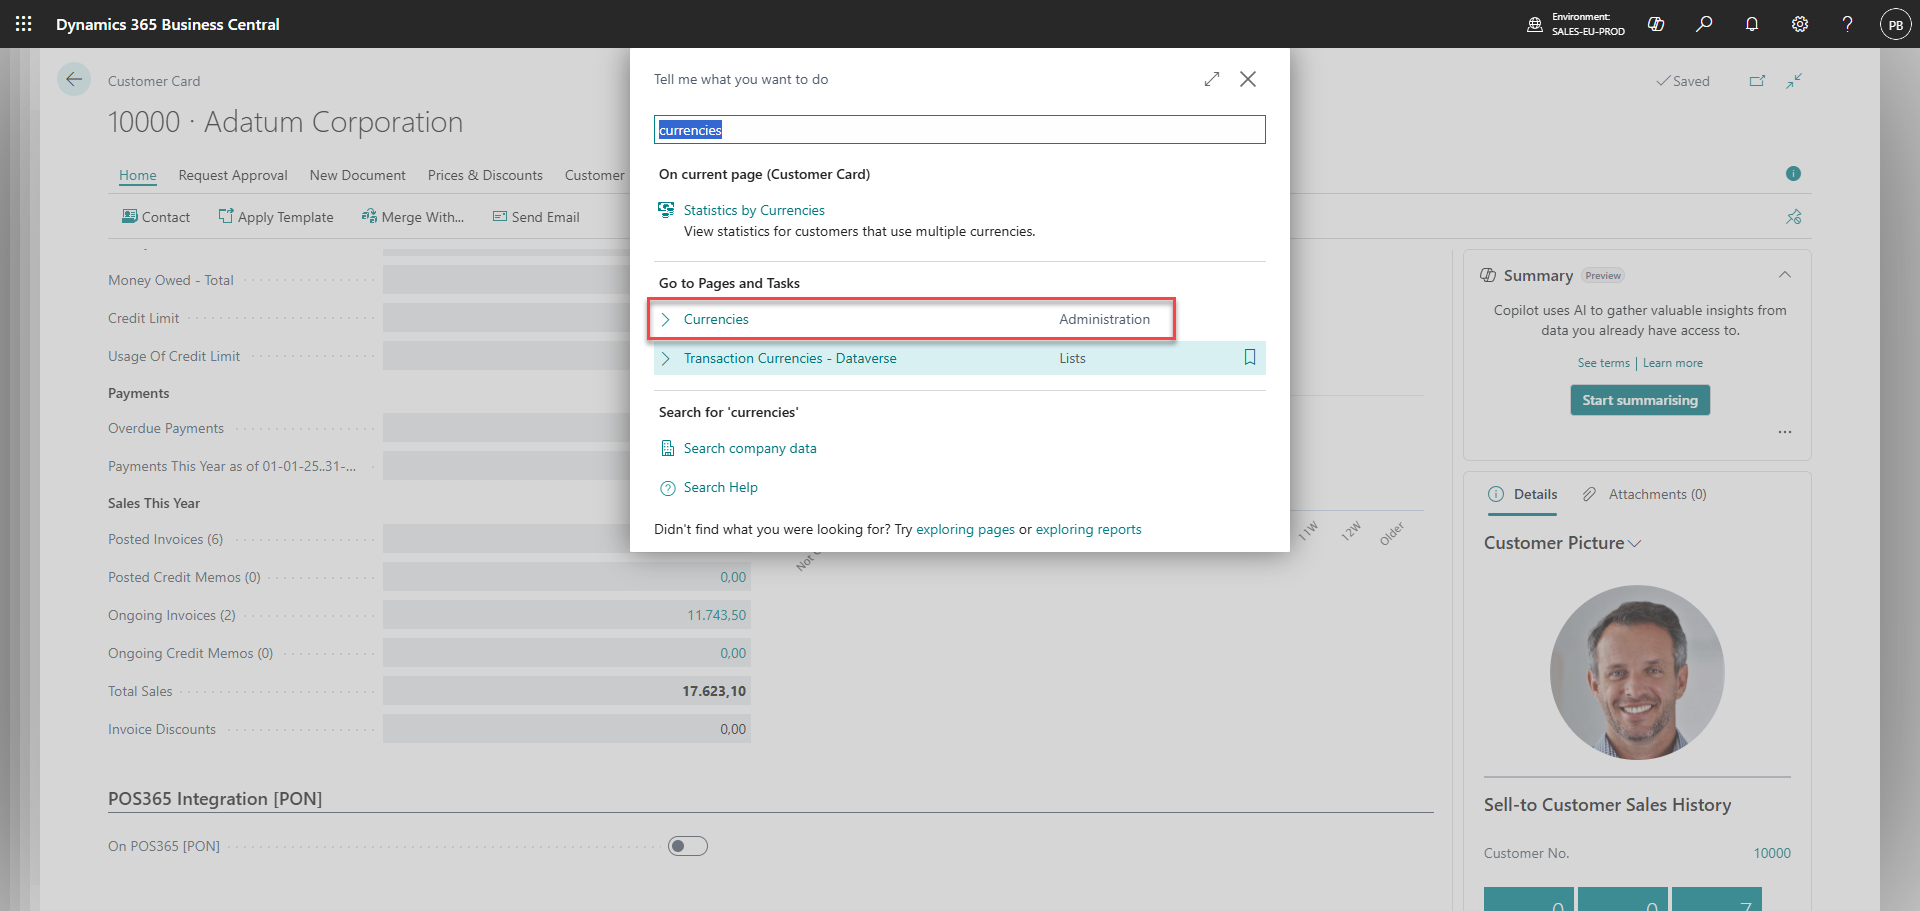
Search for 'Currencies'
Step 2:
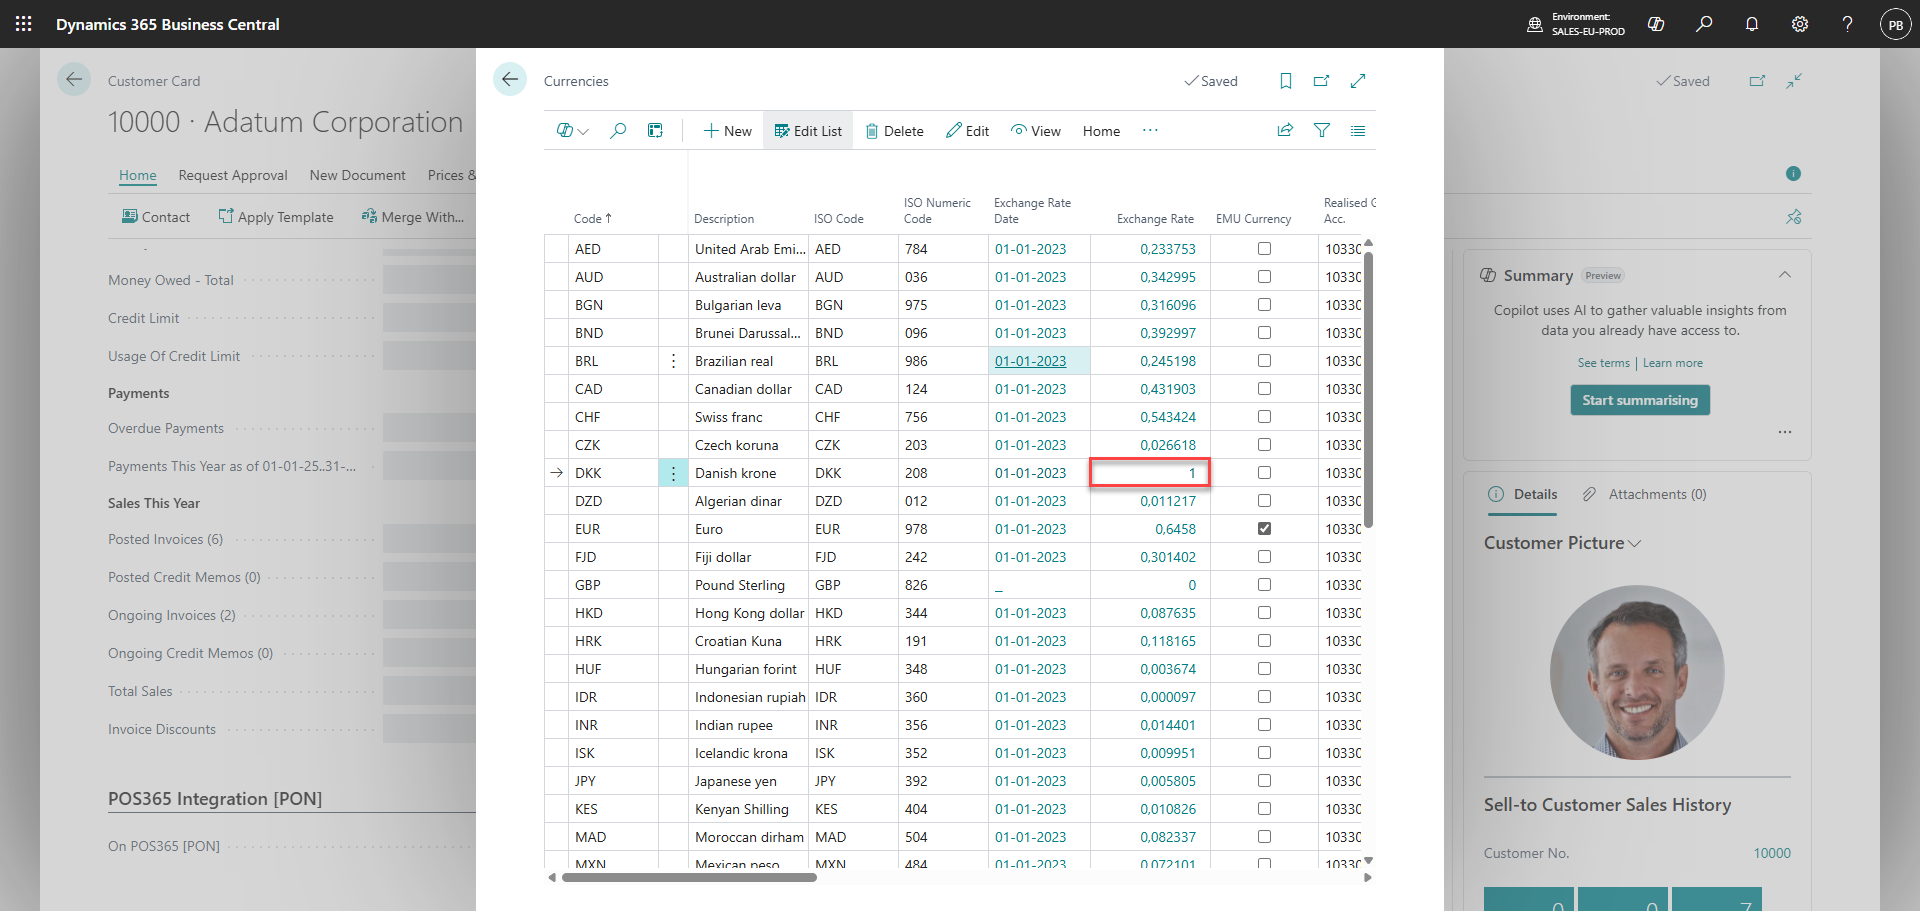
Create a POS currency. This is used for POS365 to be able to set a currency on the payments.
Click on the exchange rate to edit it
Note:
The name of the currency will be displayed on the receipt from the cash register.
Step 3:
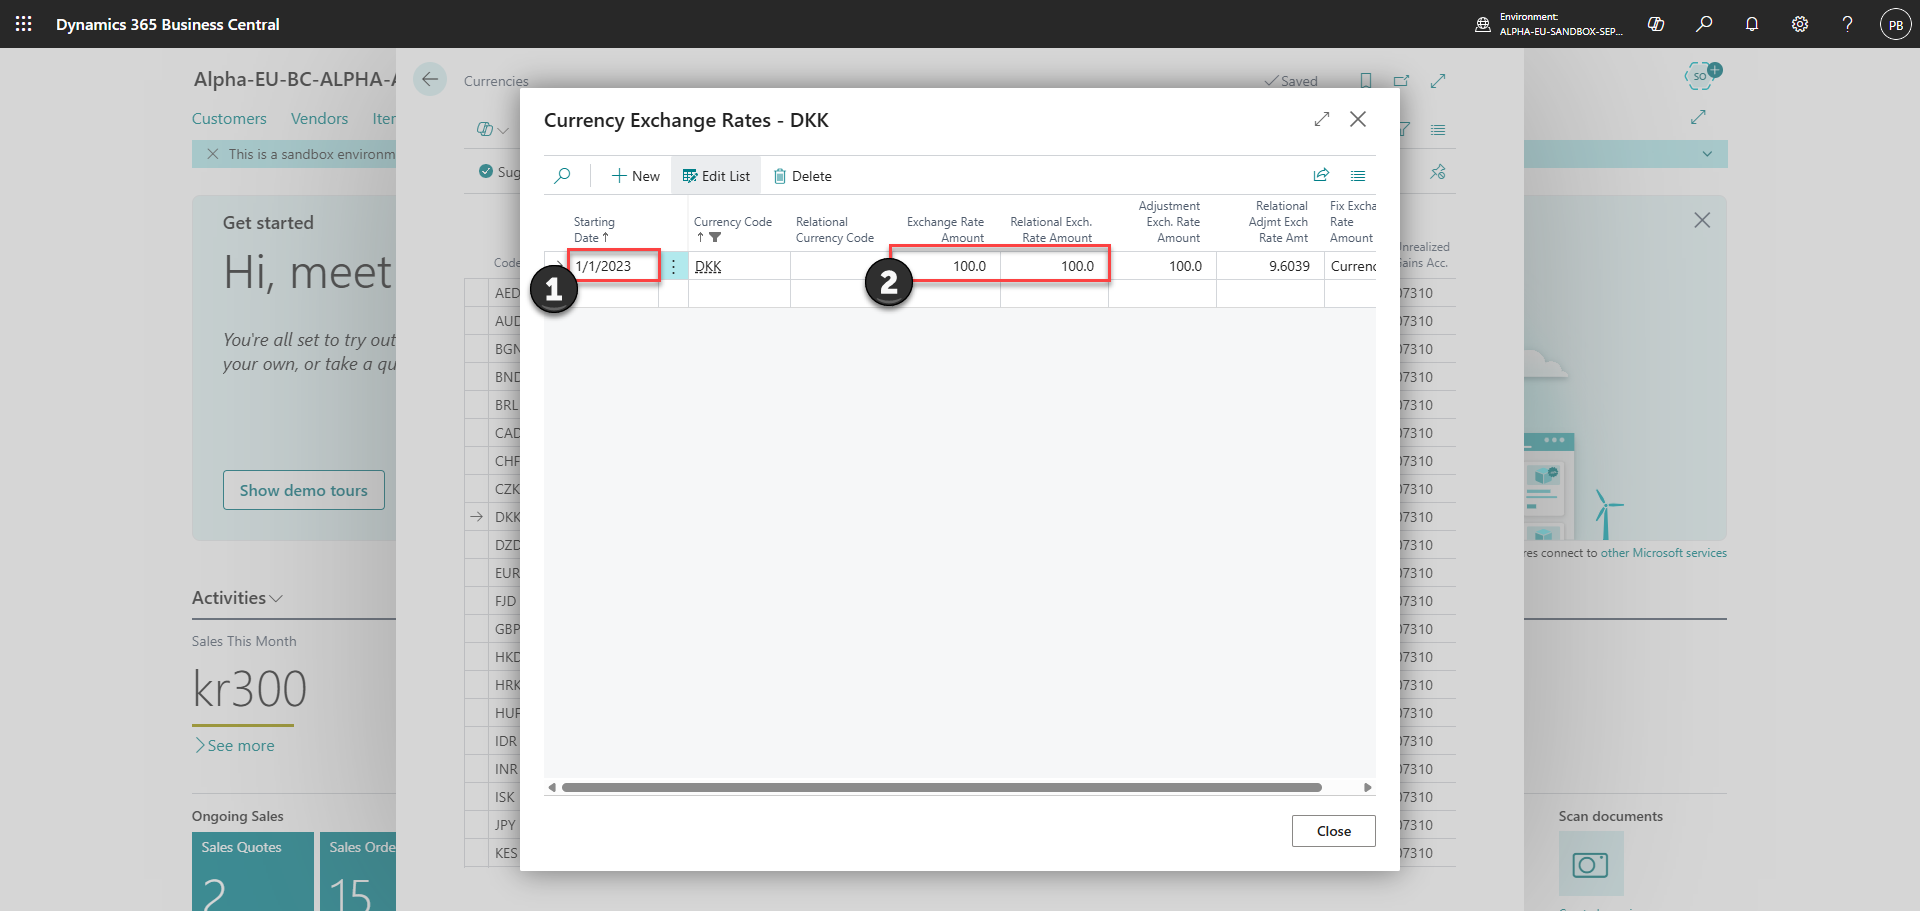
1) Set 'Starting date'
2) Set 'Exchange rate amount' and 'Relational exch. rate amount' to 100
Note:
Ensure that the exchange rate with this setup is first on the list of exchange rates for the currency
Step 4:
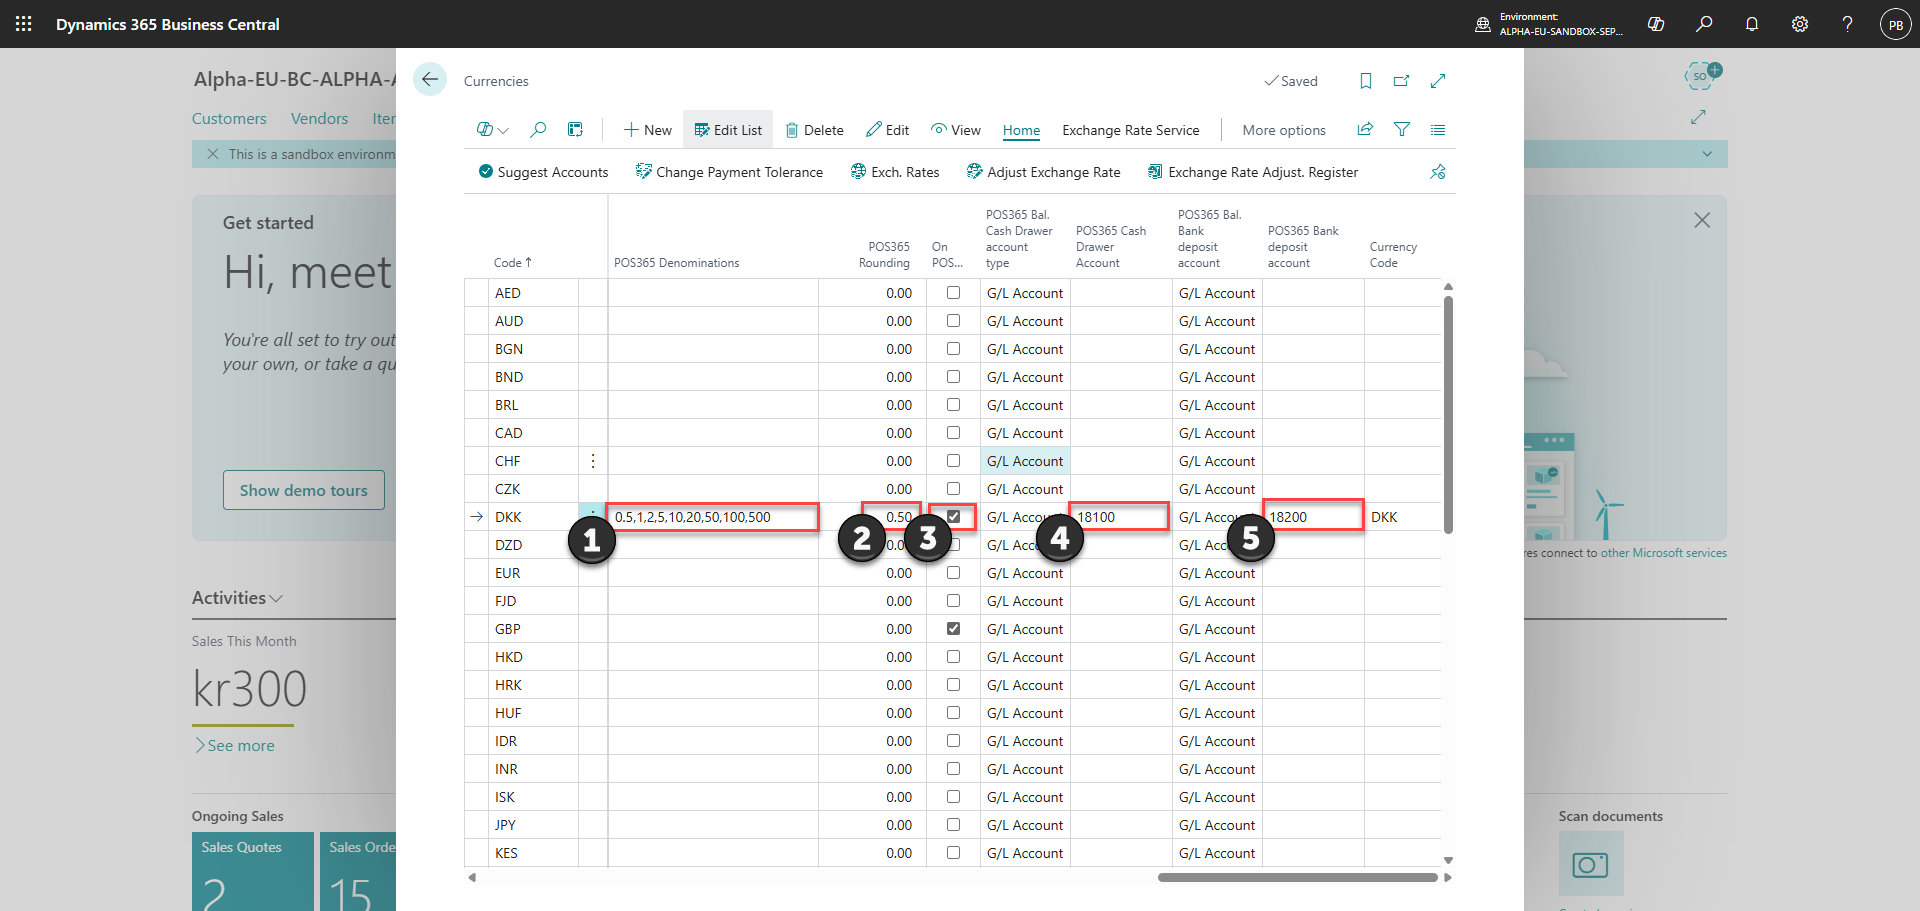
Ensure that the following has been set
Denominations = All values of physical cash
Rounding = Set to the lowest denomination
On POS = Ensures that the currency will be synchronized to the Admin Center
Cash drawer account = The account corresponding to your cash register
Bank account = The account corresponding to where you deposit your money after they have been taken from the cash register. This can be a safe or alike
Note:
Denominations for DKK: 0.5,1,2,5,10,20,50,100,200,500
Denominations for USD: 0.01,0.05,0.1,0.25,0.5,1,2,5,10,20,50,100
Denominations for GBP: 0.01,0.02,0.05,0.1,0.2,0.5,1,2,5,10,20,50
Part 7
Create a salespeople/purchaser profile for gaining access to the admin center
Step 1
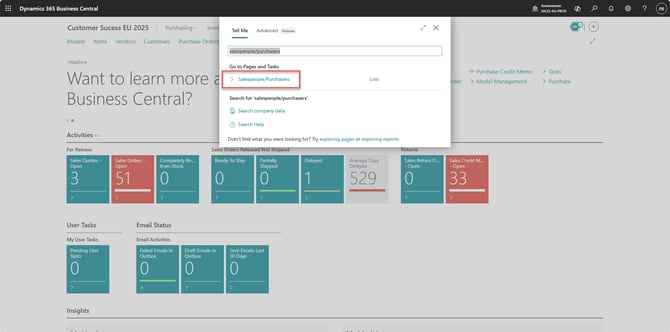
Search for 'Salespeople/Purchasers'
Step 2
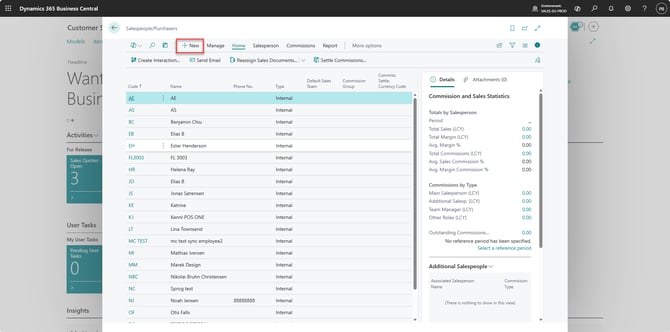
Click 'new'
Step 3
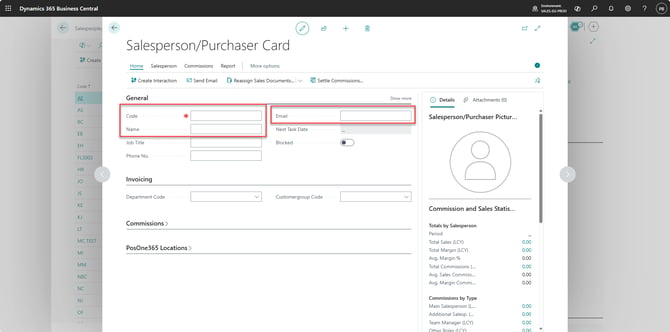
Set a code, name and email for the user
Code: Enter a short code for the user, such as their initials.
Name: Enter the name of the user who should have access to the Admin Center.
Email: Enter the user’s email address. The invitation link granting access to the Admin Center will be sent to this address.
Next step: Set up the company in the Admin Center
Continue with Create and set up a new company in the Admin Center.
The next guide also explains when to return to Business Central to complete POS365 Company Integration Setup, once the company has been synchronized.