
Step 1:
This section shows how to enable unit of measure.
For more information, see here:
Open the screen in 'Screen designer'
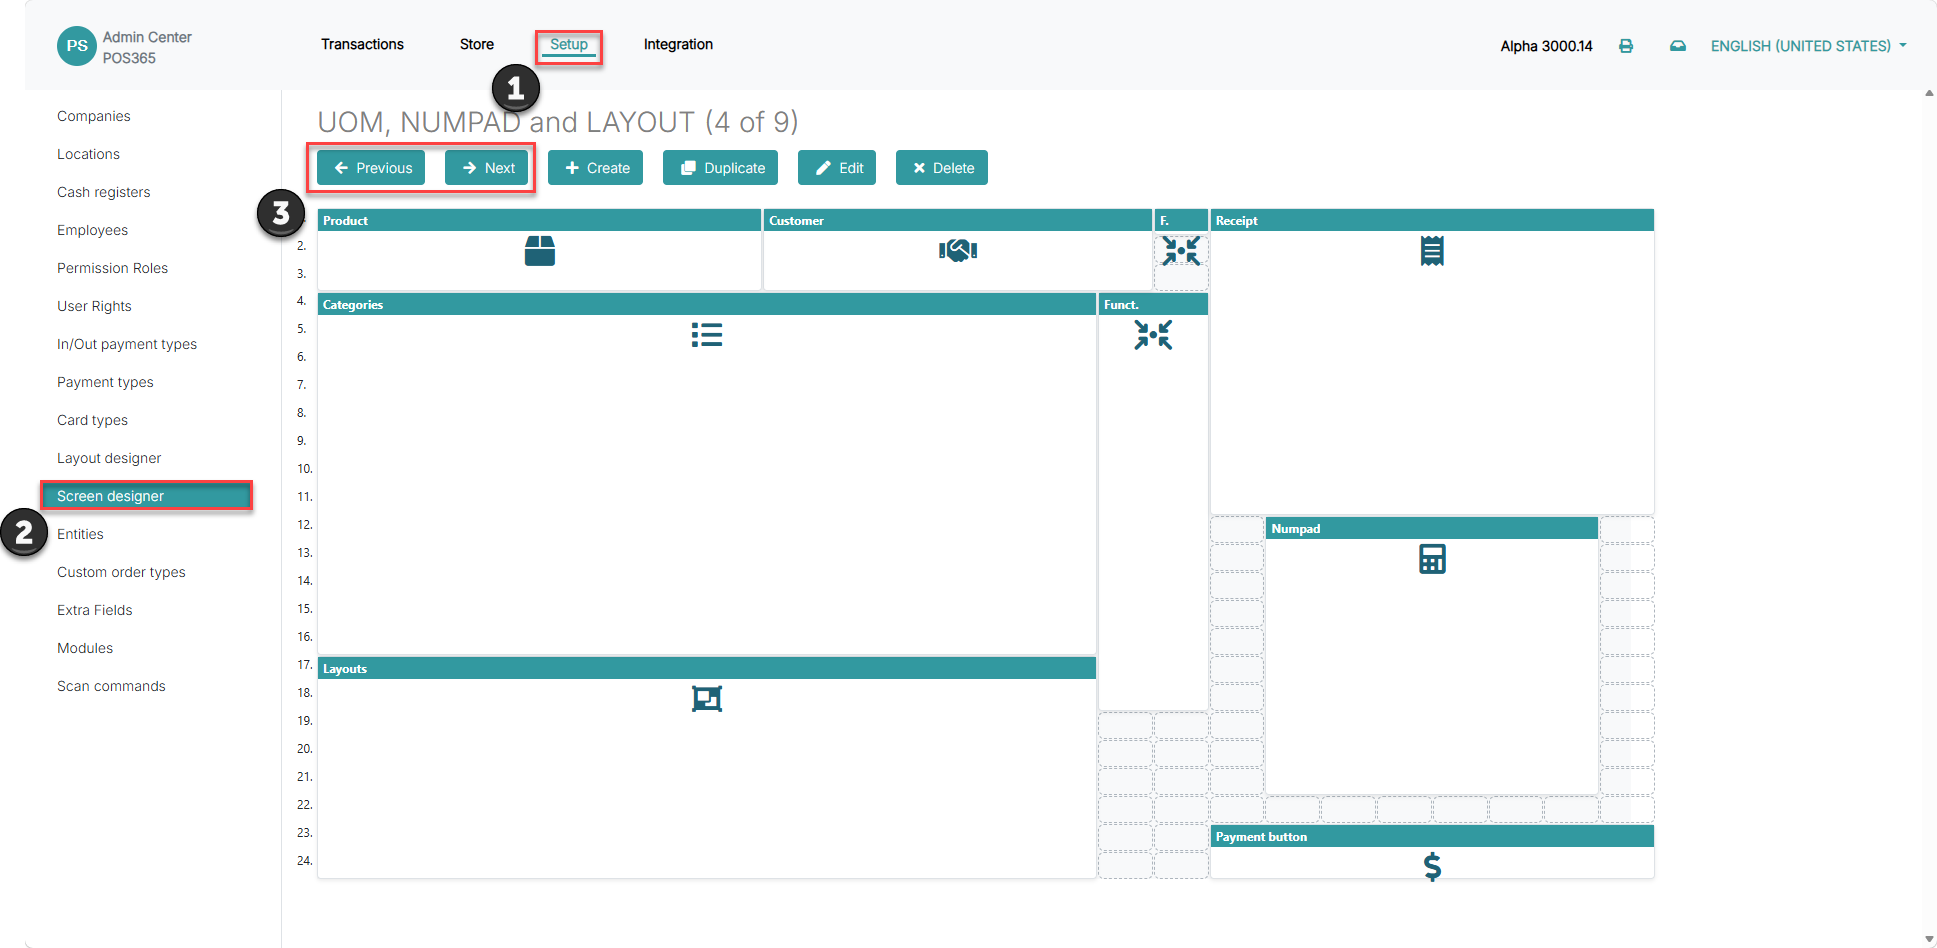
1) Go to 'Setup'.
2) Select 'Screen designer'.
3) Open the POS screen you want to update and click 'Edit'.
Note:
Make sure you edit the correct POS screen if your company uses more than one screen layout.
Step 2:
This section shows how to open the settings for the receipt area. The unit of measure setting is controlled from the 'Receipt' section in the screen layout.
For more information, see here:
Open 'Receipt' settings
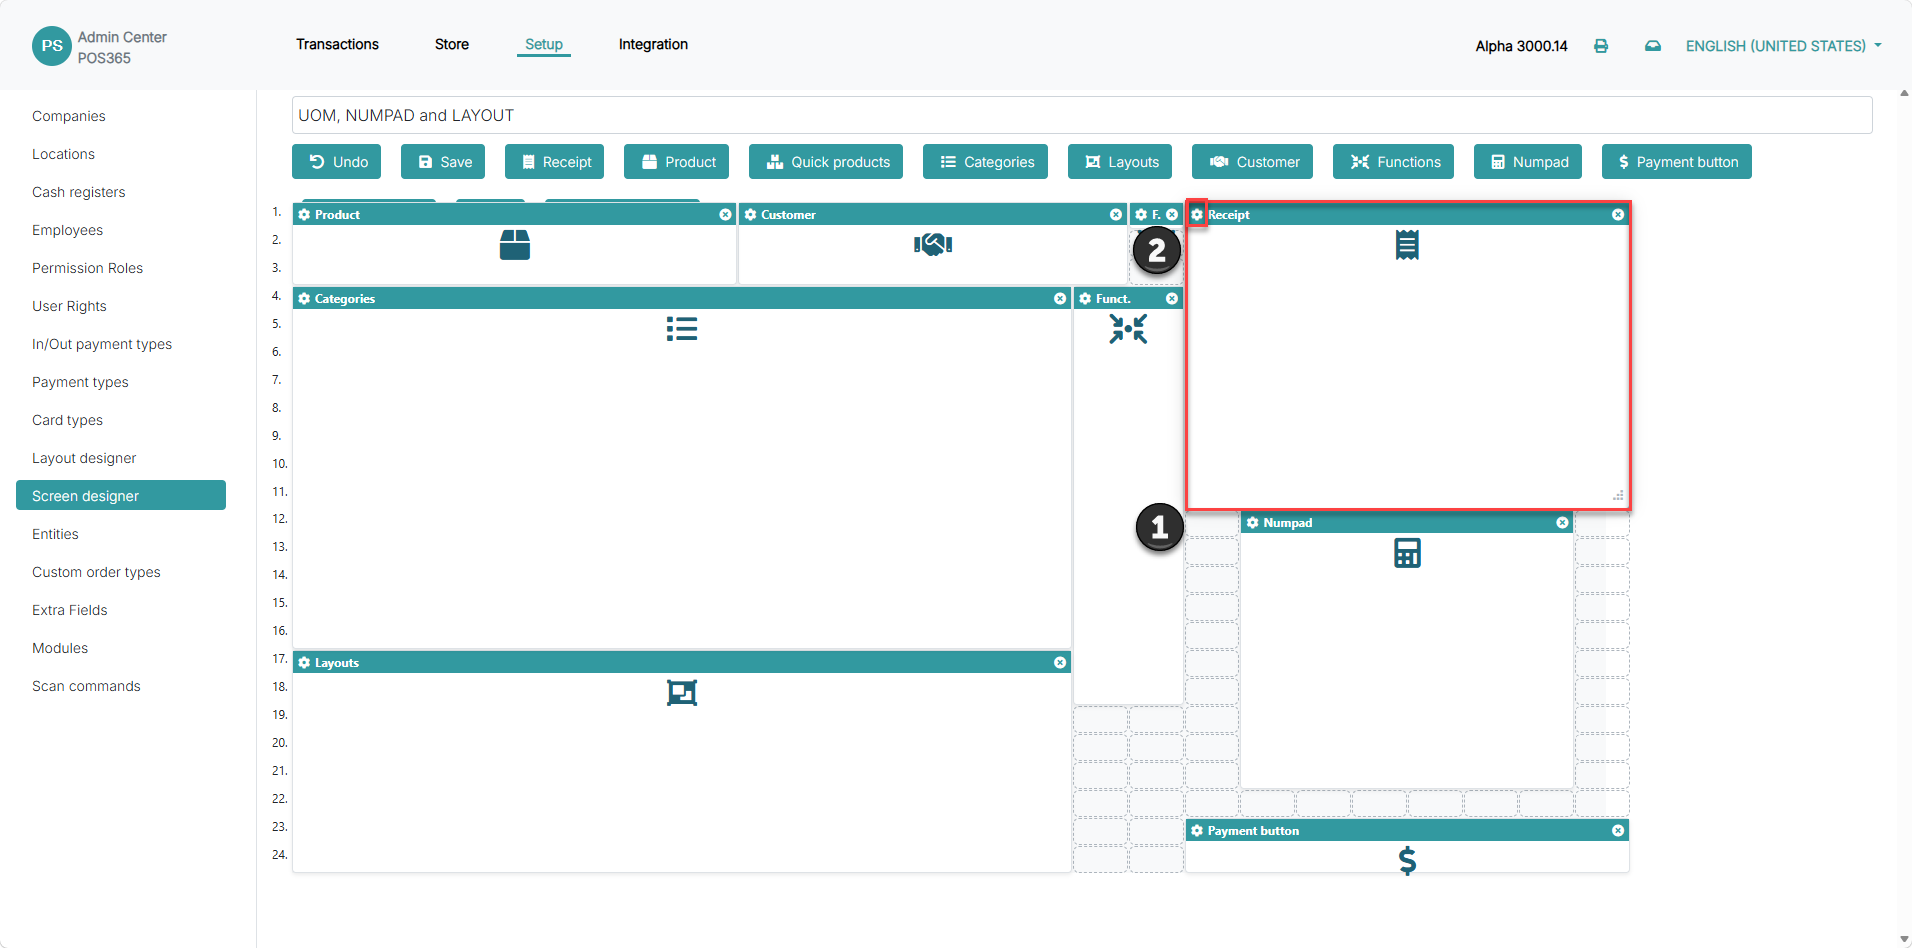
1) Find the 'Receipt' area on the screen.
2) Click the settings icon next to 'Receipt'.
Step 3:
This section shows how to enable unit of measure for the receipt area. When enabled, POS can show the product unit on the receipt screen and receipt output.
For more information, see here:
Set 'Show unit of measure' to true
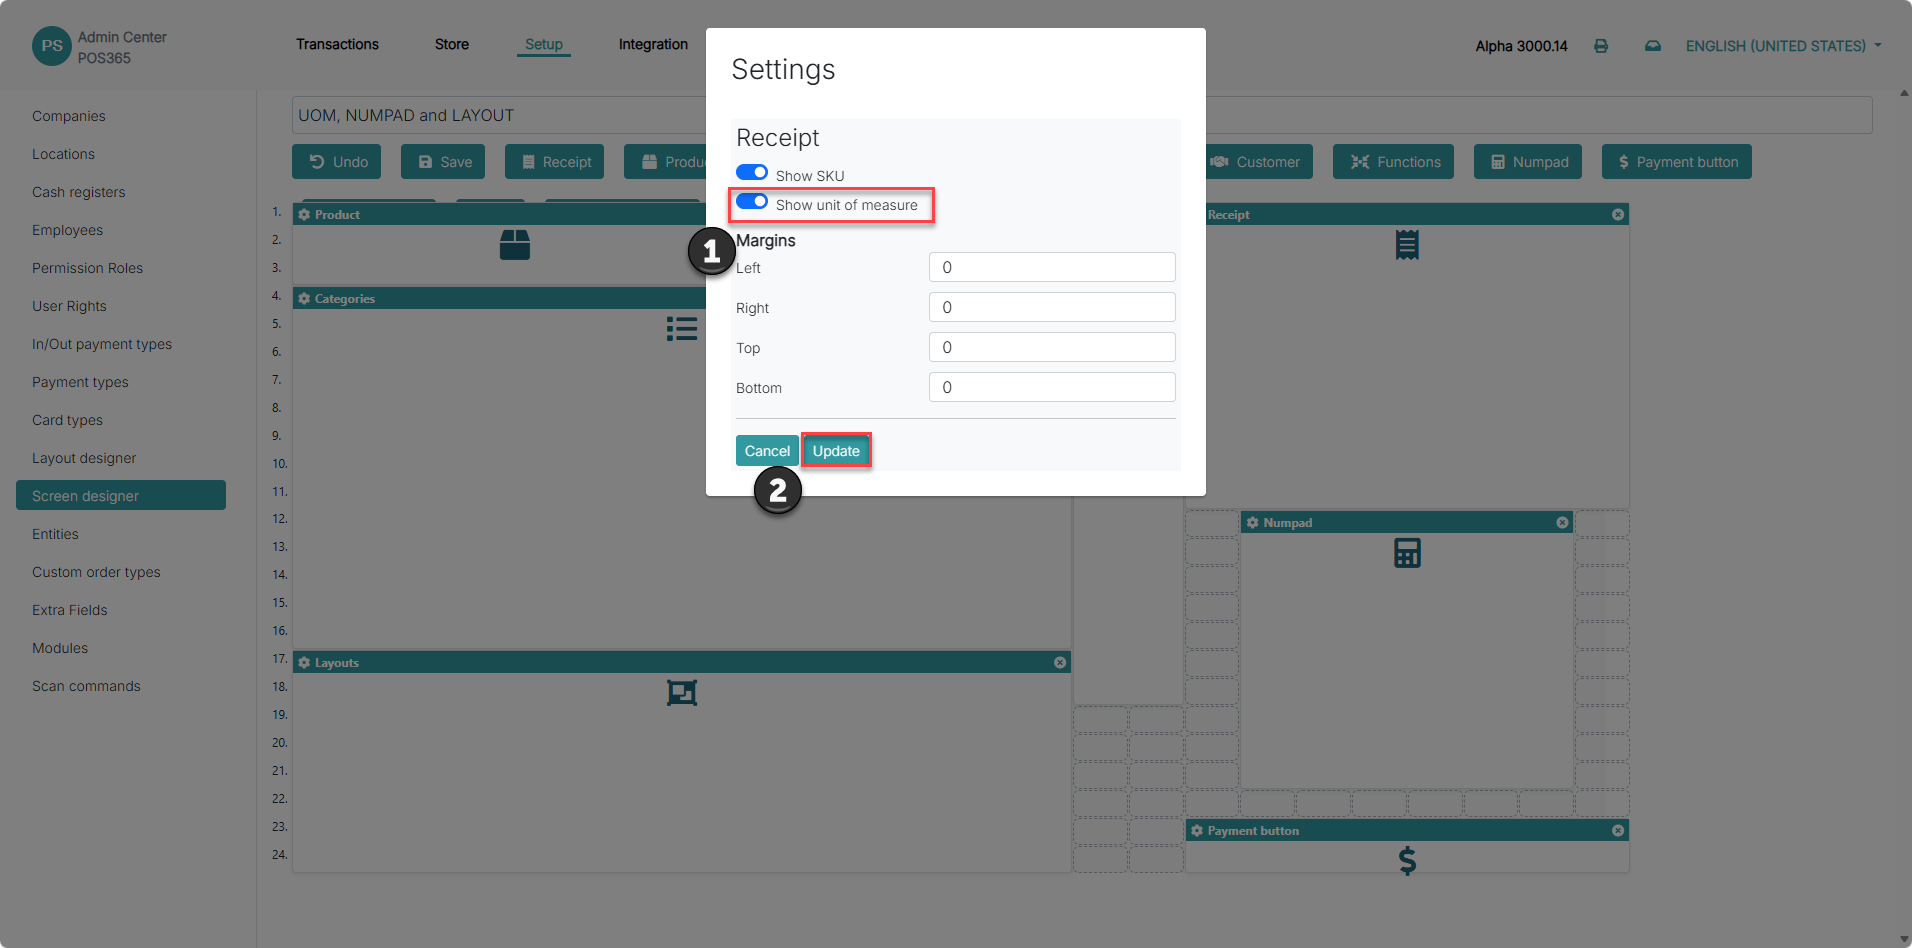
1) Find 'Show unit of measure' and set 'Show unit of measure' to 'True'.
2) Click 'Update'.
Note:
You can also keep 'Show SKU' enabled if the receipt should show both SKU and unit of measure.
Step 4:
This section shows how to save the screen layout. The change must be saved before it takes effect in POS.
For more information, see here:
Save the updated screen
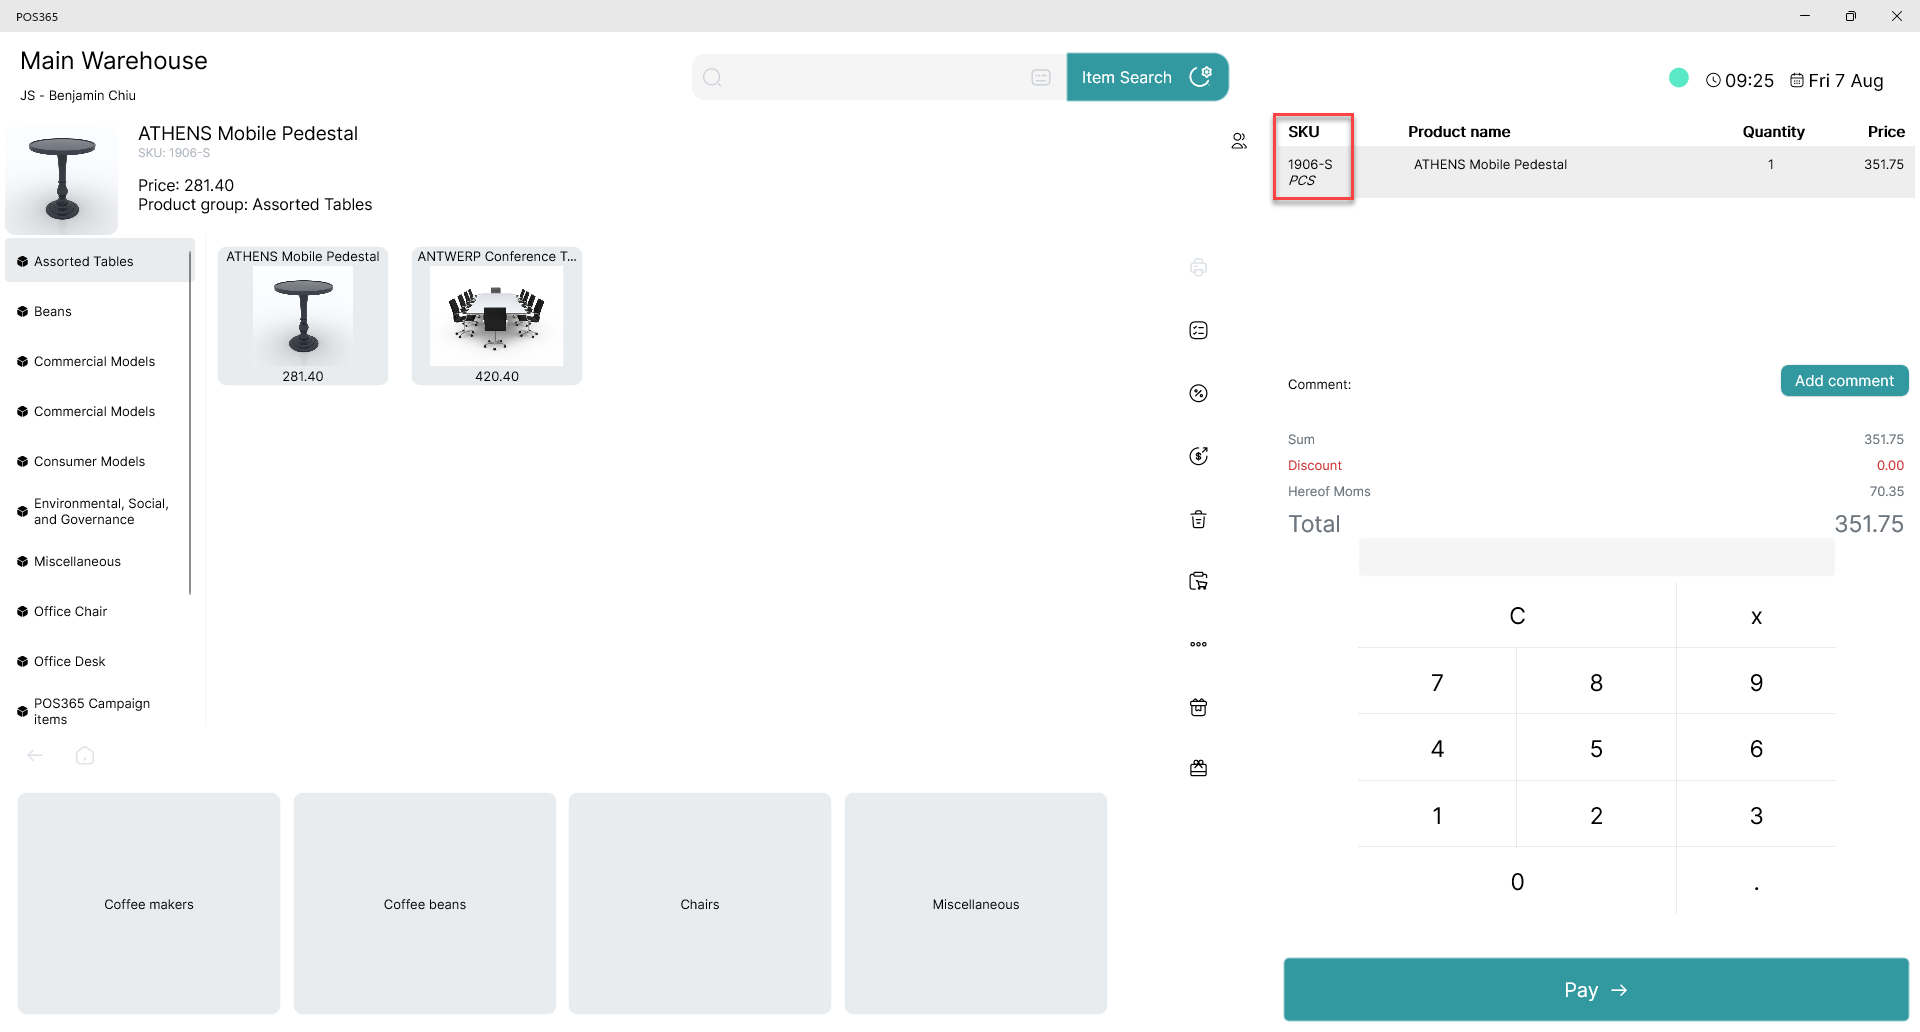
1) Click 'Save'.
2) Open POS.
3) Test a product with unit of measure.
4) Check that the unit of measure is shown correctly on the receipt screen and receipt.
Note:
If unit of measure is not shown, check that the product has a unit of measure and that the correct POS screen is used.