
Create an inventory transfer order in POS365
This guide explains how to create an inventory transfer order to move items between locations in POS365.
Step 1: Open Inventory Transfers
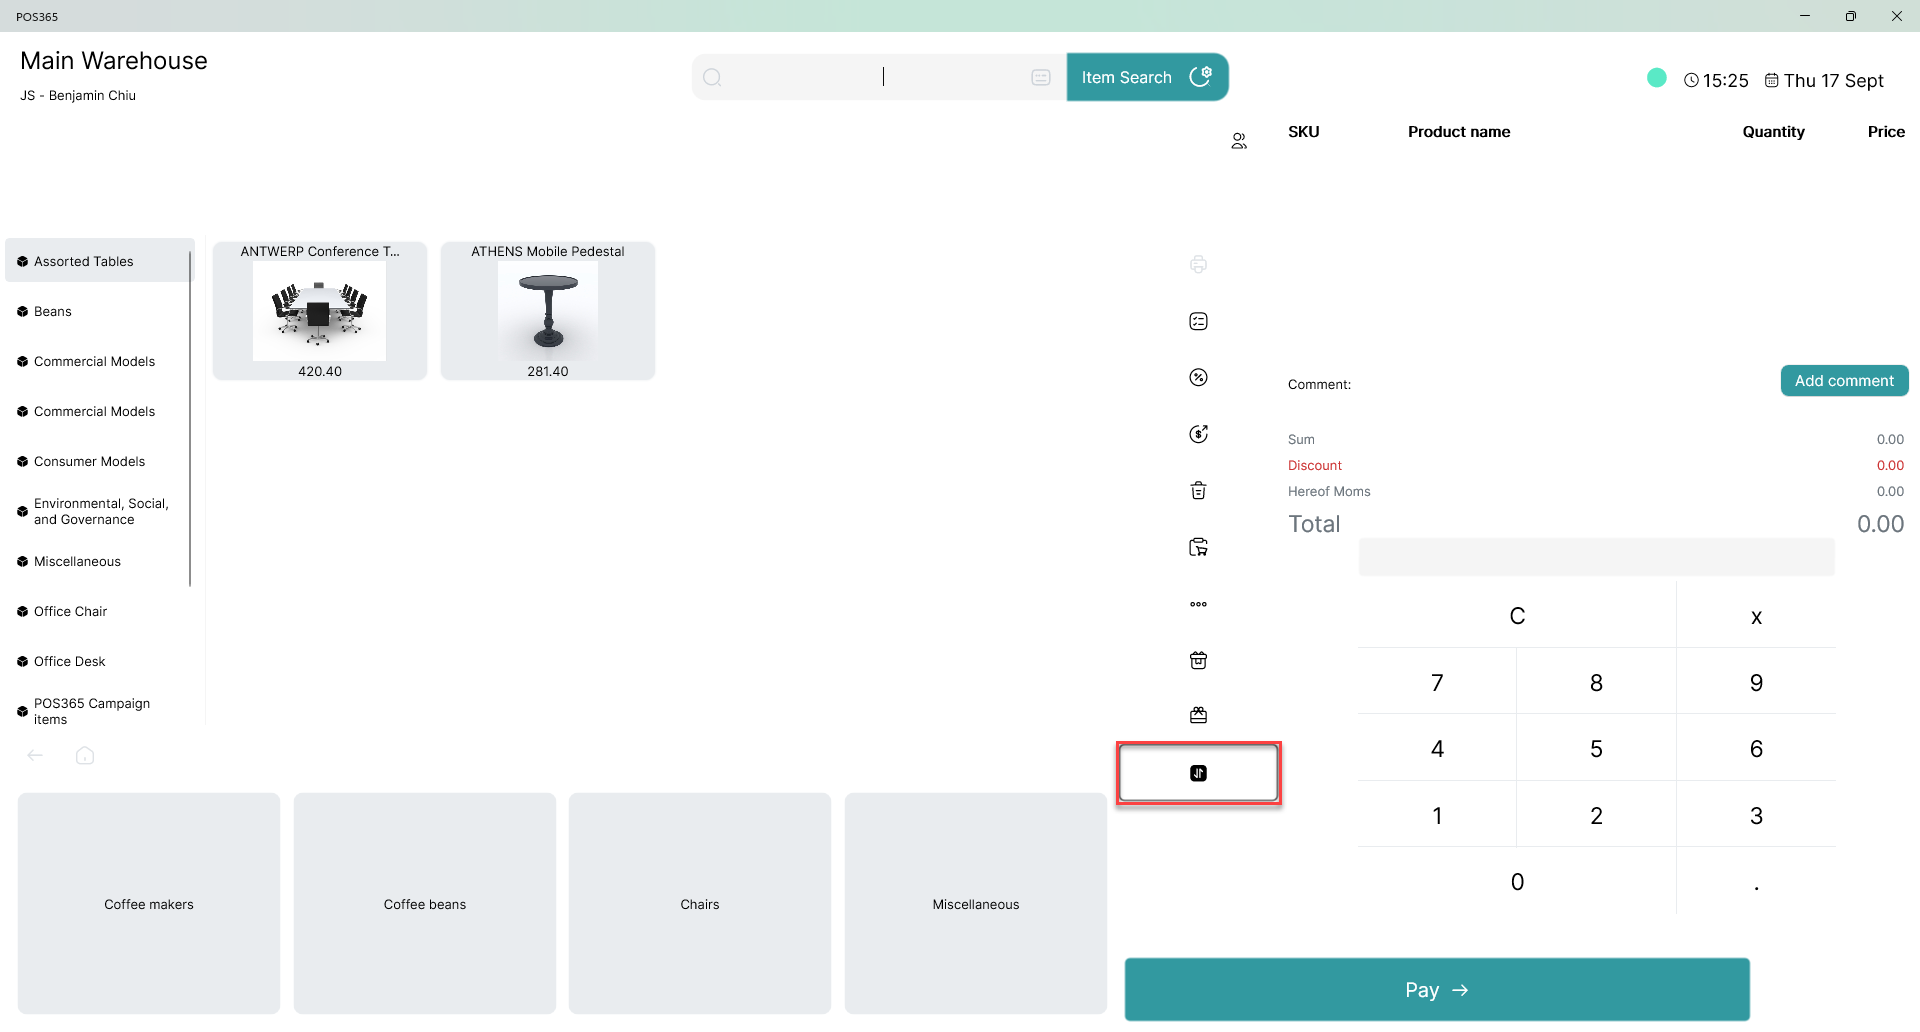
Click the highlighted button on the POS365 sales screen to open Inventory Transfers.
Step 2: Create a new transfer
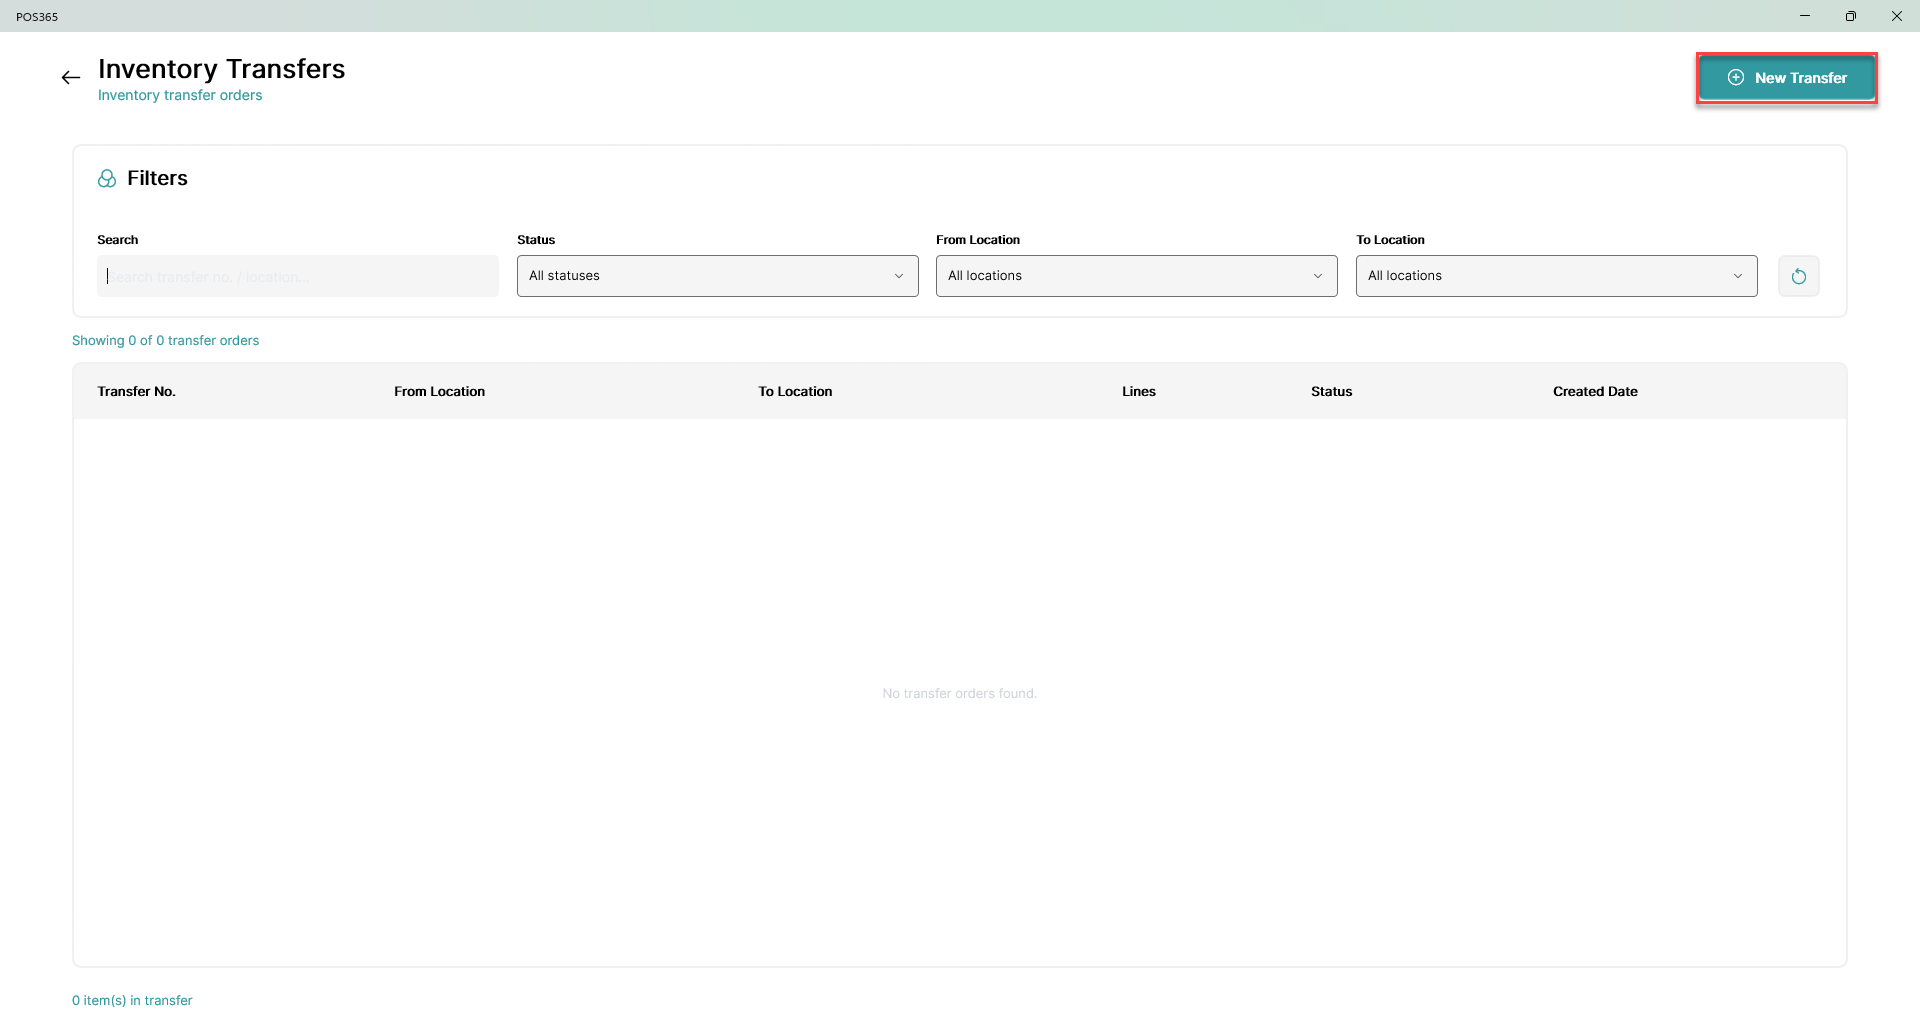
Click New Transfer in the upper-right corner.
Step 3: Enter transfer details and add items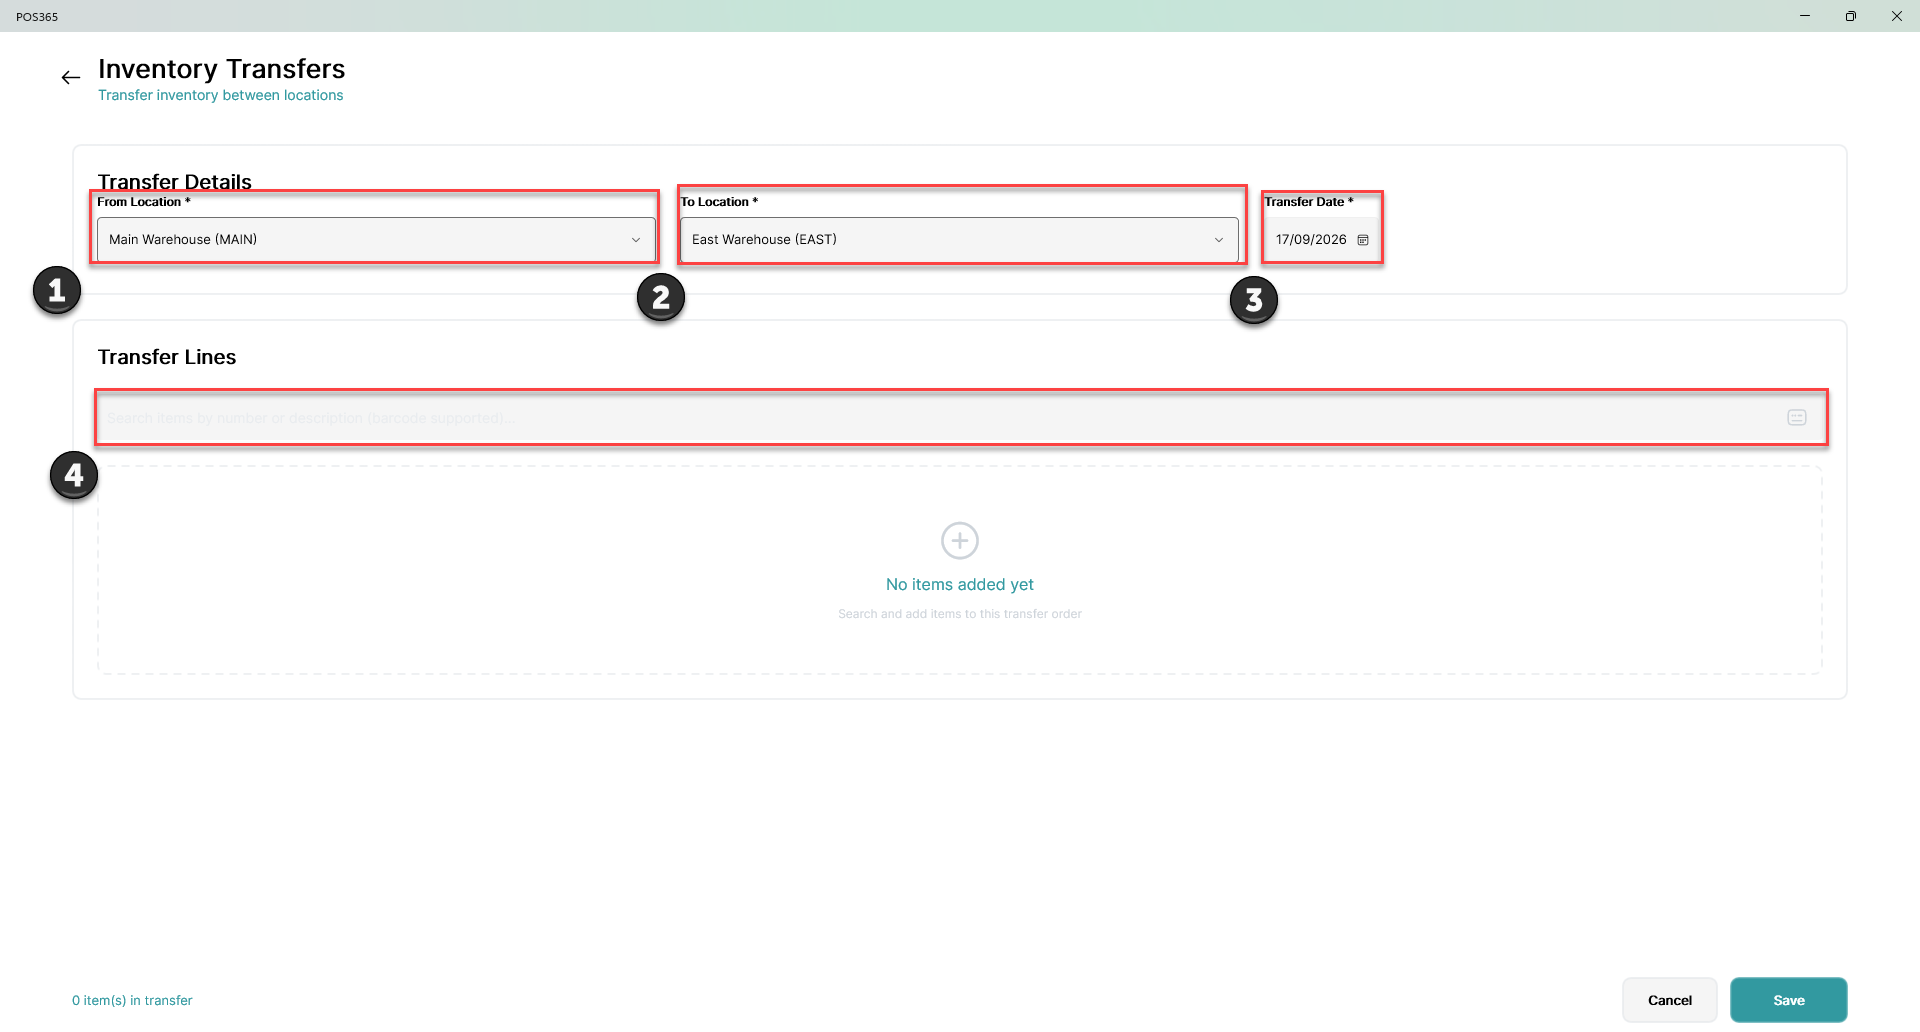
- From Location: Select the location the items are transferred from.
- To Location: Select the location the items are transferred to.
- Transfer Date: Select the date for the transfer.
- Transfer Lines: Search by item number or description, or scan a barcode, to add the items you want to transfer.
Step 4: Adjust the items and save
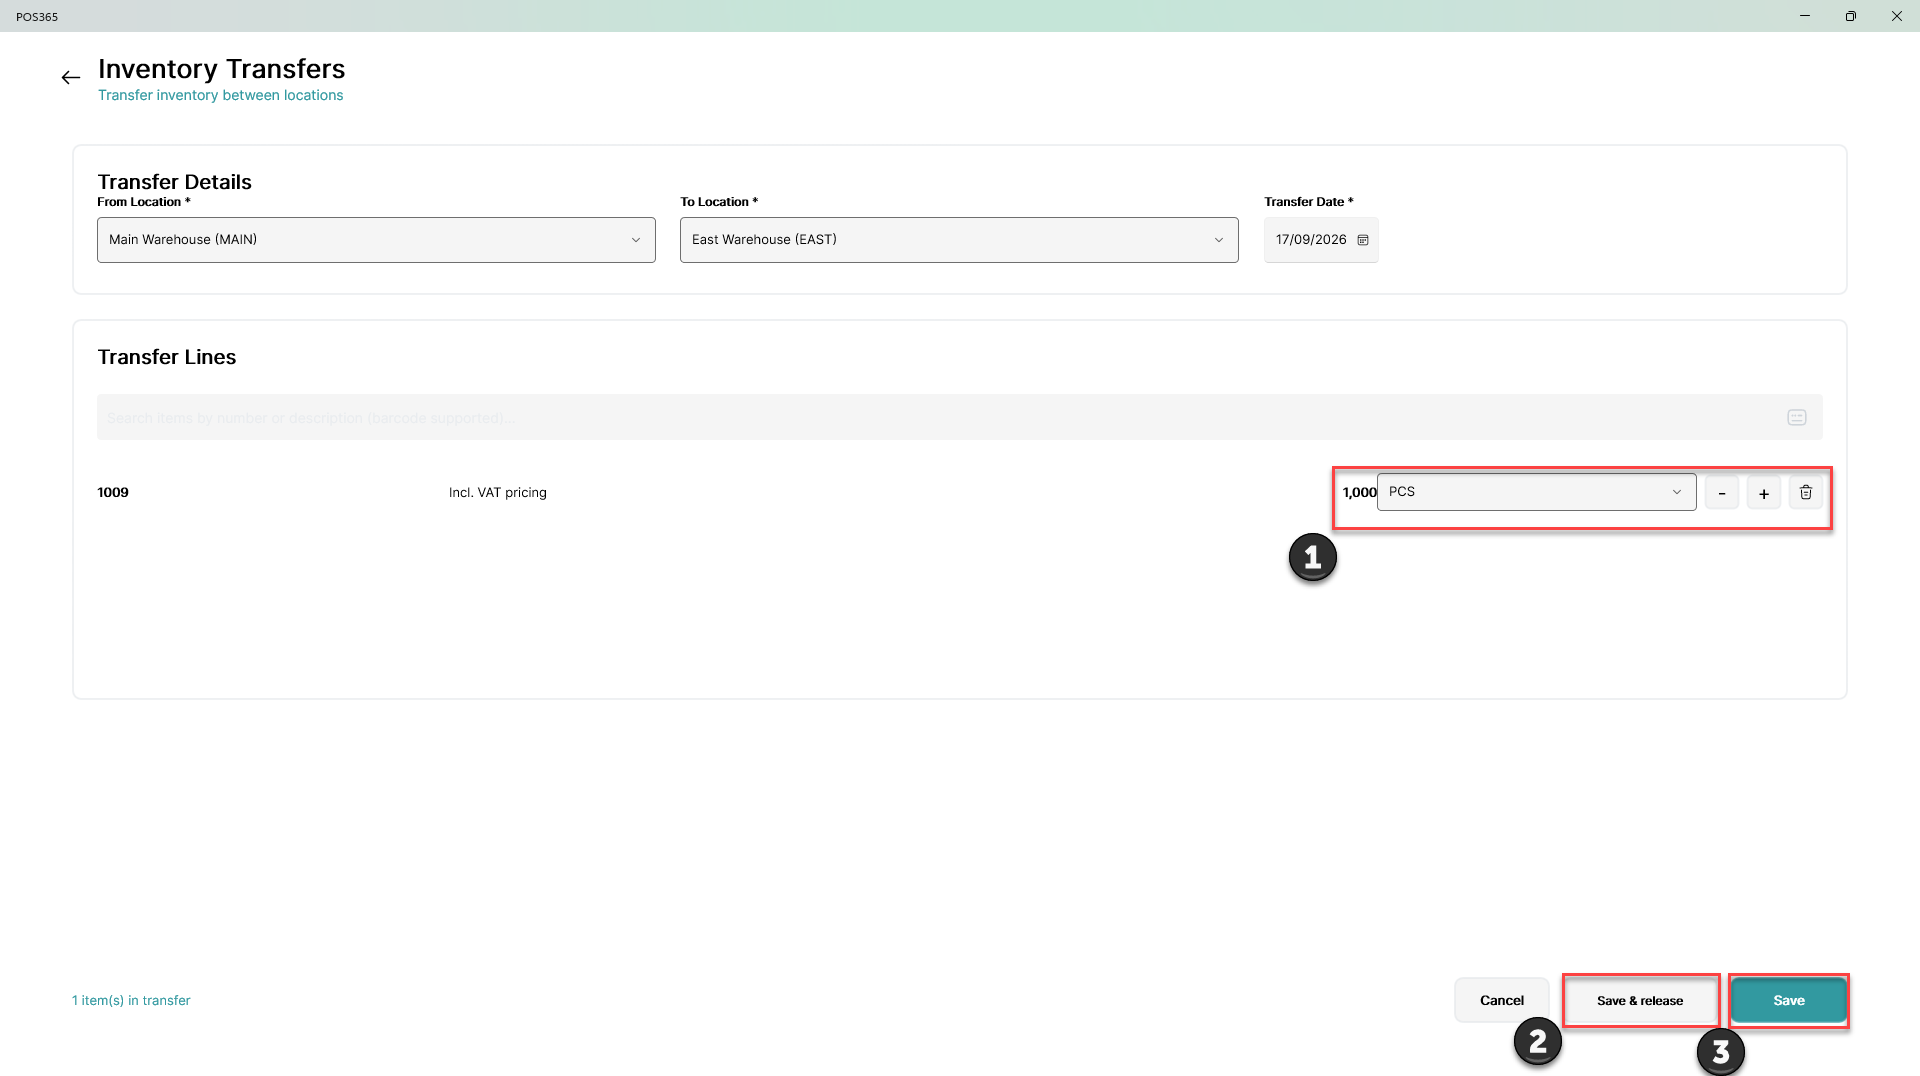
- Check each item’s quantity and unit of measure. Use − and + to adjust the quantity, select the unit from the dropdown, or click the bin icon to remove an item.
- Click Save & release to save and release the transfer order.
- Alternatively, click Save to save the transfer order without releasing it.