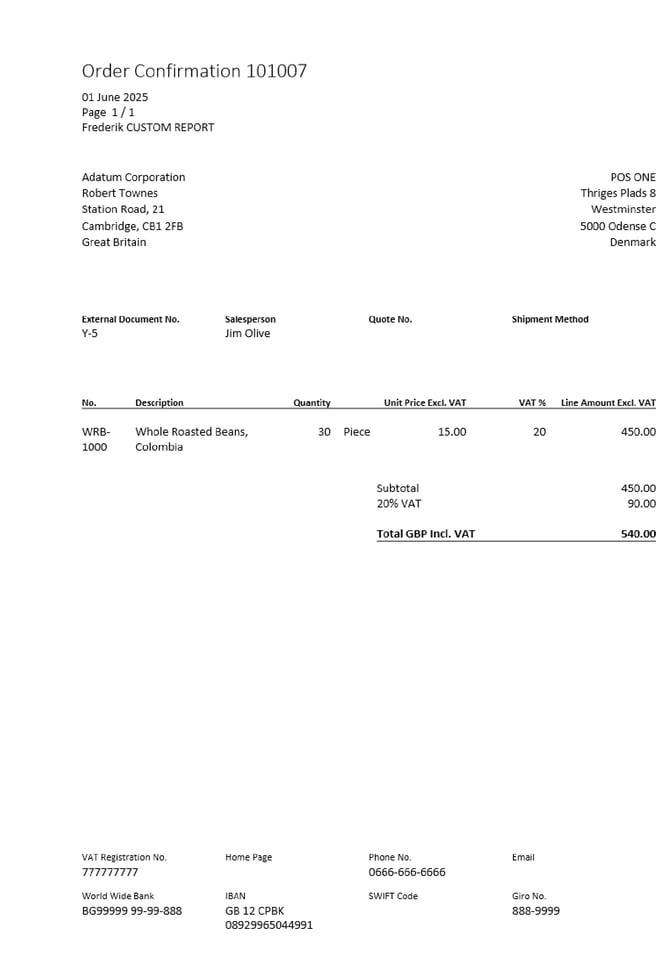
Note: The reports available in POS365 are configured in Business Central under Report Layouts.
Part 1:
Add the report button to POS365 in the Admin Center.
Step 1:
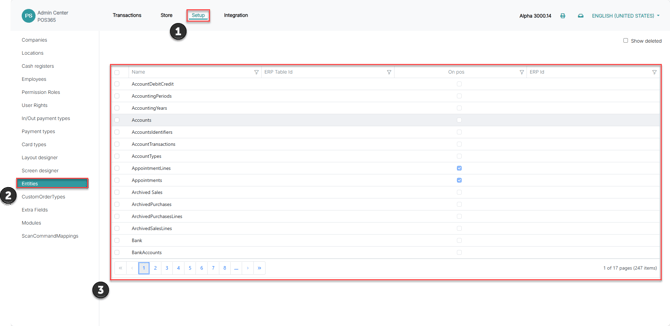
1) Go to 'Setup'
2) Click on 'Entities'
3) Find the relevant entity and click on it
Step 2:
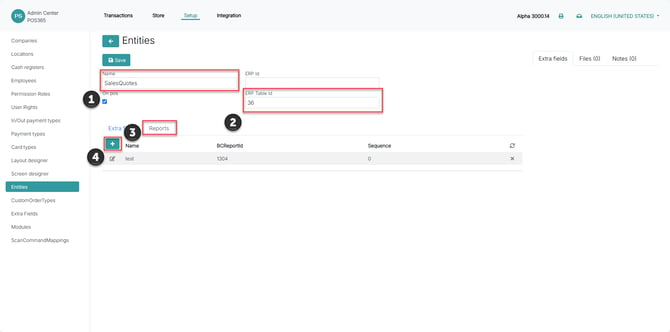
1) For this example, we will use 'Sales quotes'
2) Add 'ERP Table Id', which can be found in BC with the Page inspector
3) Click on 'Reports'
4) Click on '+'
Step 3:
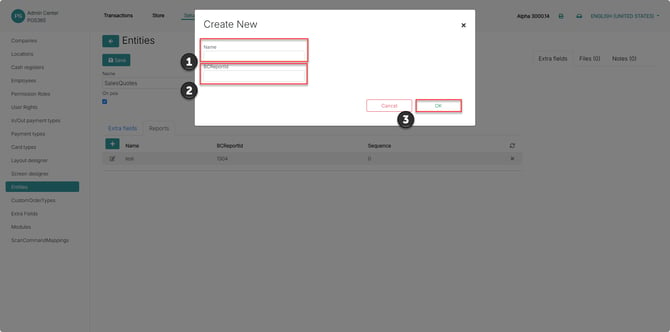
1) Enter a name for the report
2) Enter the BCReportId, obtained from BC under Report Layouts
3) Click 'OK'
Step 4:
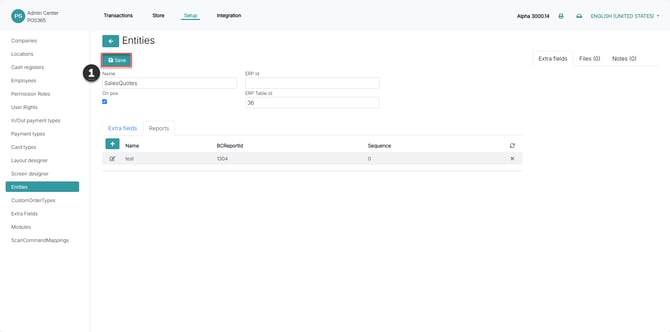
1) Click 'Save'
Part 2:
How to find the reports on the POS
Step 1:
Start from the sales screen and open the order overview. This is where you can find the customer and the order for which you want to generate a report .
For more information, see here:
Open the order overview
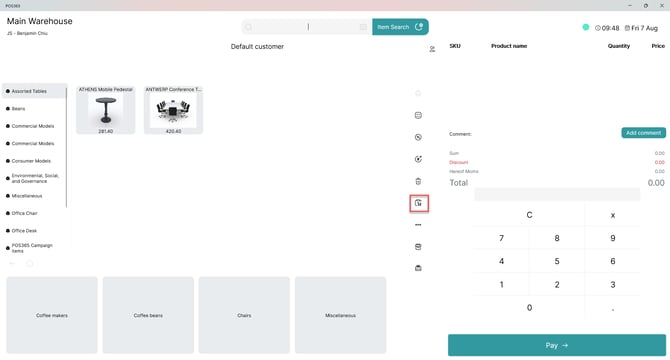
1) Click the 'Orders' icon.
2) The customer selection view opens.
Step 2:
Select the customer connected to the order. The POS shows the customer list, so you can find the correct customer before opening their orders
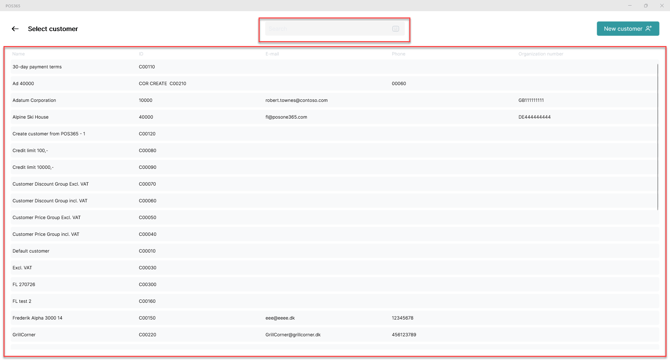
1) Search for the customer, or find the customer in the list.
2) Click the customer you want to use.
3) The 'Manage orders' view opens for the selected customer.
Step 3:
Find the order for which you want to generate a report. The order list shows the available orders, so you can choose the correct one and open the order details.
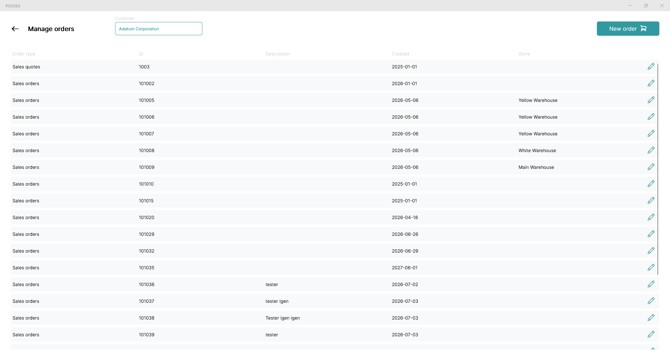
1) Find the correct order in the 'Manage orders' list and click the edit icon on the right side of the order.
2) The order details window opens.
Step 4:
Open the report option from the order details. This is where POS365 can generate the Business Central report for the selected order.
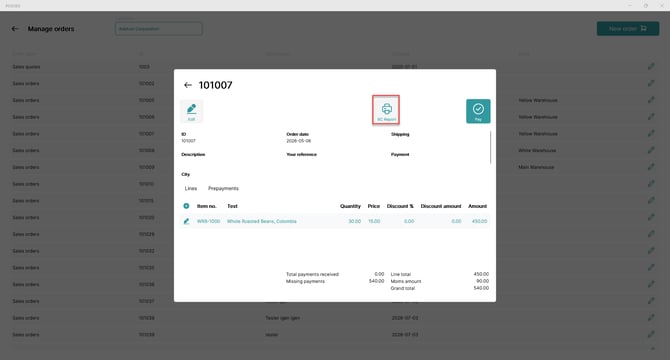
1) Click 'BC Report'.
2) The 'Confirmation' window opens.
Step 5:
Select the report in the confirmation window. This step confirms which document should be generated for the customer.
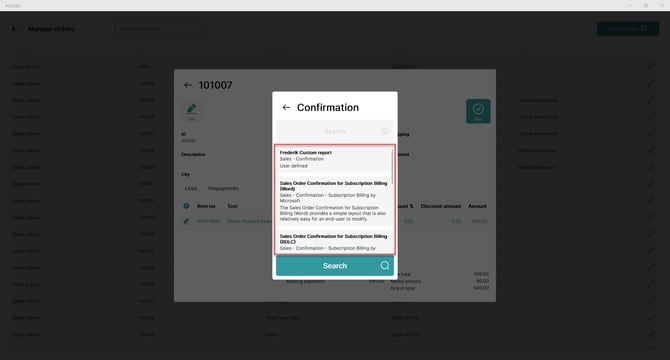
1) In the 'Confirmation' window, select the relevant report.
2) Click 'Search'.
3) POS365 opens the report preview.
Step 6:
Review the generated document. The preview shows the order information, customer details, item lines, quantities, and total amounts.
Review the document: