
Create a layout:
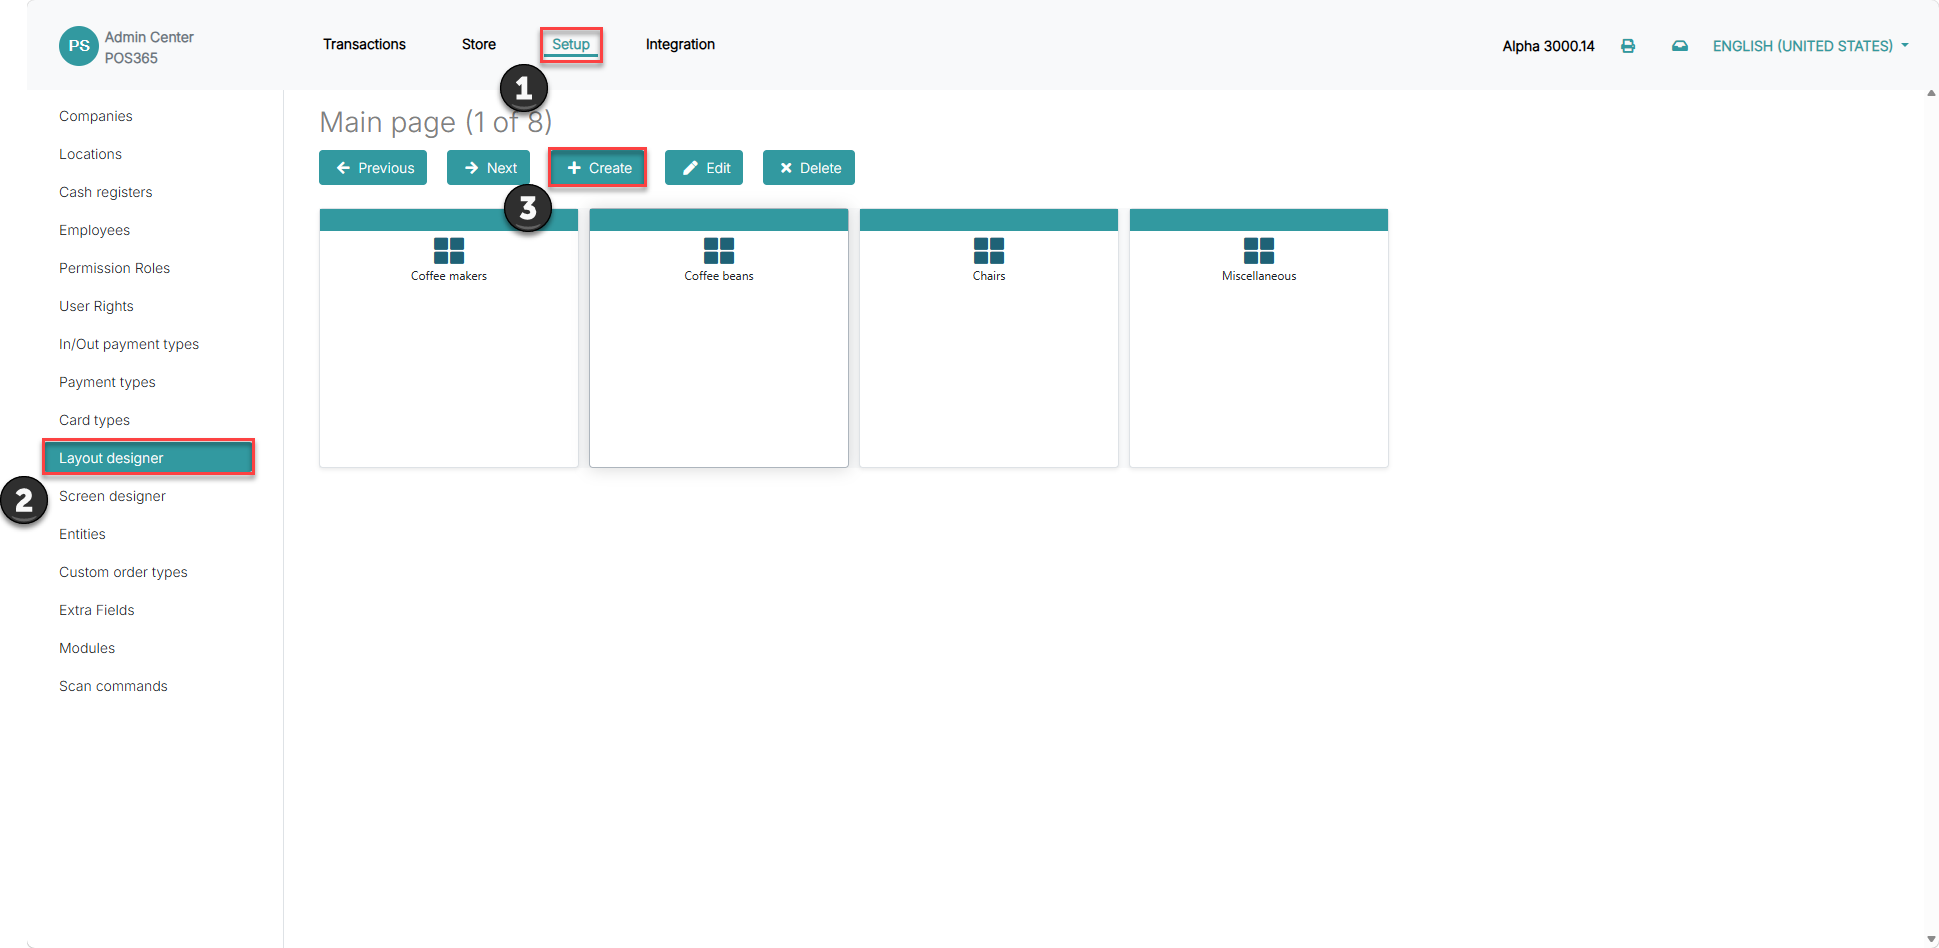
- Go to 'Setup'
- Open 'Layout designer'
- Click 'Create'
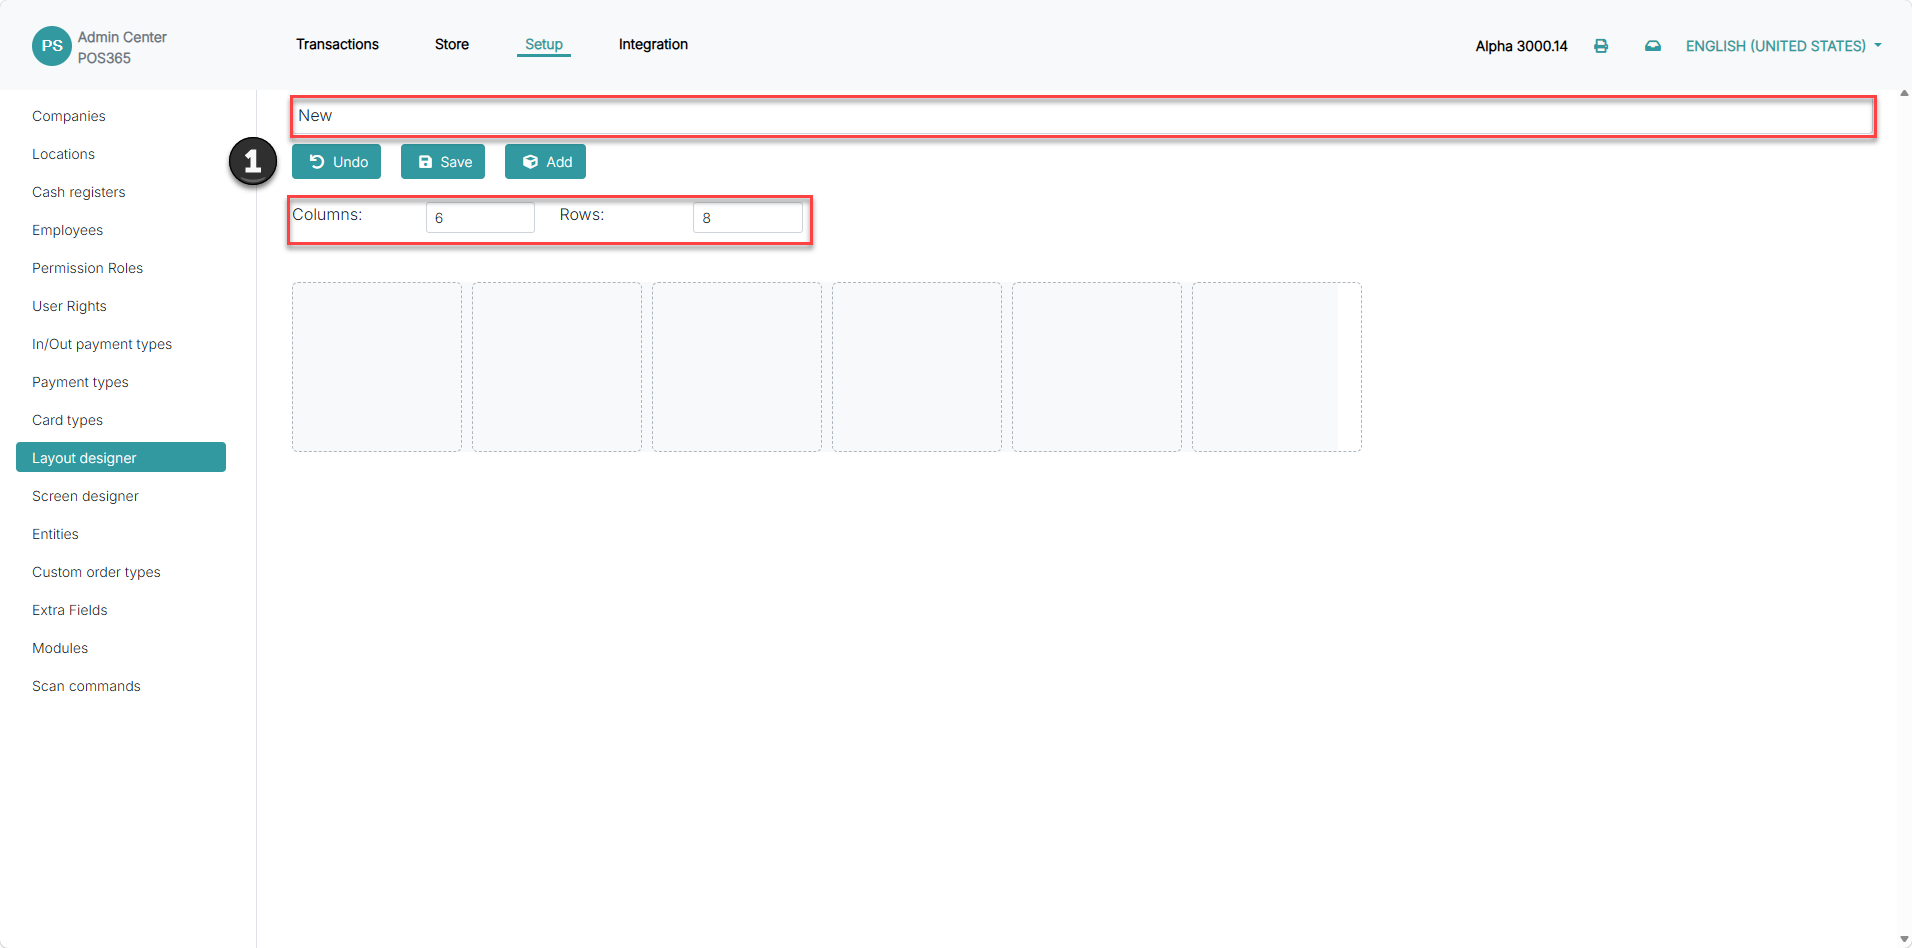
- Enter a recognizable name and select the number of columns and rows.
Columns and rows define the structure of the layout and how the buttons are arranged.
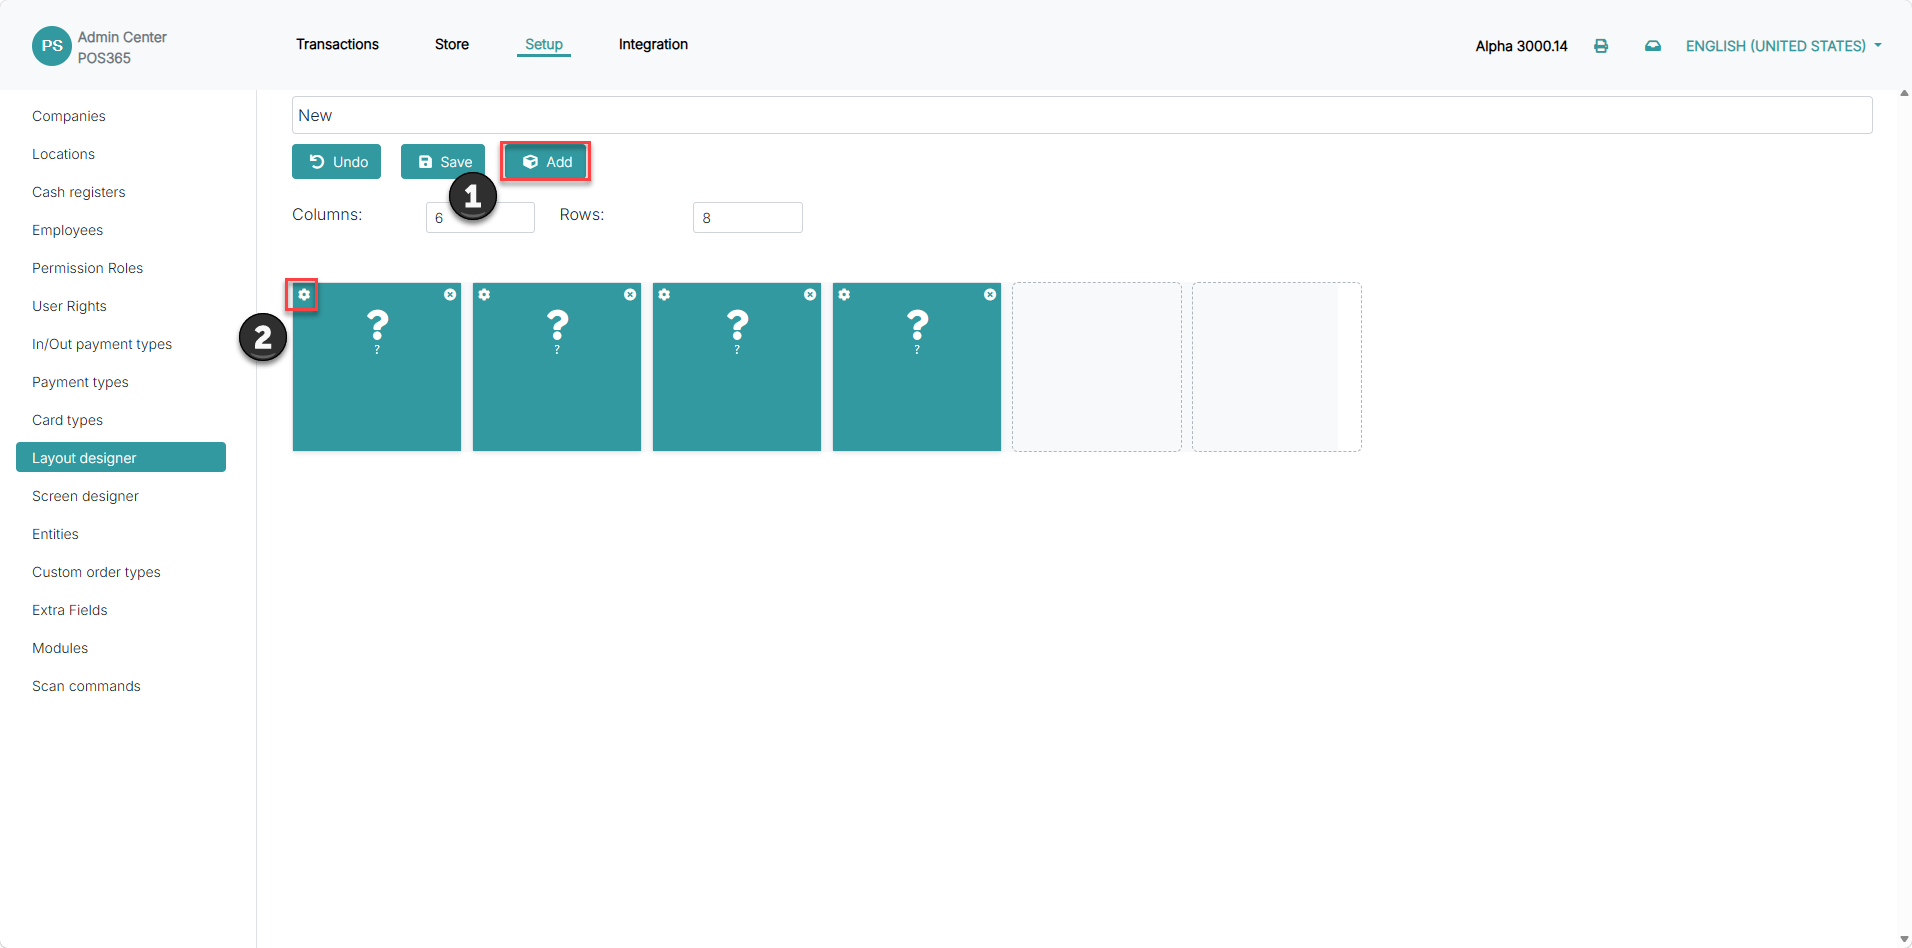
- Click 'Add' to add a new button. Repeat this until the layout contains the required number of buttons.
- Click the settings icon on an empty button to configure it.
Add a product to a button:
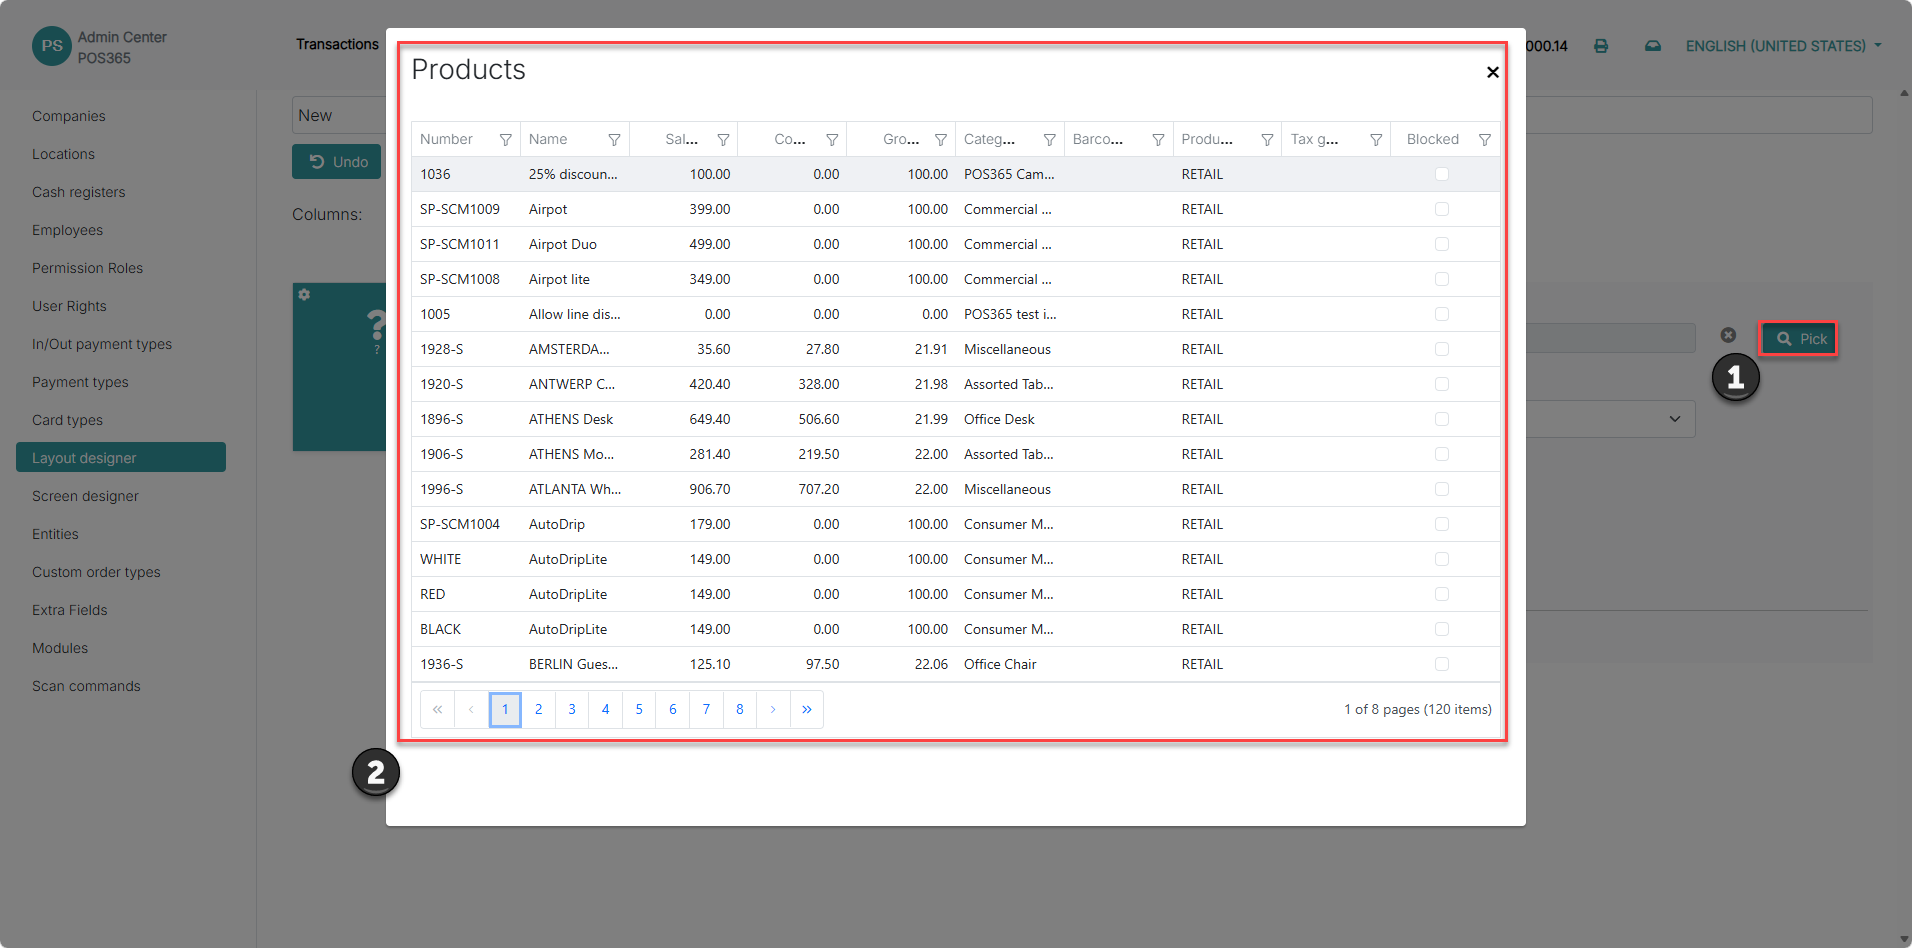
- Click 'Pick' next to the Product field to open the list of available products.
- Use the search and filtering options to find and select the required product.
The button automatically displays the name of the selected product. When an employee clicks the button in POS365, the product is added directly to the basket.
Link to another layout:
You can also configure a button to open another layout. This is useful for creating a main layout that links to layouts for different product groups.
Create the layouts you want to connect before configuring the navigation buttons.
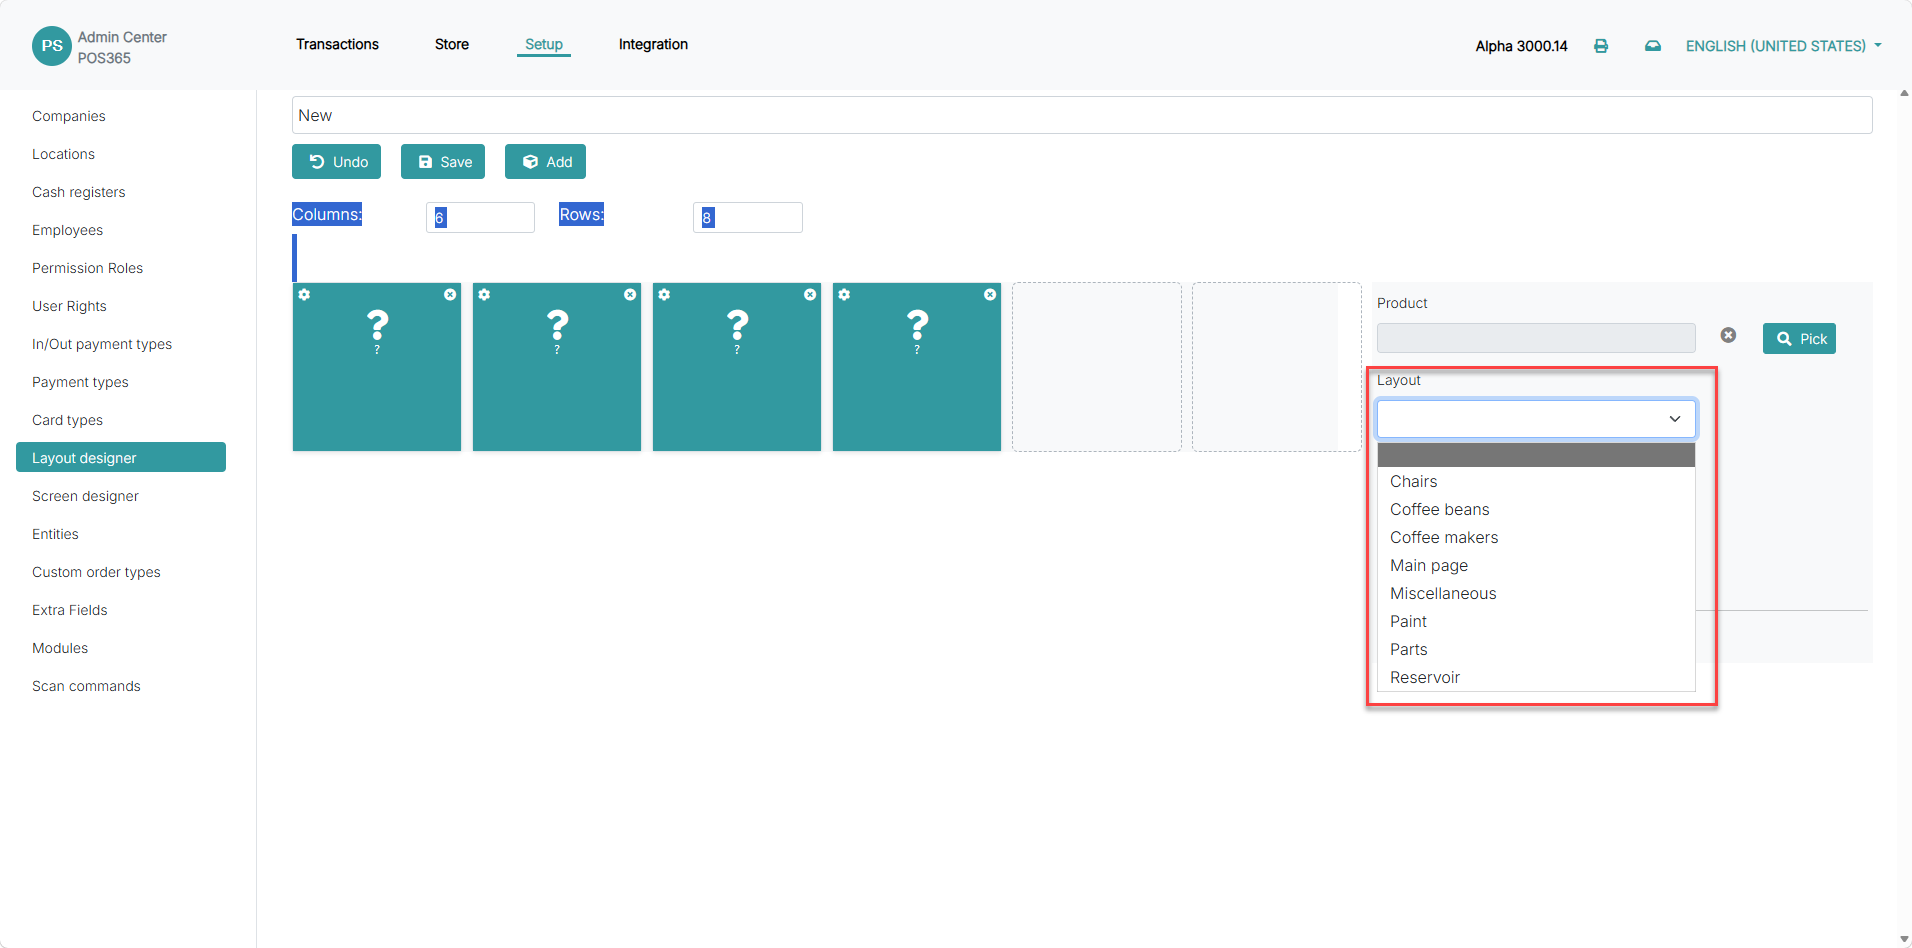
Open the settings for the button, leave the Product field empty, and select the required layout in the 'Layout' field.
The button automatically displays the name of the selected layout.
Click 'Save' after all buttons have been configured.
Add the layout to a screen:
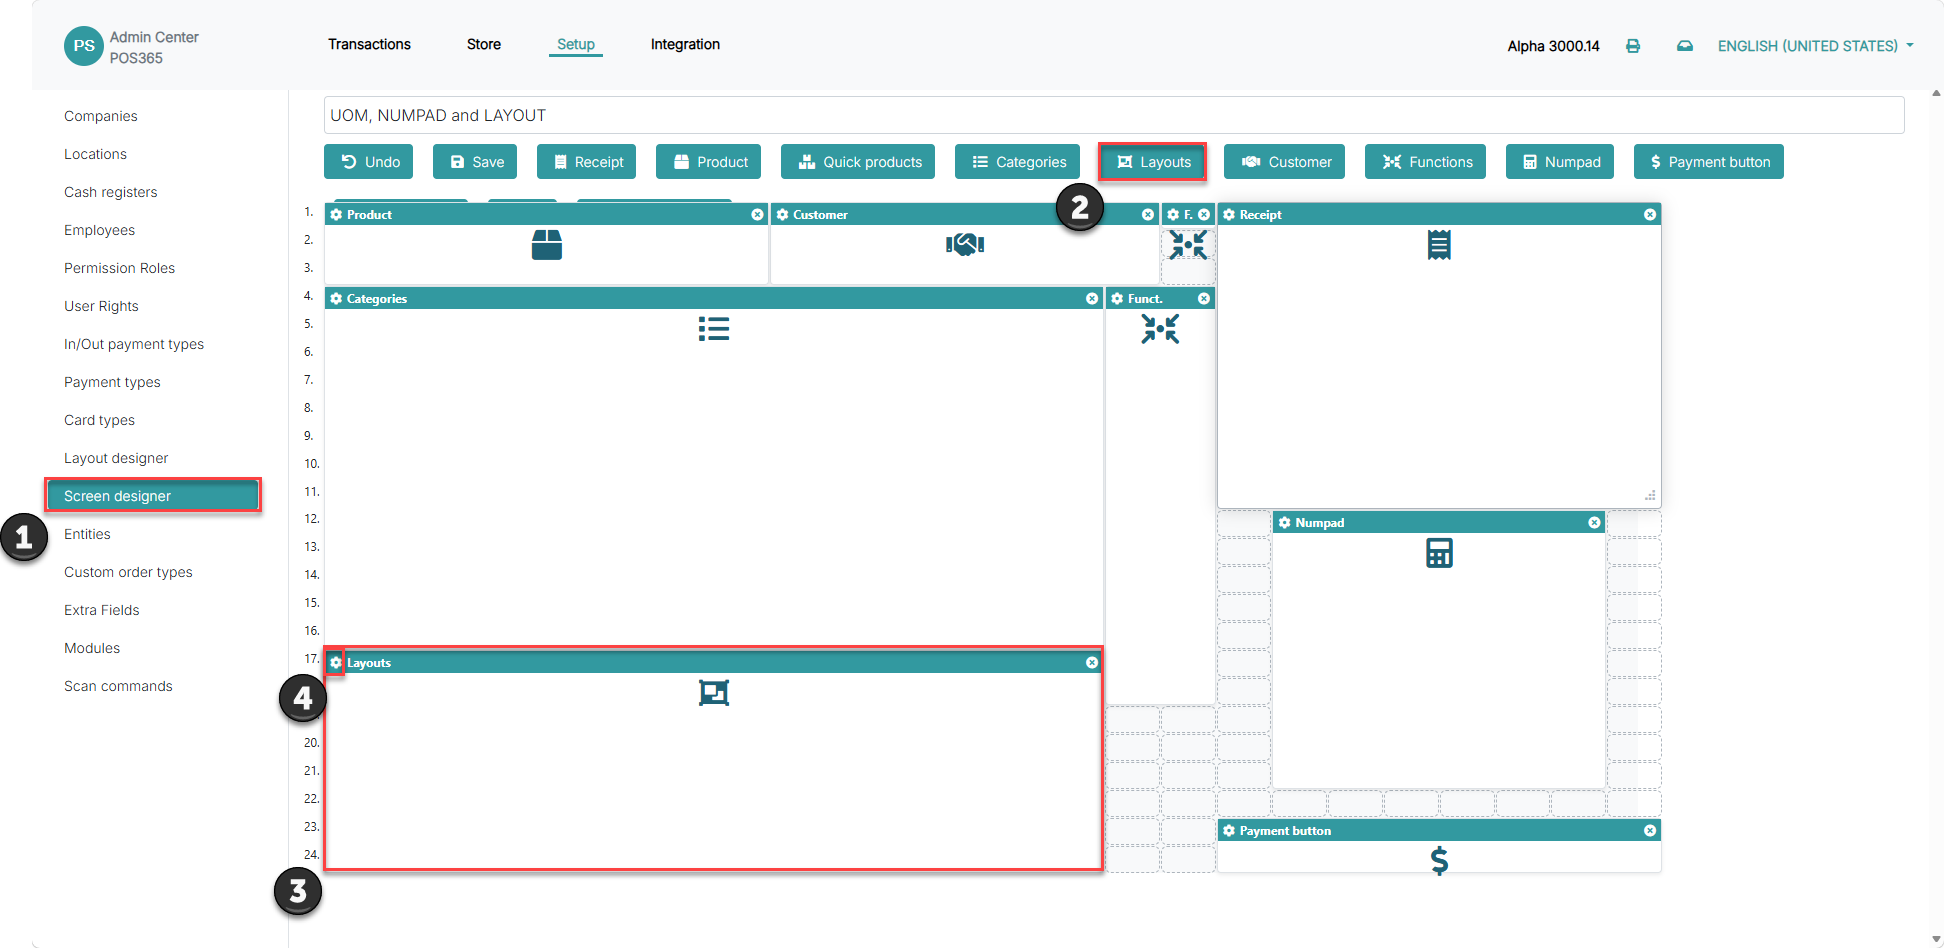
- Go to 'Setup', open 'Screen designer', select the required screen, and click 'Edit'.
- Click 'Layouts' to add the Layouts module.
- Move and resize the module so it fits the screen design.
- Click the settings icon on the Layouts module.
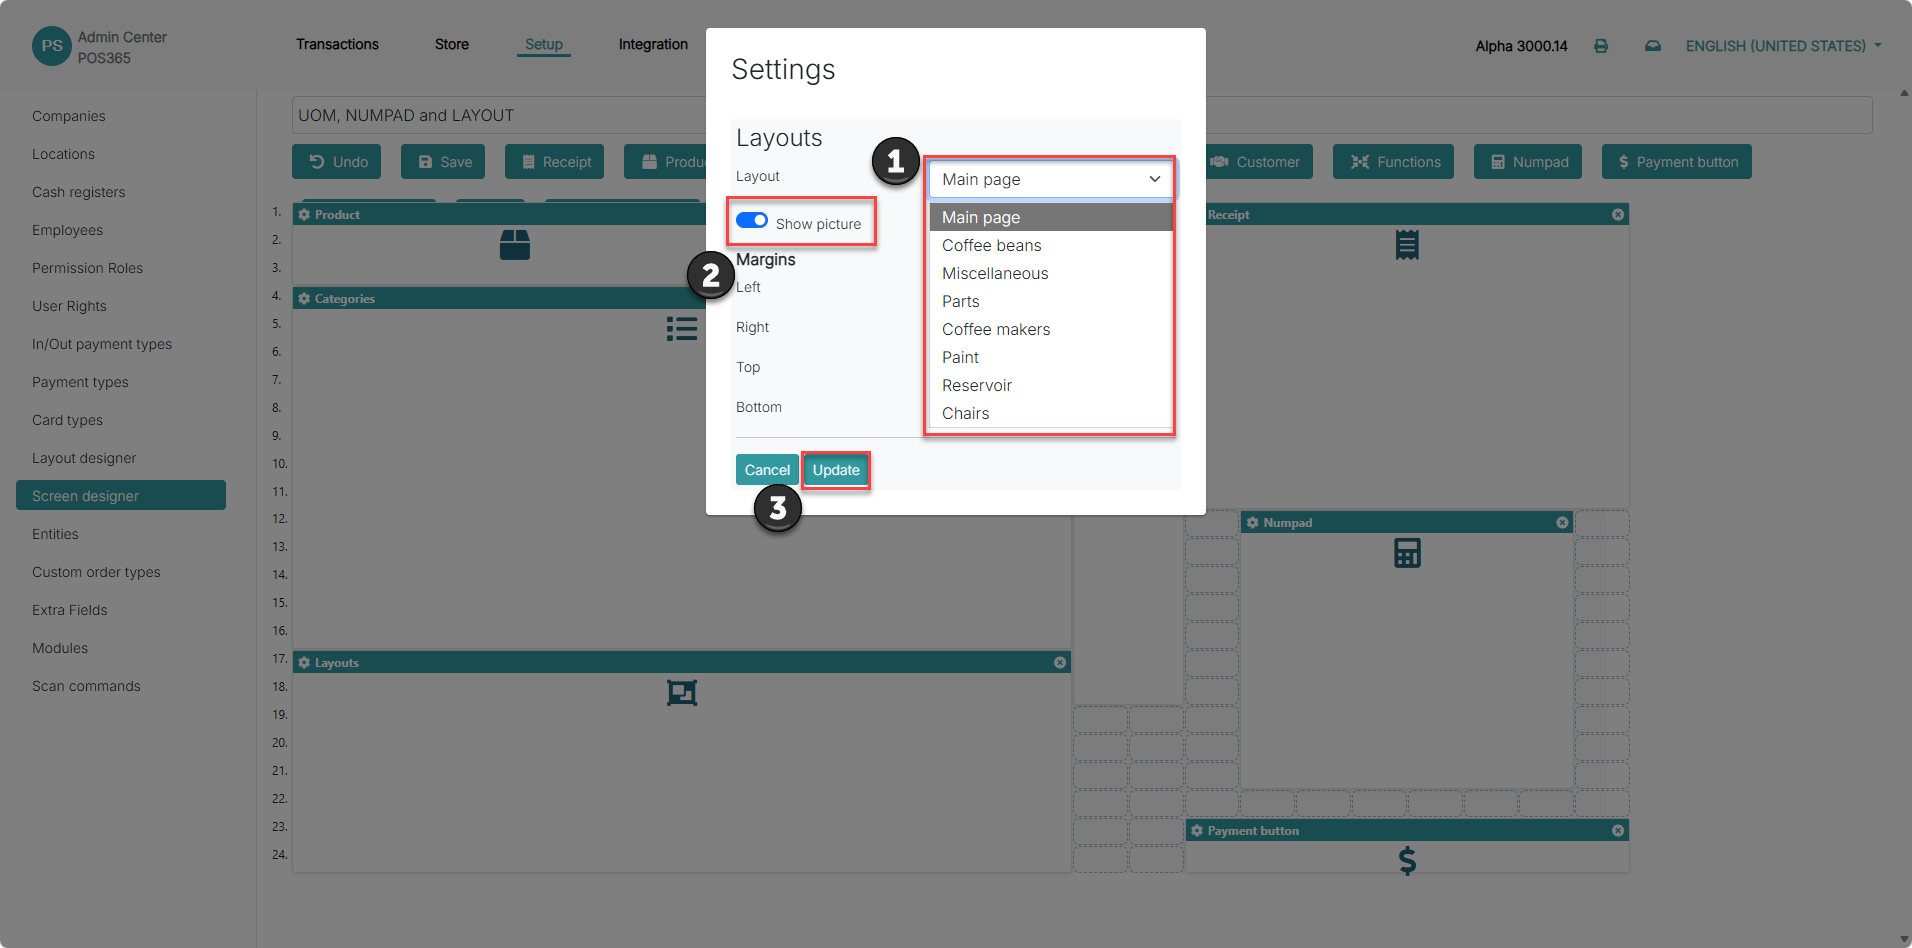
- Select the layout that should be displayed when the screen opens.
- Enable 'Show picture' if product images should be displayed on the layout buttons.
- Click 'Update'.
Click 'Save' to save the complete screen design.
Assign the screen to a cash register:
Each cash register must be assigned a screen containing the Layouts module.
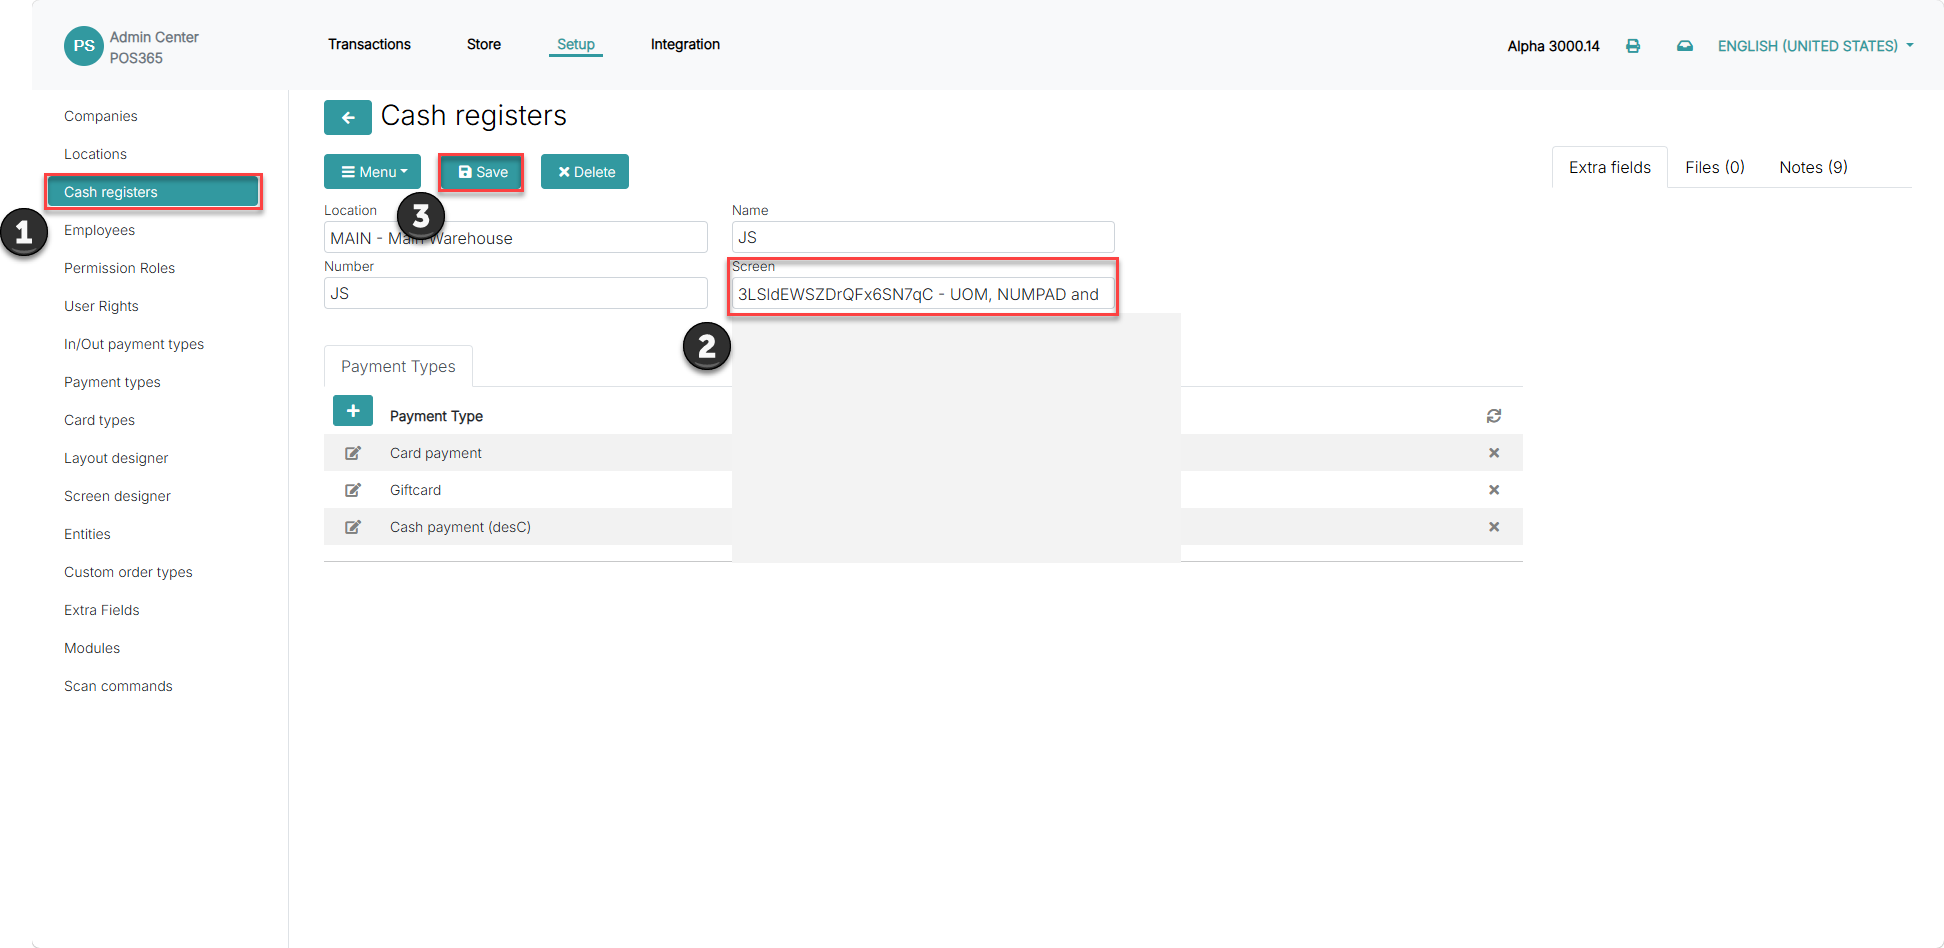
- Go to 'Setup', open 'Cash registers', and select the required cash register.
- Select the configured screen in the 'Screen' field.
- Click 'Save'.
Repeat these steps for every cash register that should use the screen.
Restart the POS365 app after completing the setup so the selected screen and layout are loaded.
Use layouts in POS365:
After restarting POS365, the selected screen and layout are automatically displayed on the cash register.
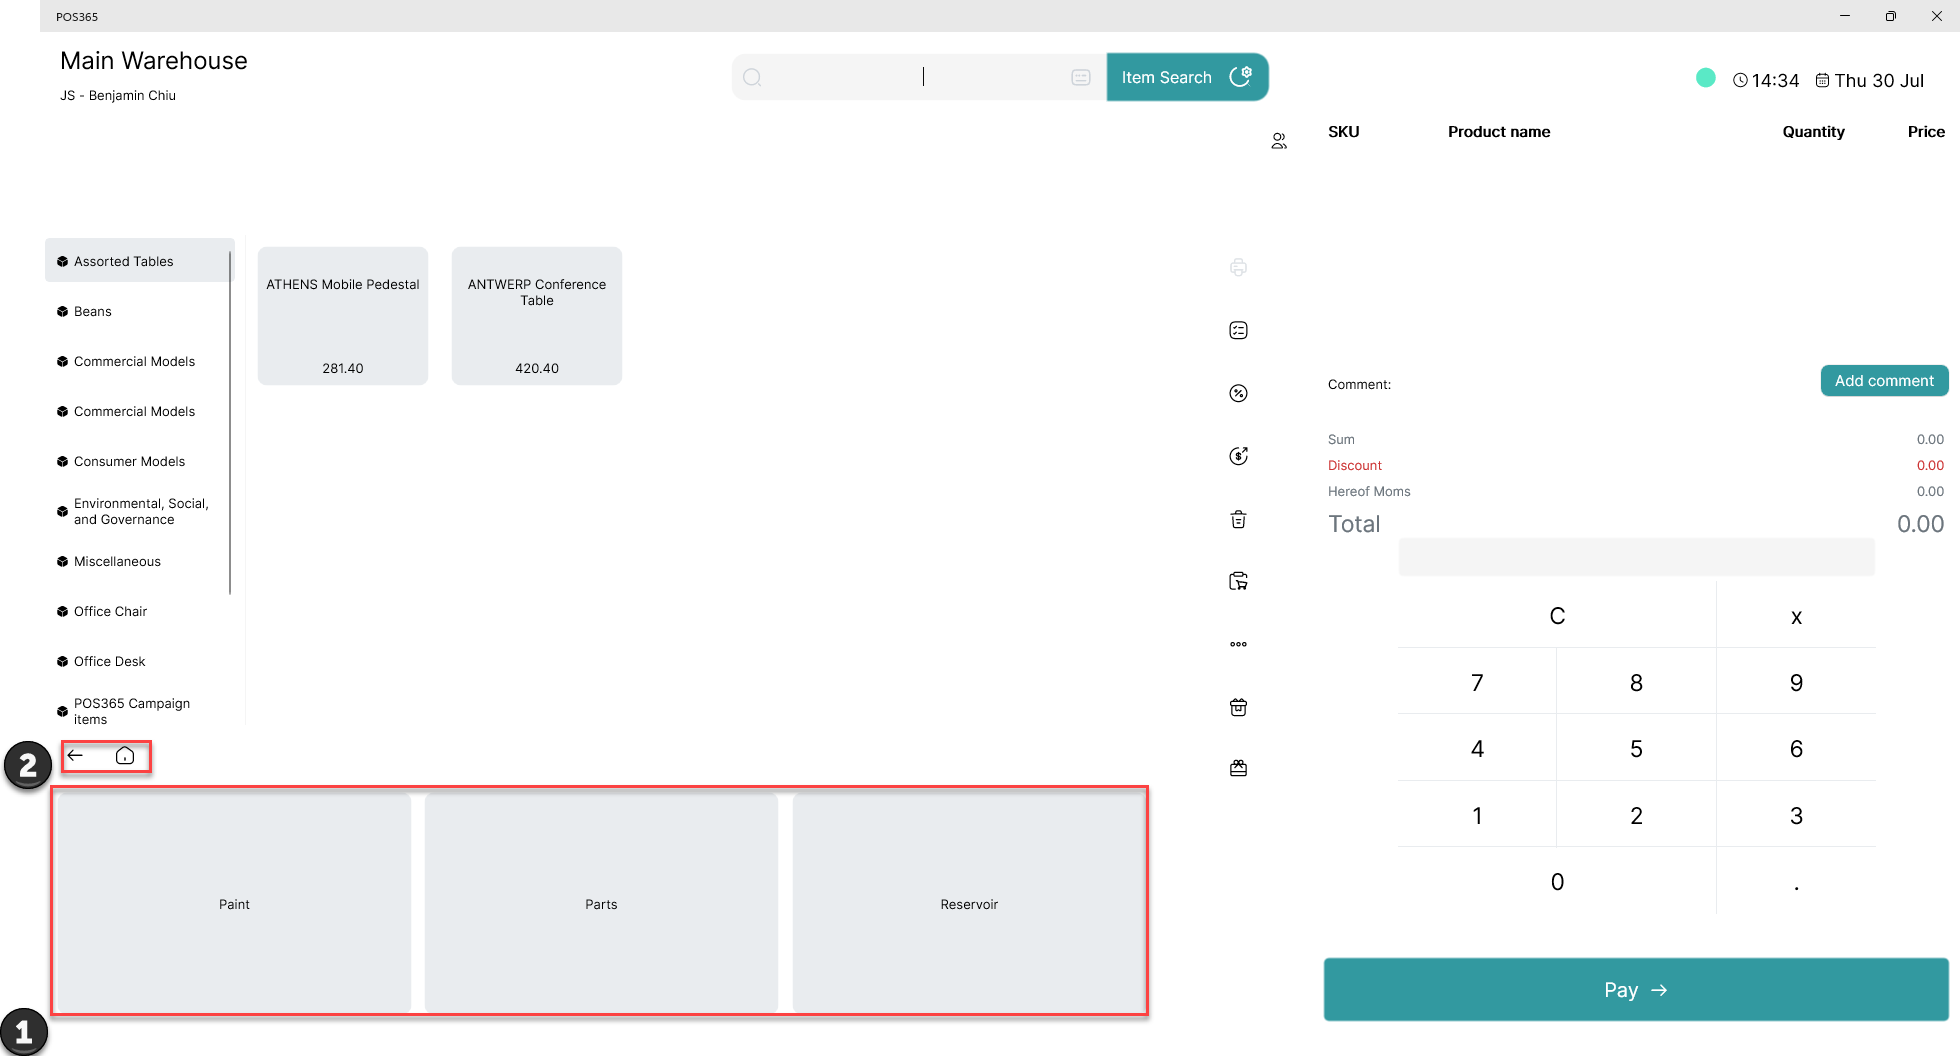
- Click a product button to add the product directly to the basket. Click a button linked to another layout to open that layout.
- Use the back button at the top of the Layouts module to return to the previous layout. Use the home button to return to the starting layout.
If a layout, screen design, or screen assignment is changed, restart POS365 to load the updated setup.