
This guide explains how to access the necessary information for setting up a Business Central integration in the Admin Center. The information must be provided in the BC credentials words file received from the Sales Department at POS-ONE.
Step 1: Azure setup
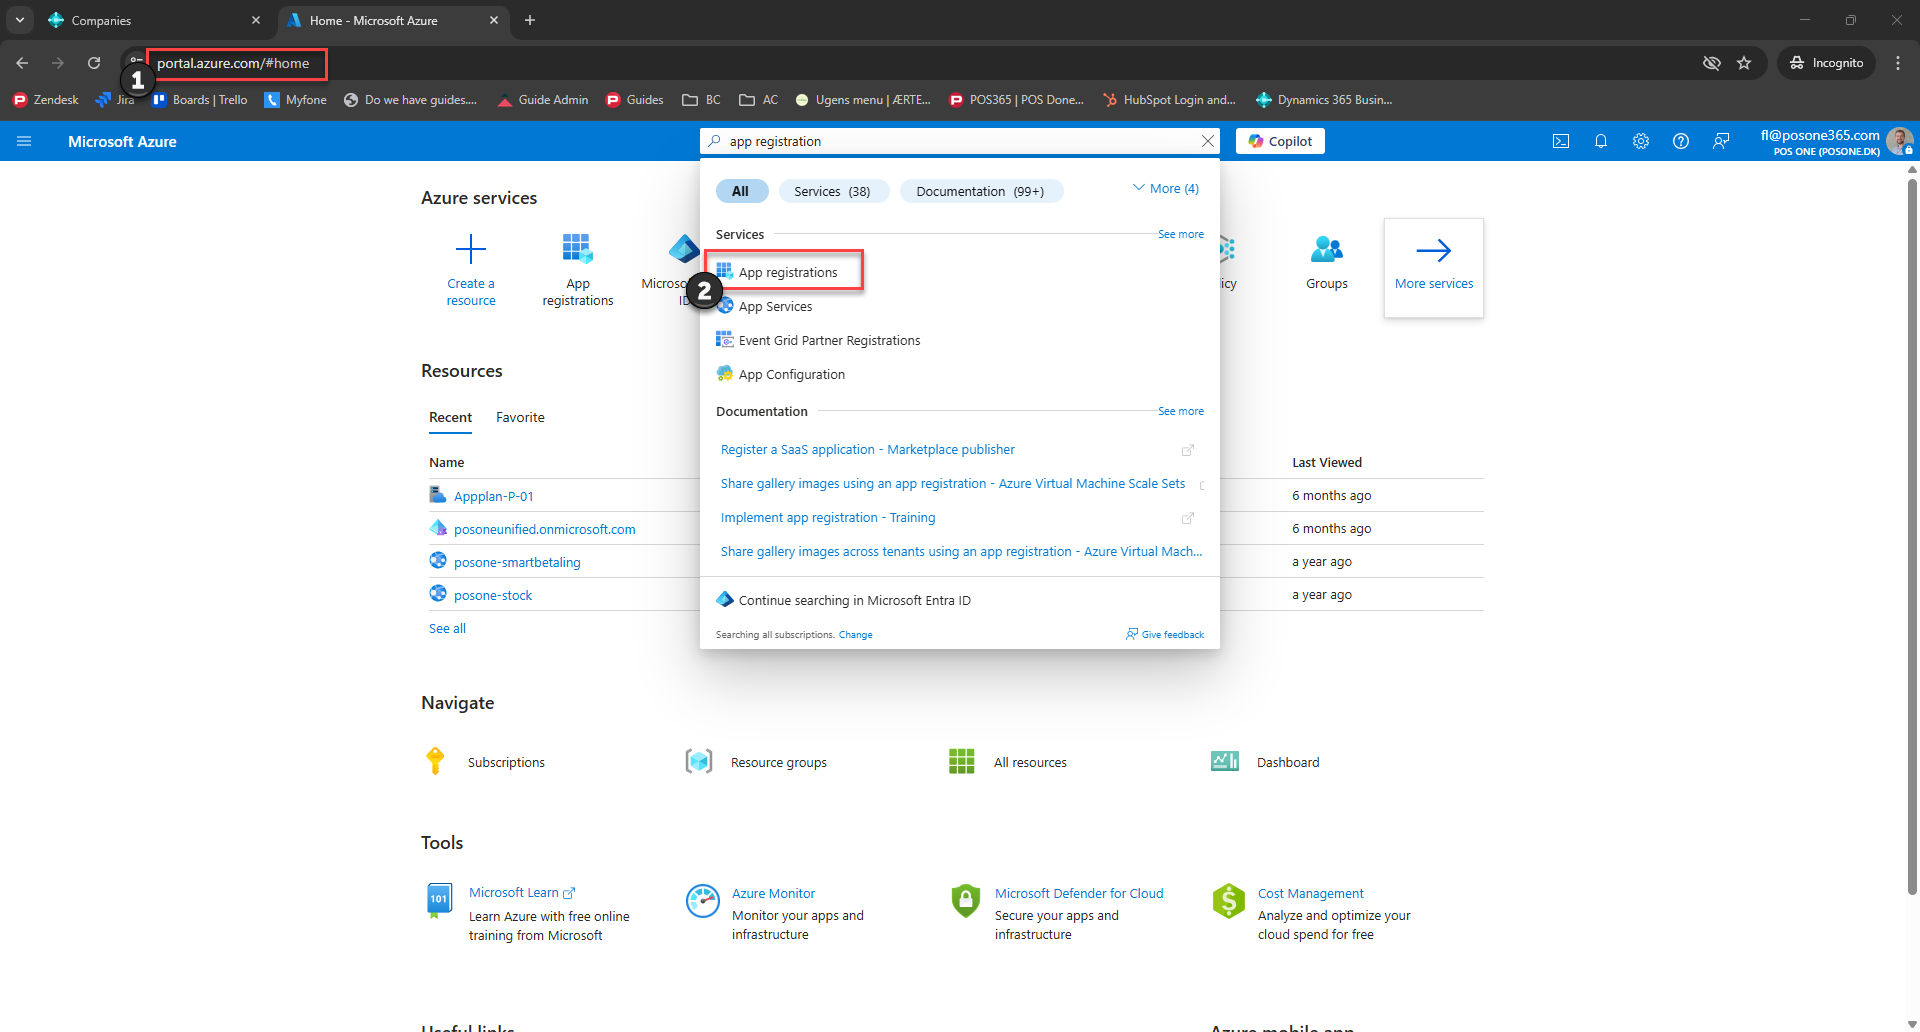
1) Go to portal.azure.com
2) Open 'App registrations'
Step 2:
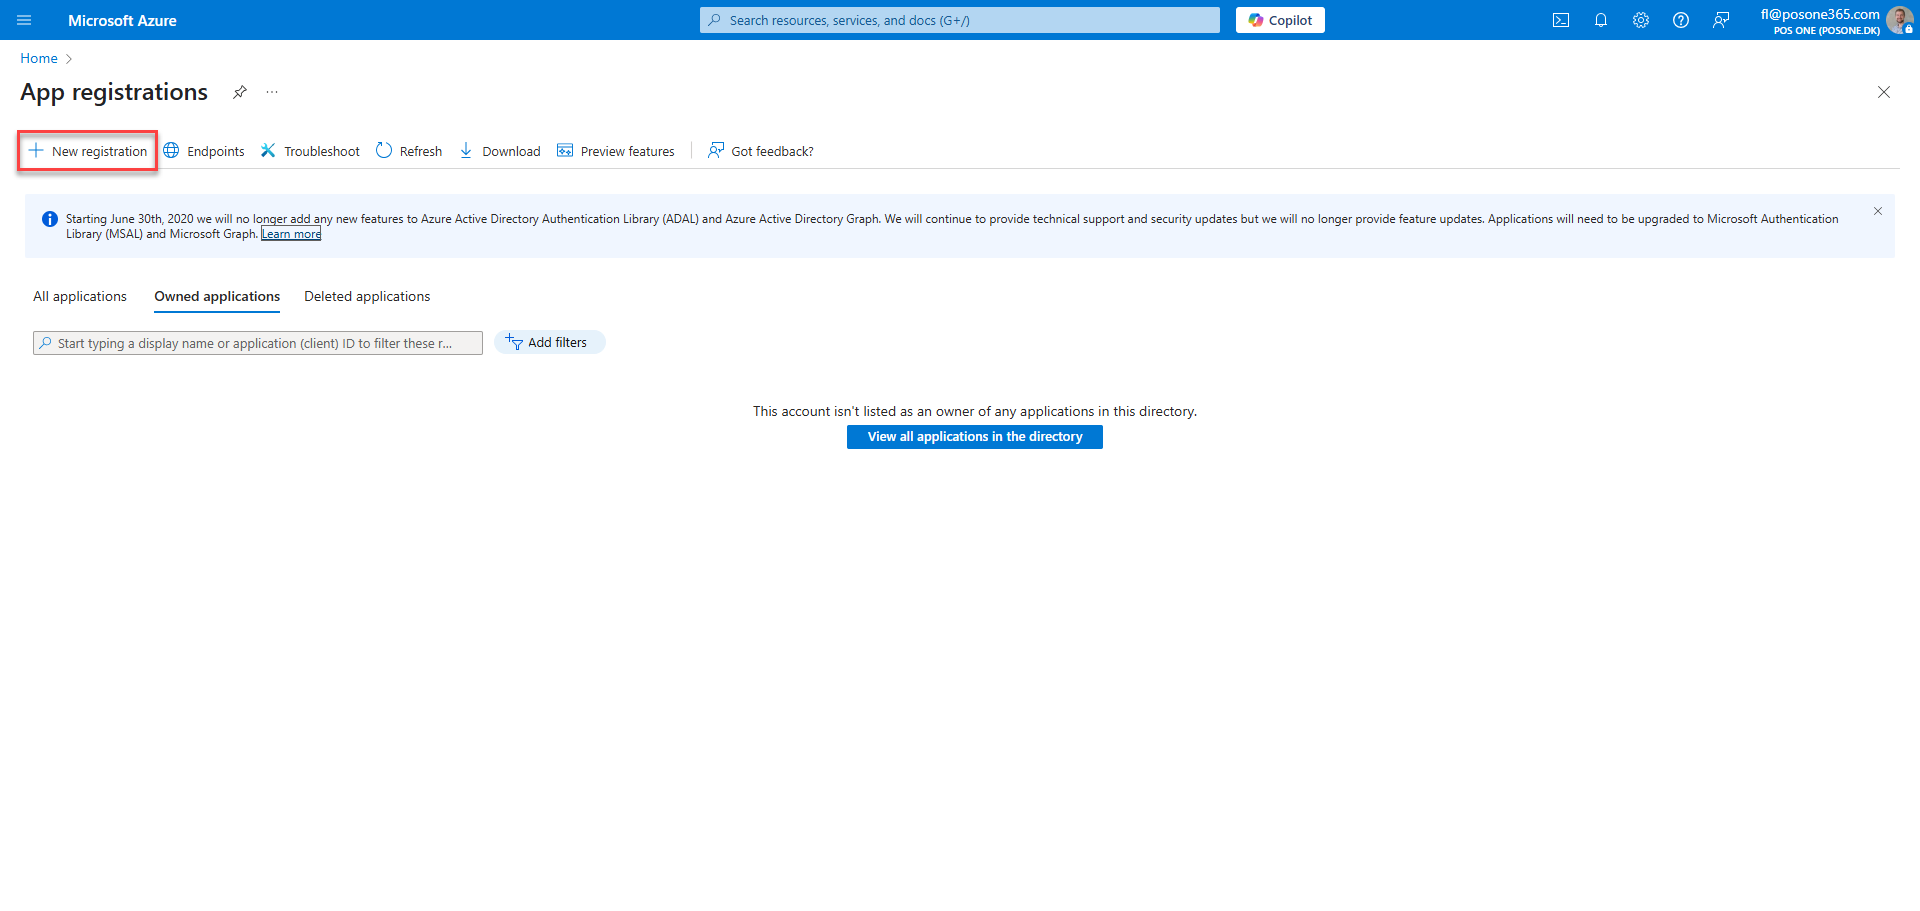
Click 'New registration'
Step 3:
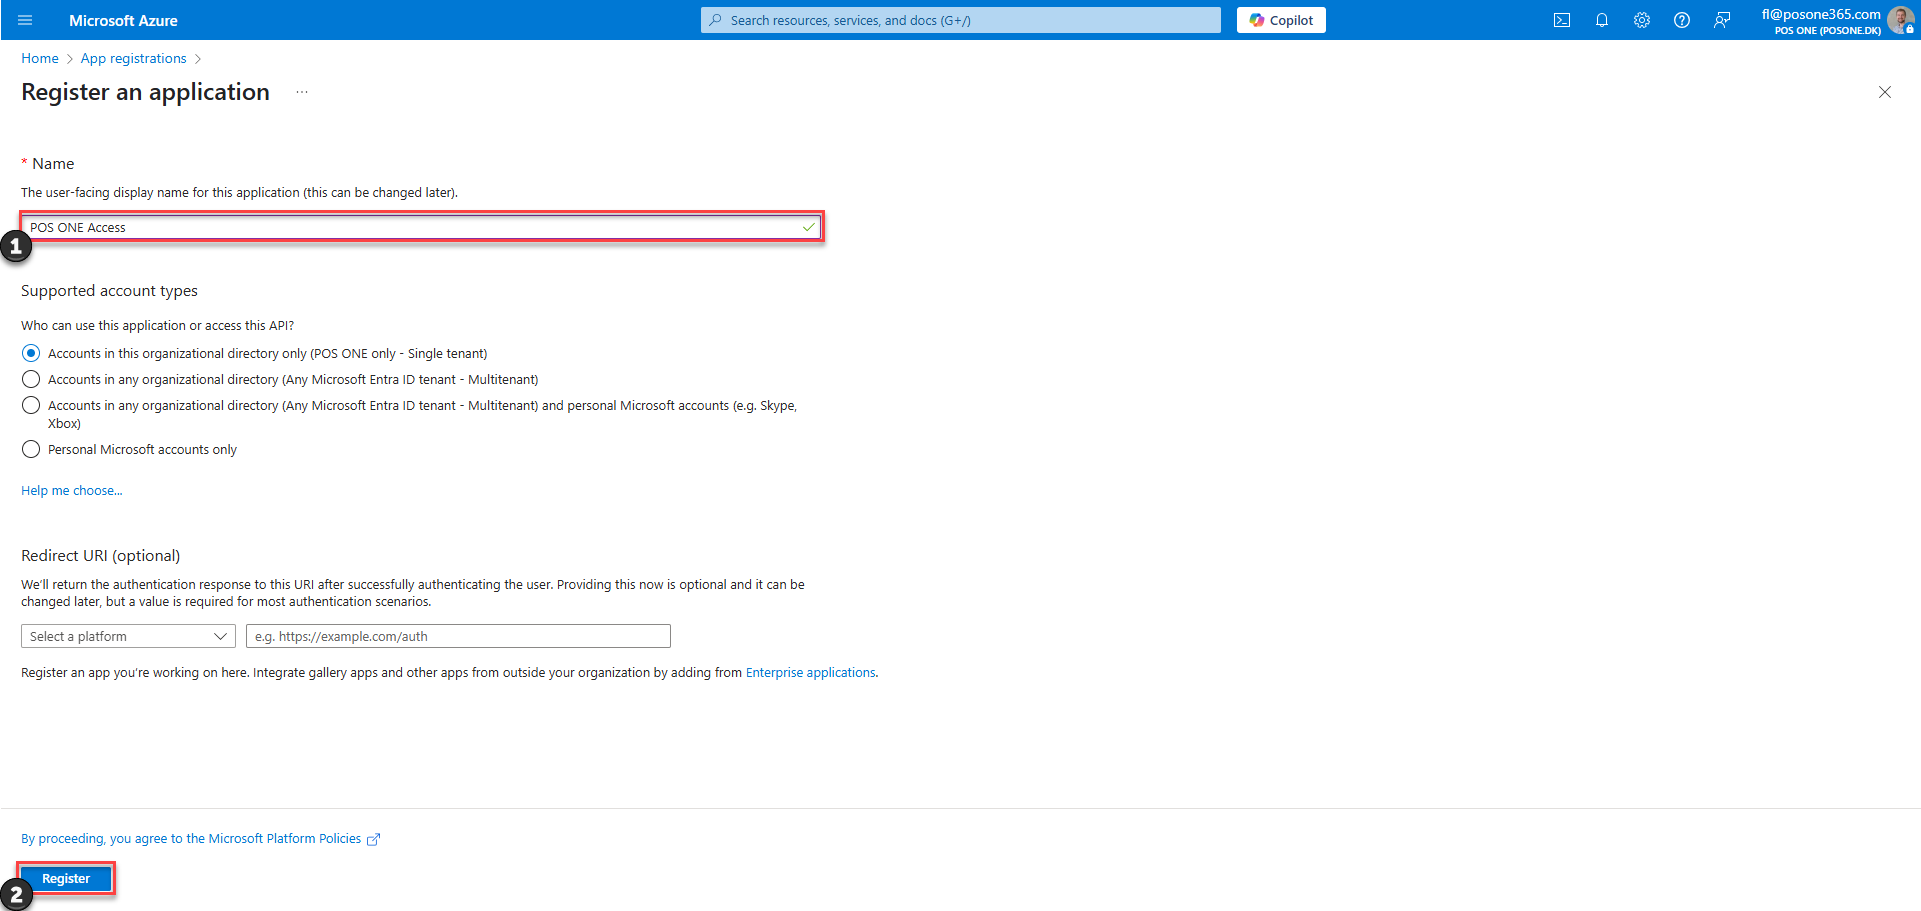
1) Rename the registration to 'POS ONE Access'
2) Click 'Register'
Step 4:
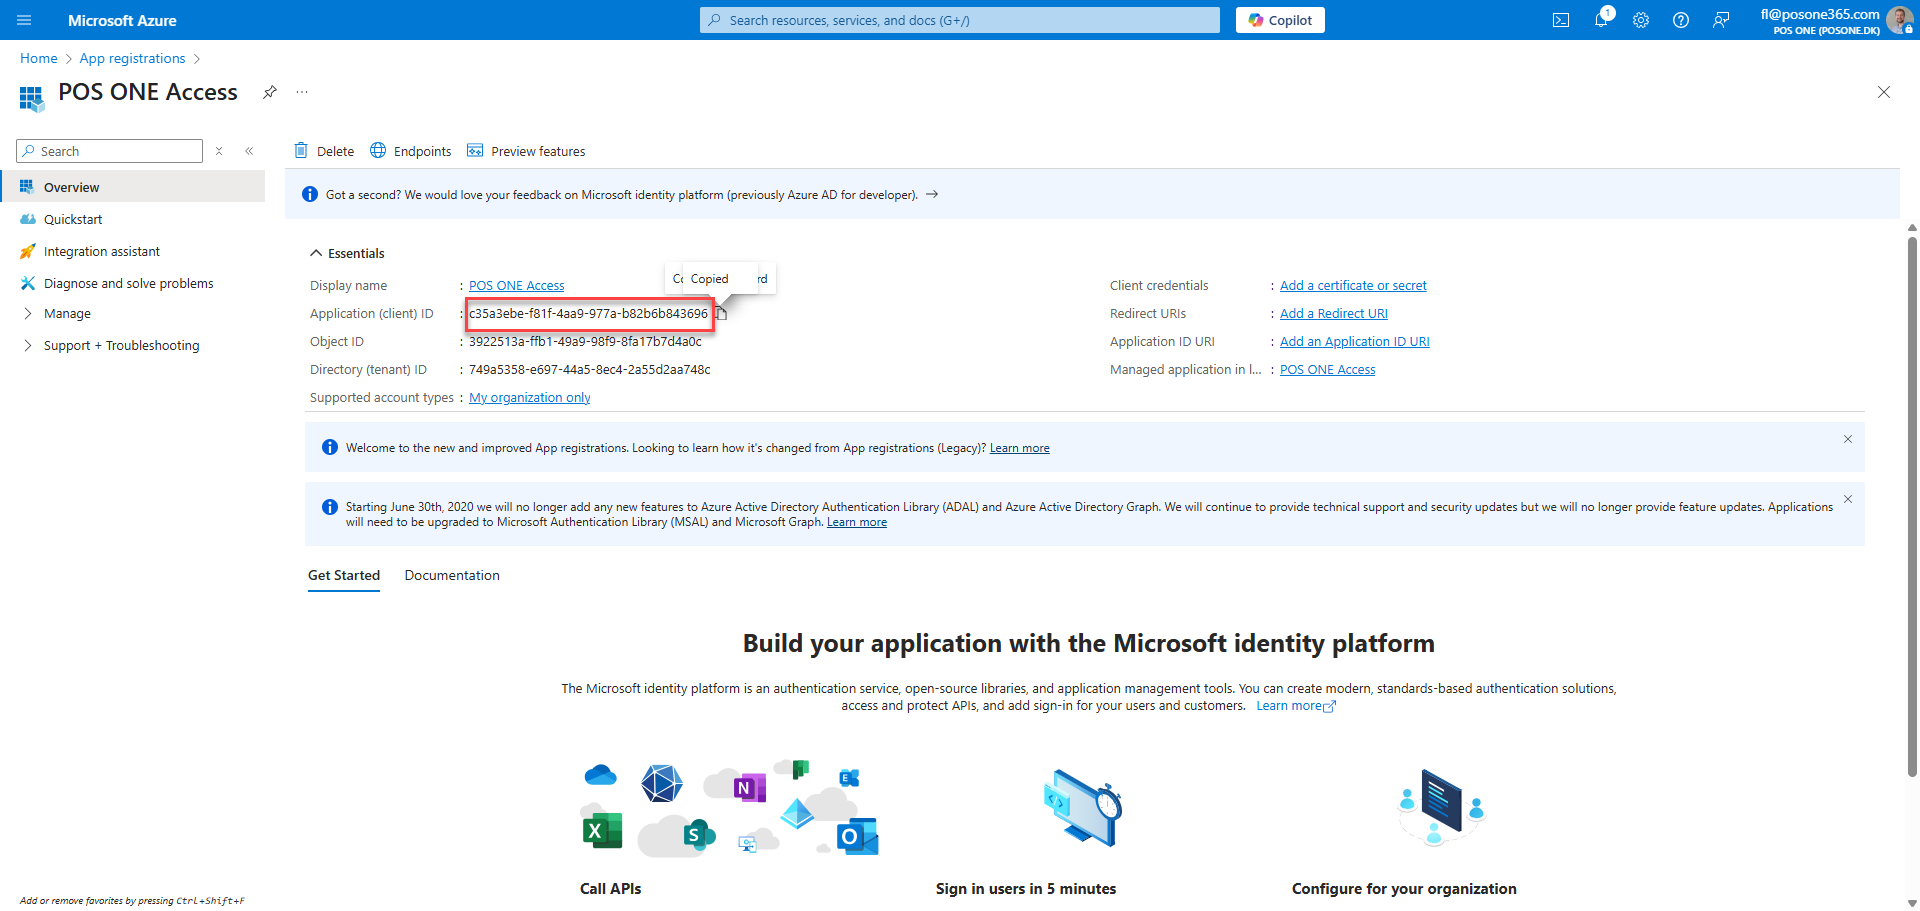
Copy the 'Application (client) ID'. This is the "BC Client ID" needed in the word document received from POS ONE
Step 5:
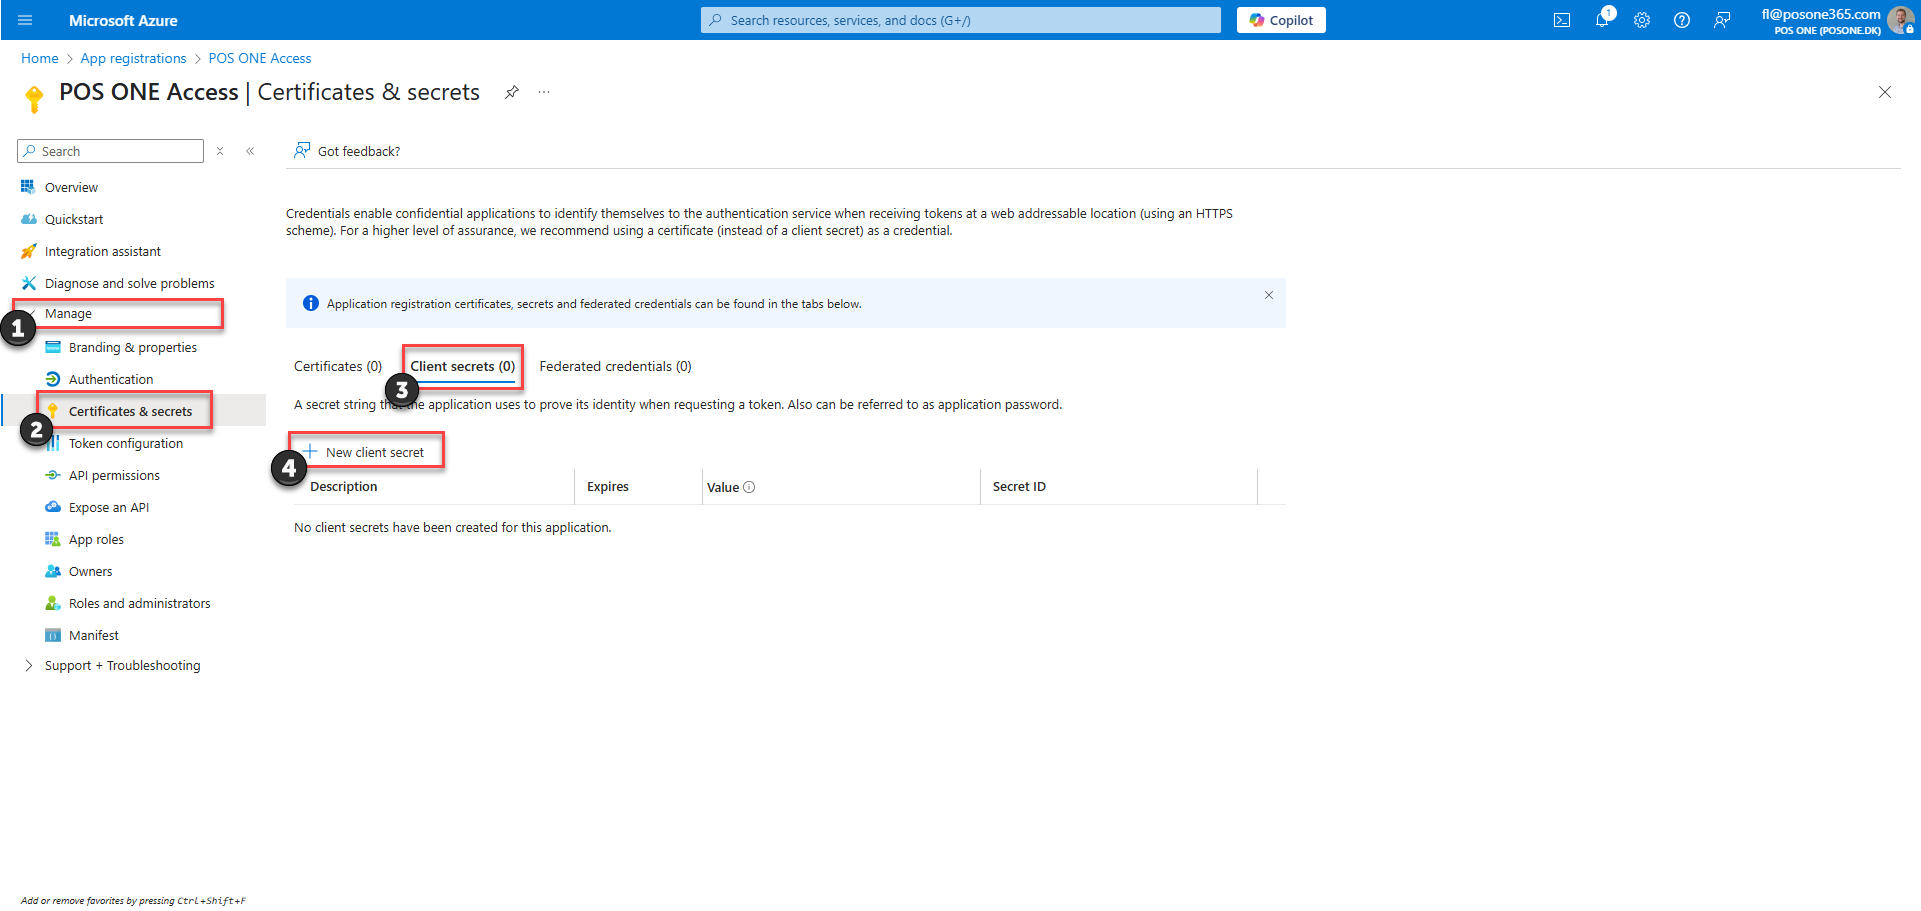
1) Click on 'Manage'
2) Open 'Certificates & secrets'
3) Go to 'Client secrets'
4) Click 'New client secret'
Step 6:
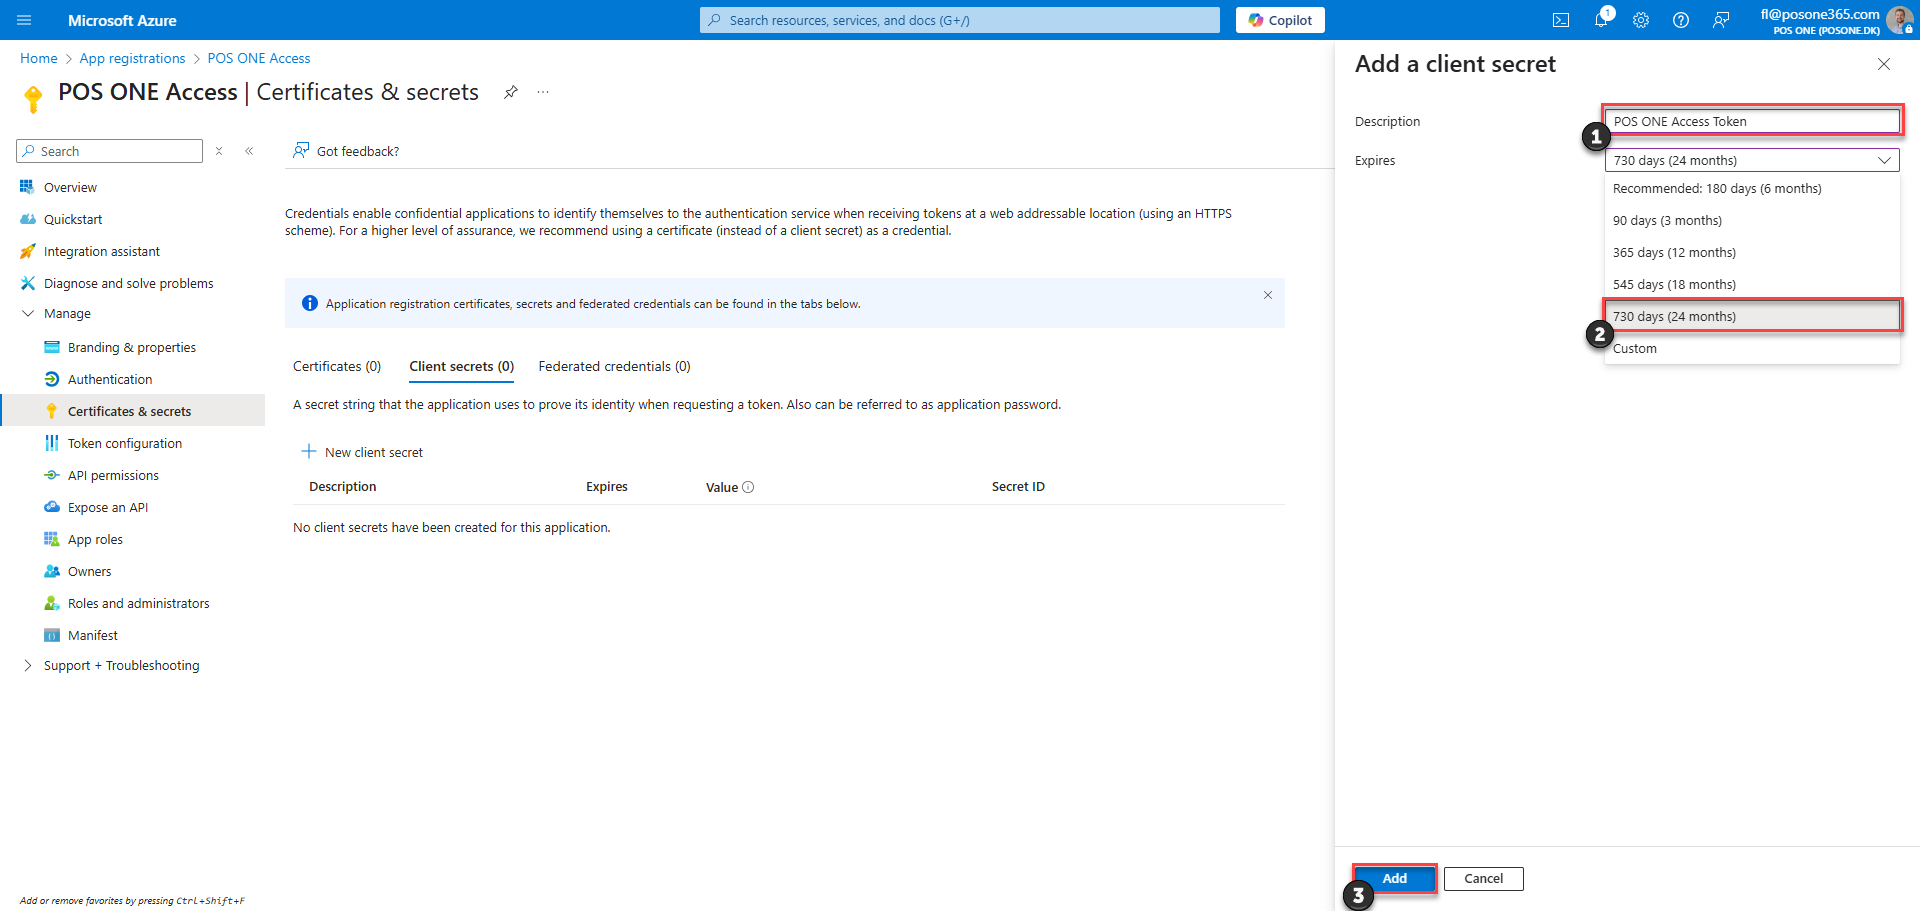
1) At description, write 'POS ONE Access Token'
2) Select the maximum expiration
3) Click 'Add'
Step 7:
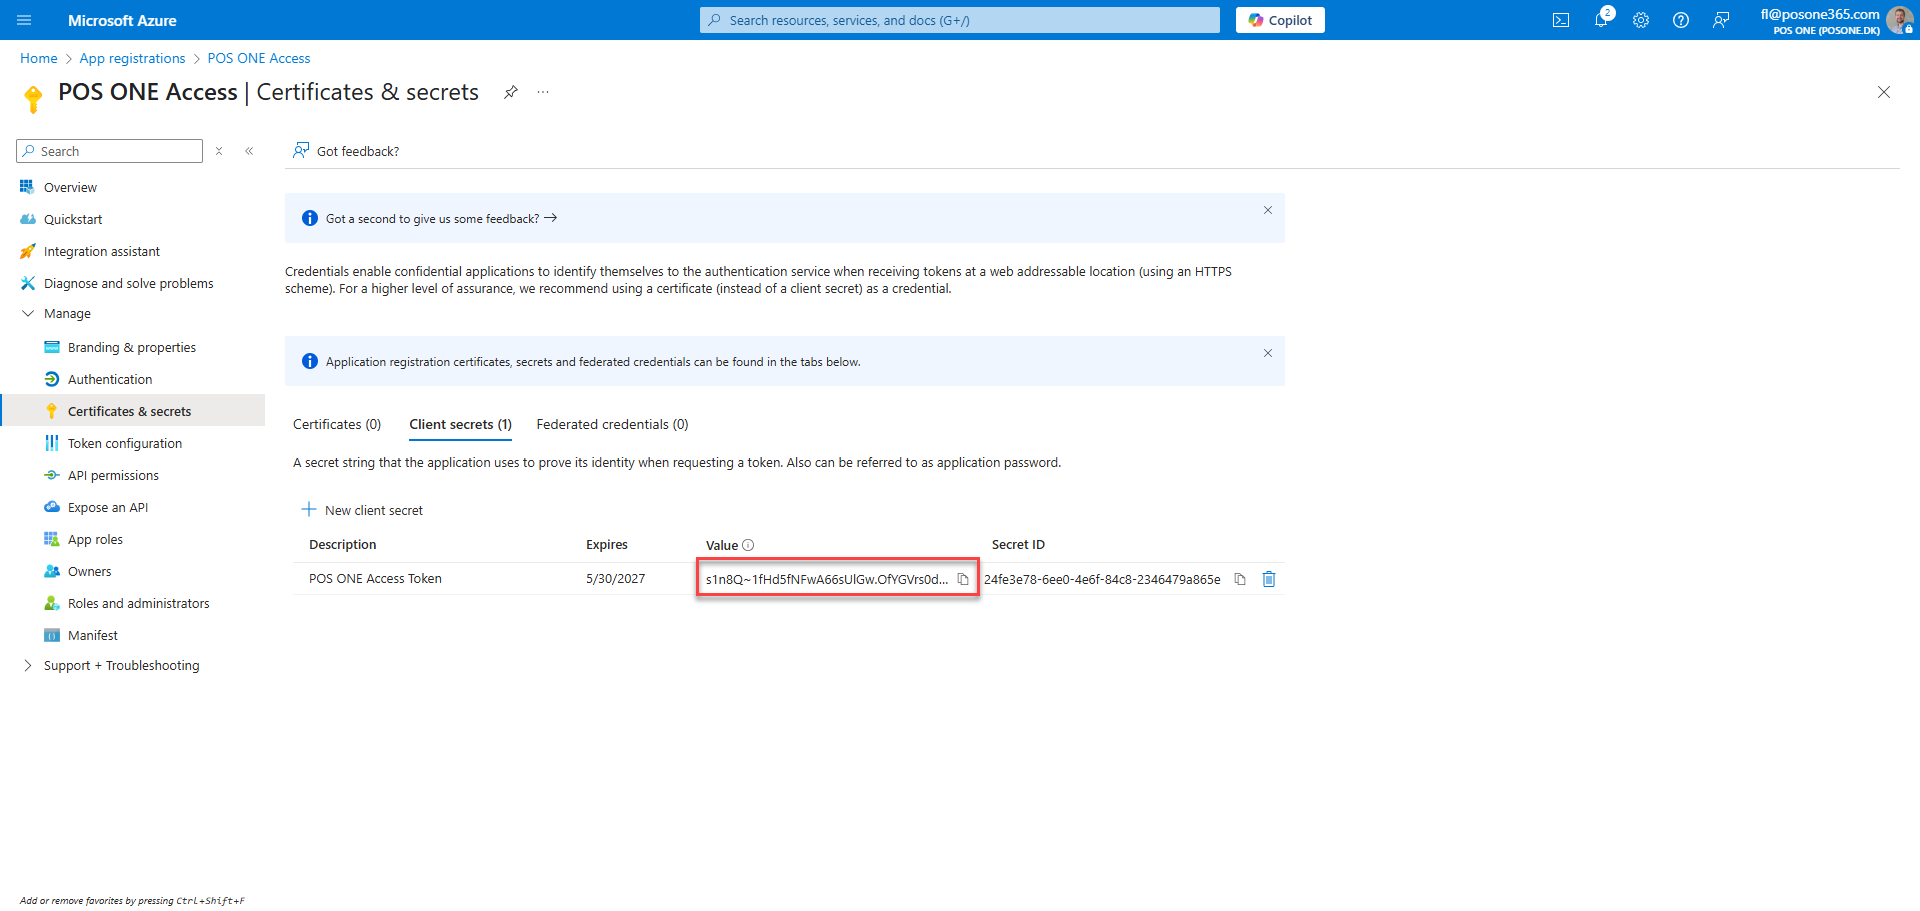
1) Find the newly created token names 'POS ONE Access Token'
2) Copy the 'Value' field. This is the Client Secret that needs to be put in the word document received from POS ONE
Note: It is not possible to access the Client Secret again after the page has been exited
Step 8:
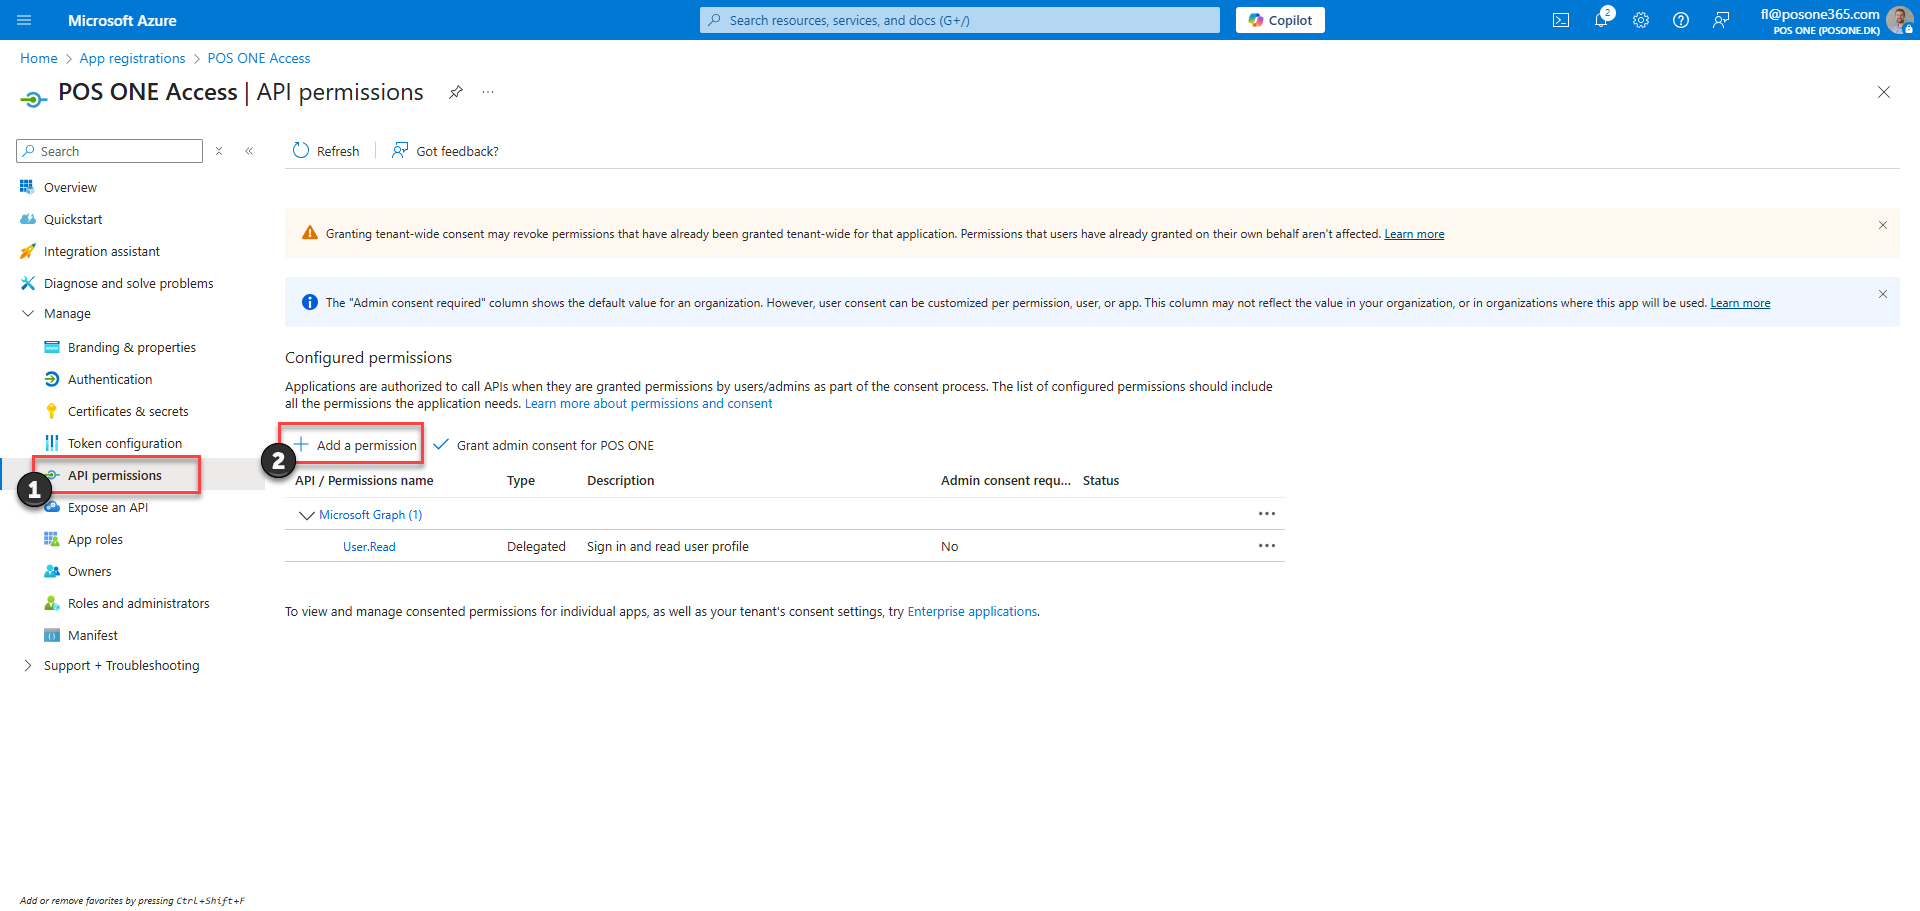
1) Go to 'API permissions'
2) Click 'Add a permission'
Step 9:
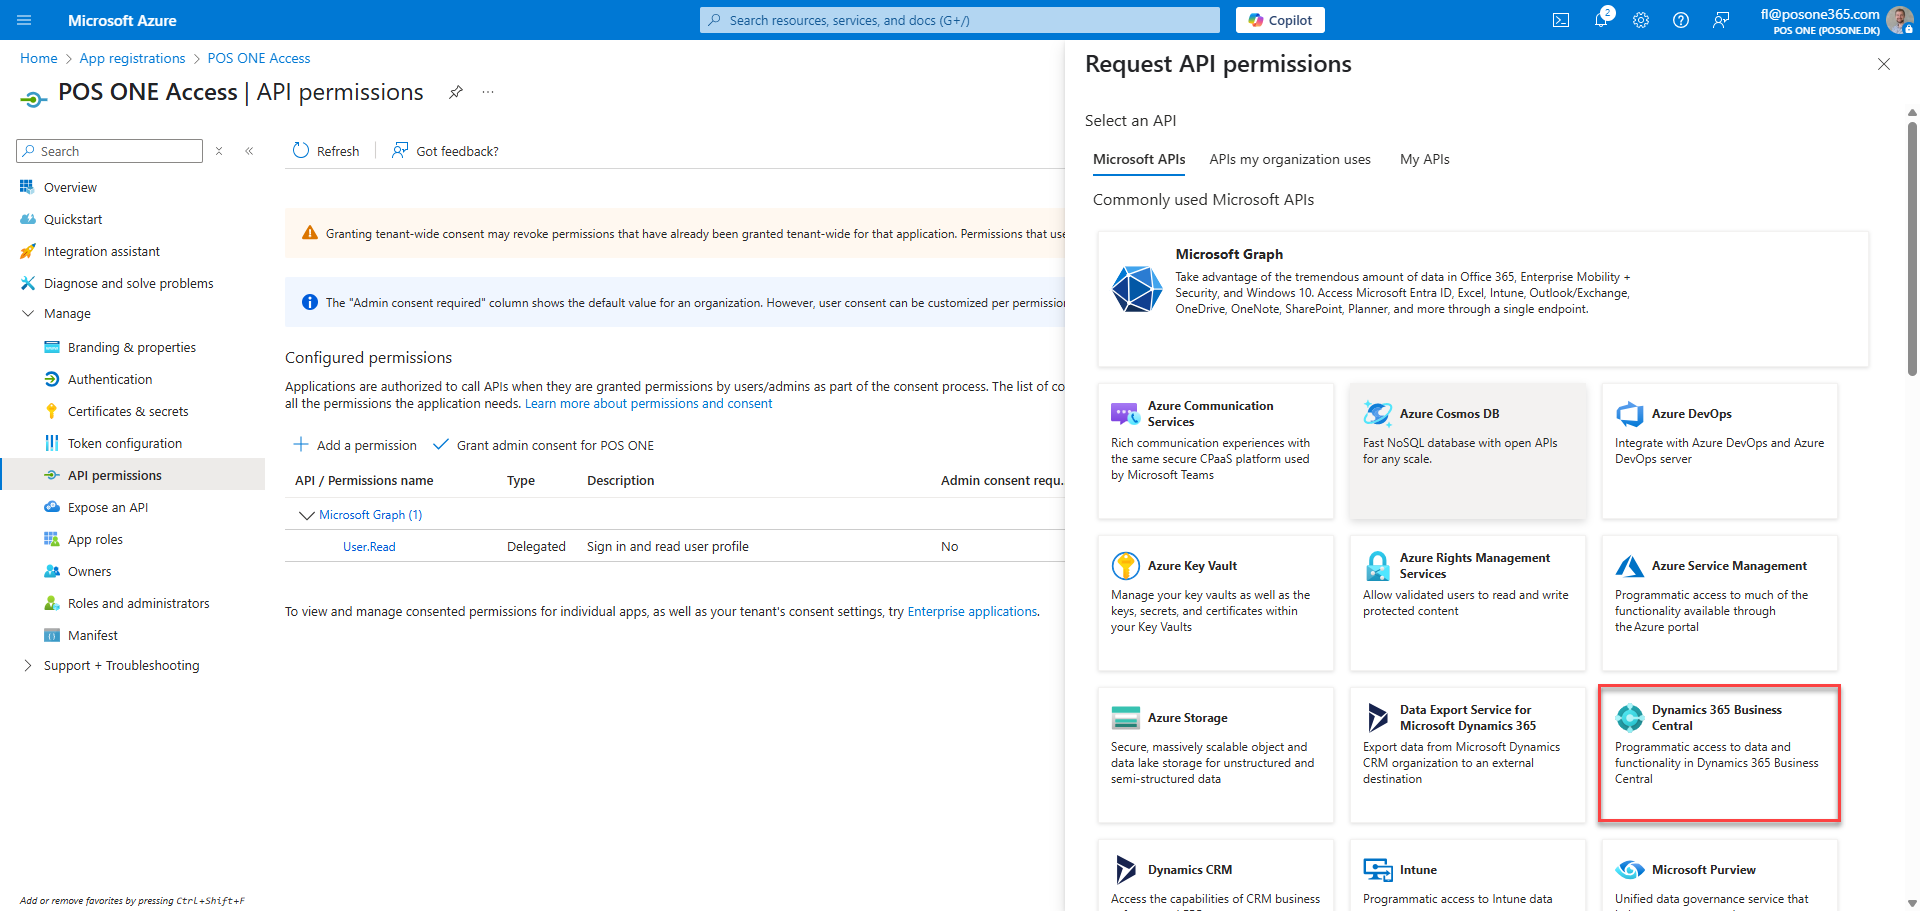
Select 'Dynamics 365 Business Central'
Step 10:
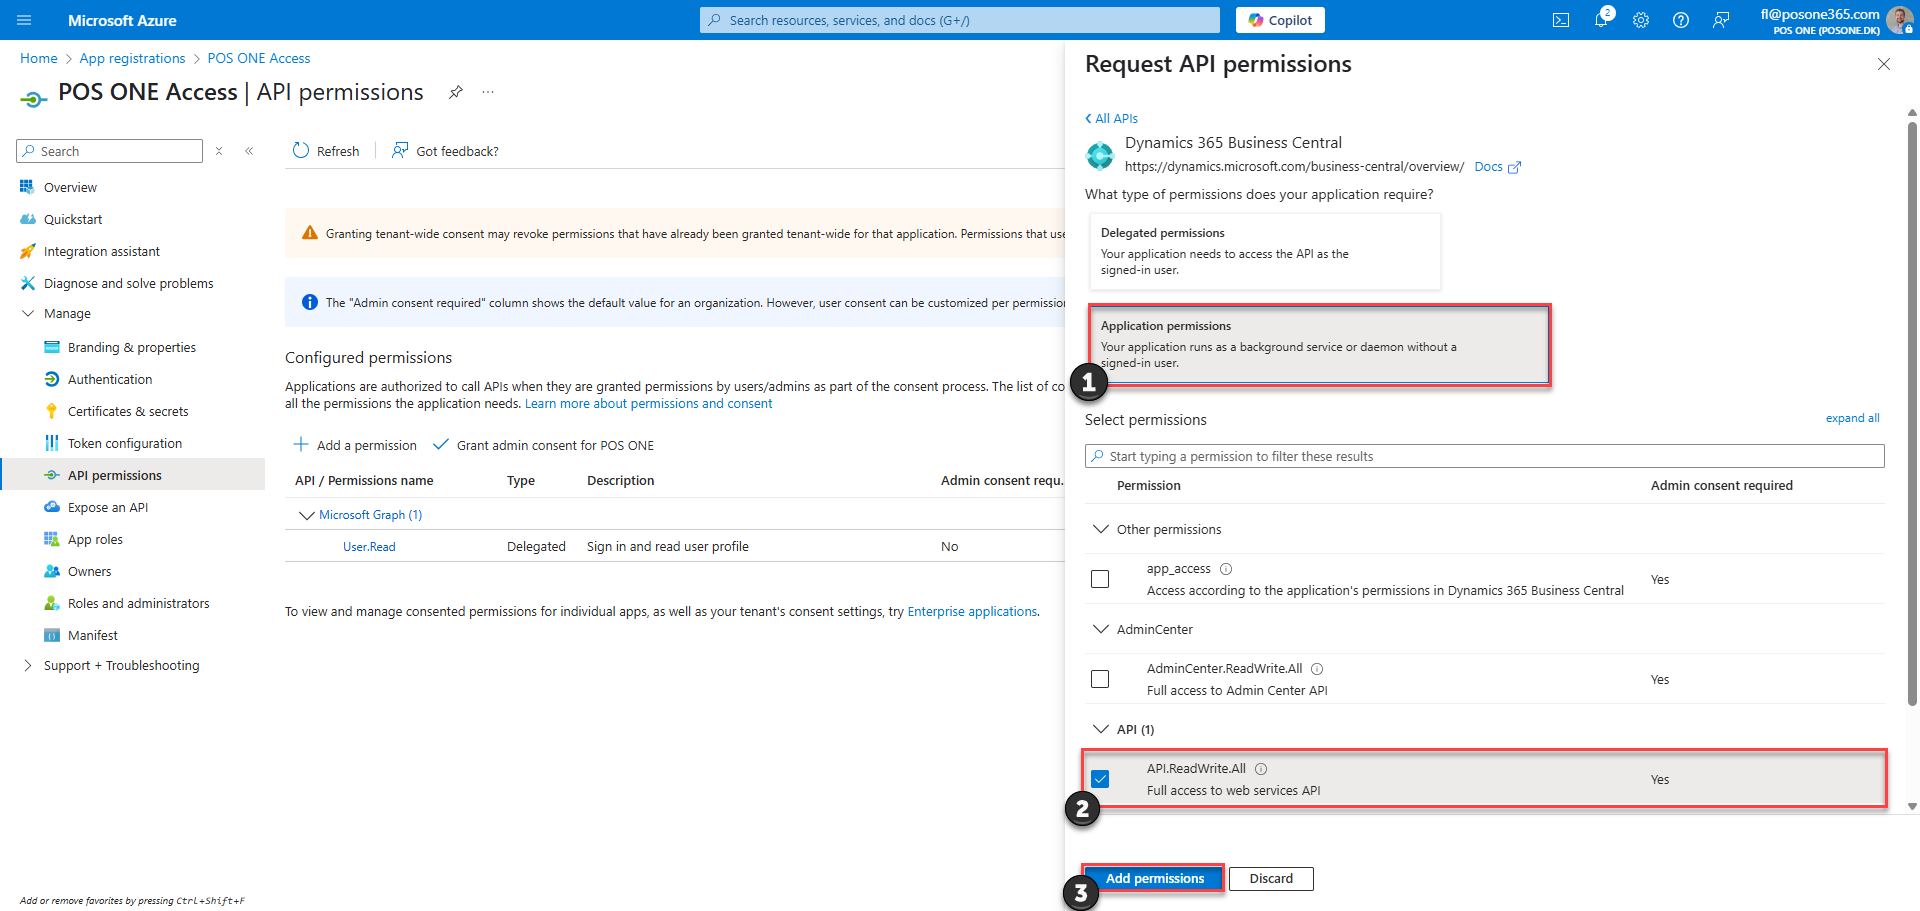
1) Click on 'Application permissions'
2) Select the 'API.ReadWrite.All' checkbox
3) Click 'Add permission'
Step 11:
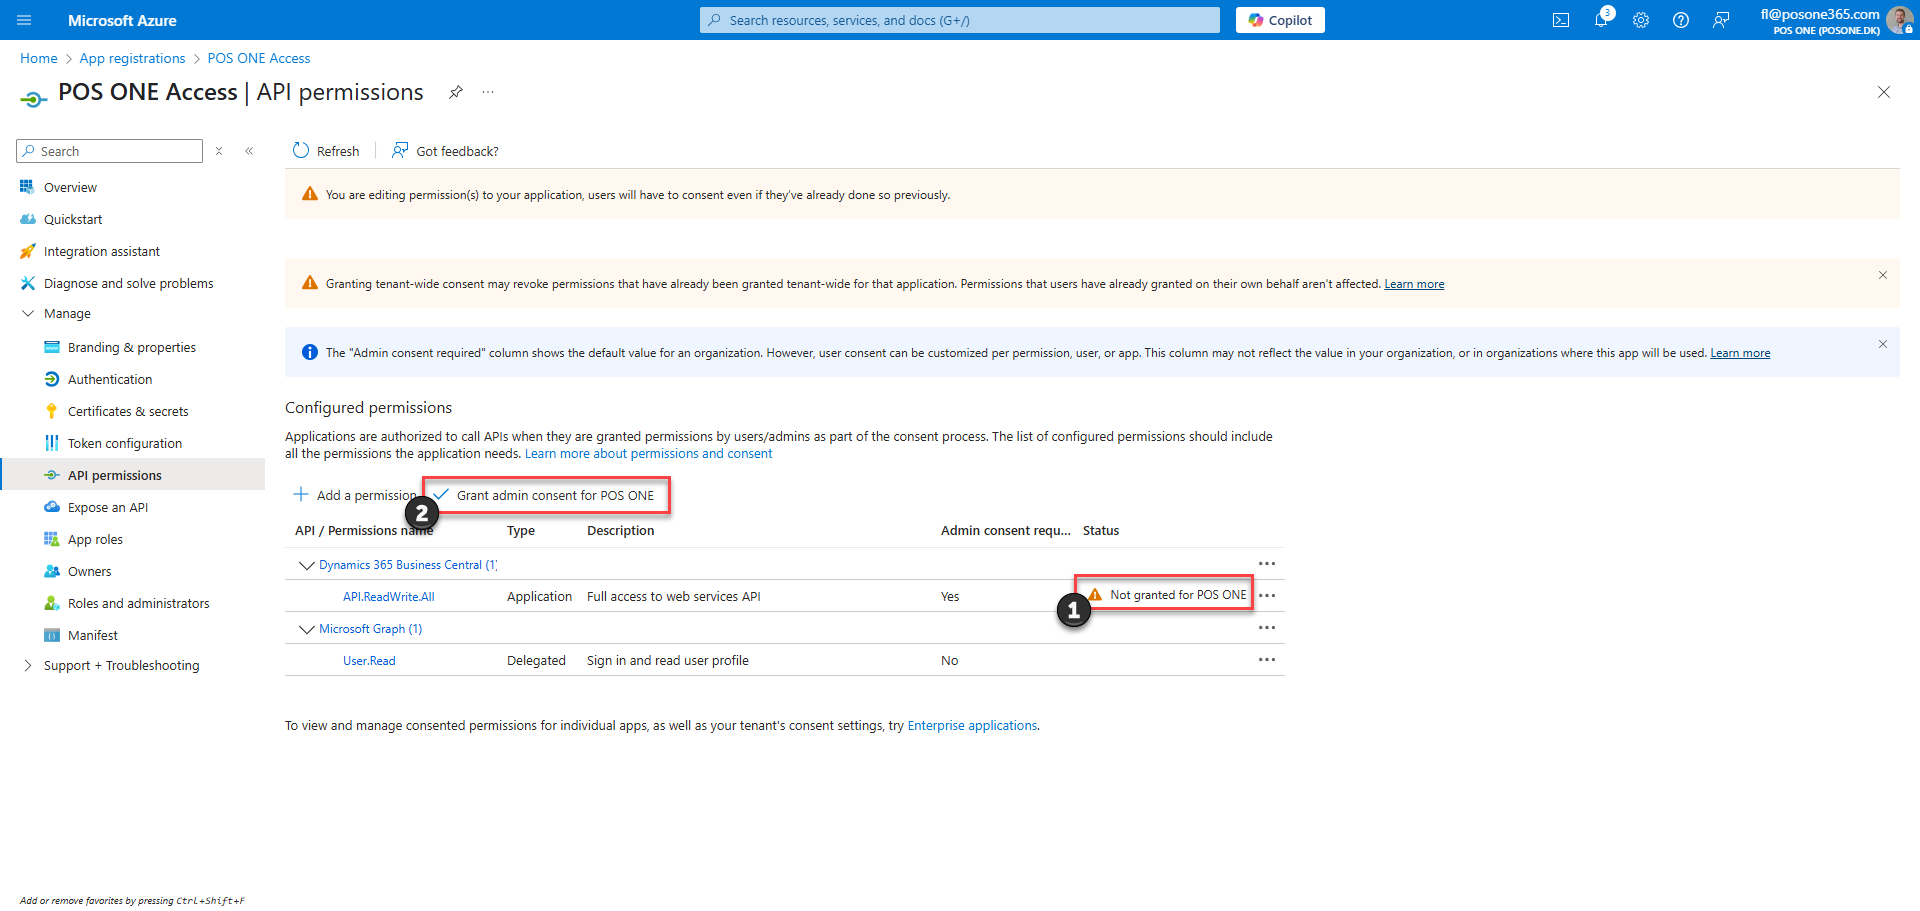
1) The permission has been added but needs permission from an Admin to be enabled
2) Click on 'Grant admin consent for POS ONE'
Note: If the button is grey and you can't click it, contact an Admin and ask them to perform this step
Step 12:
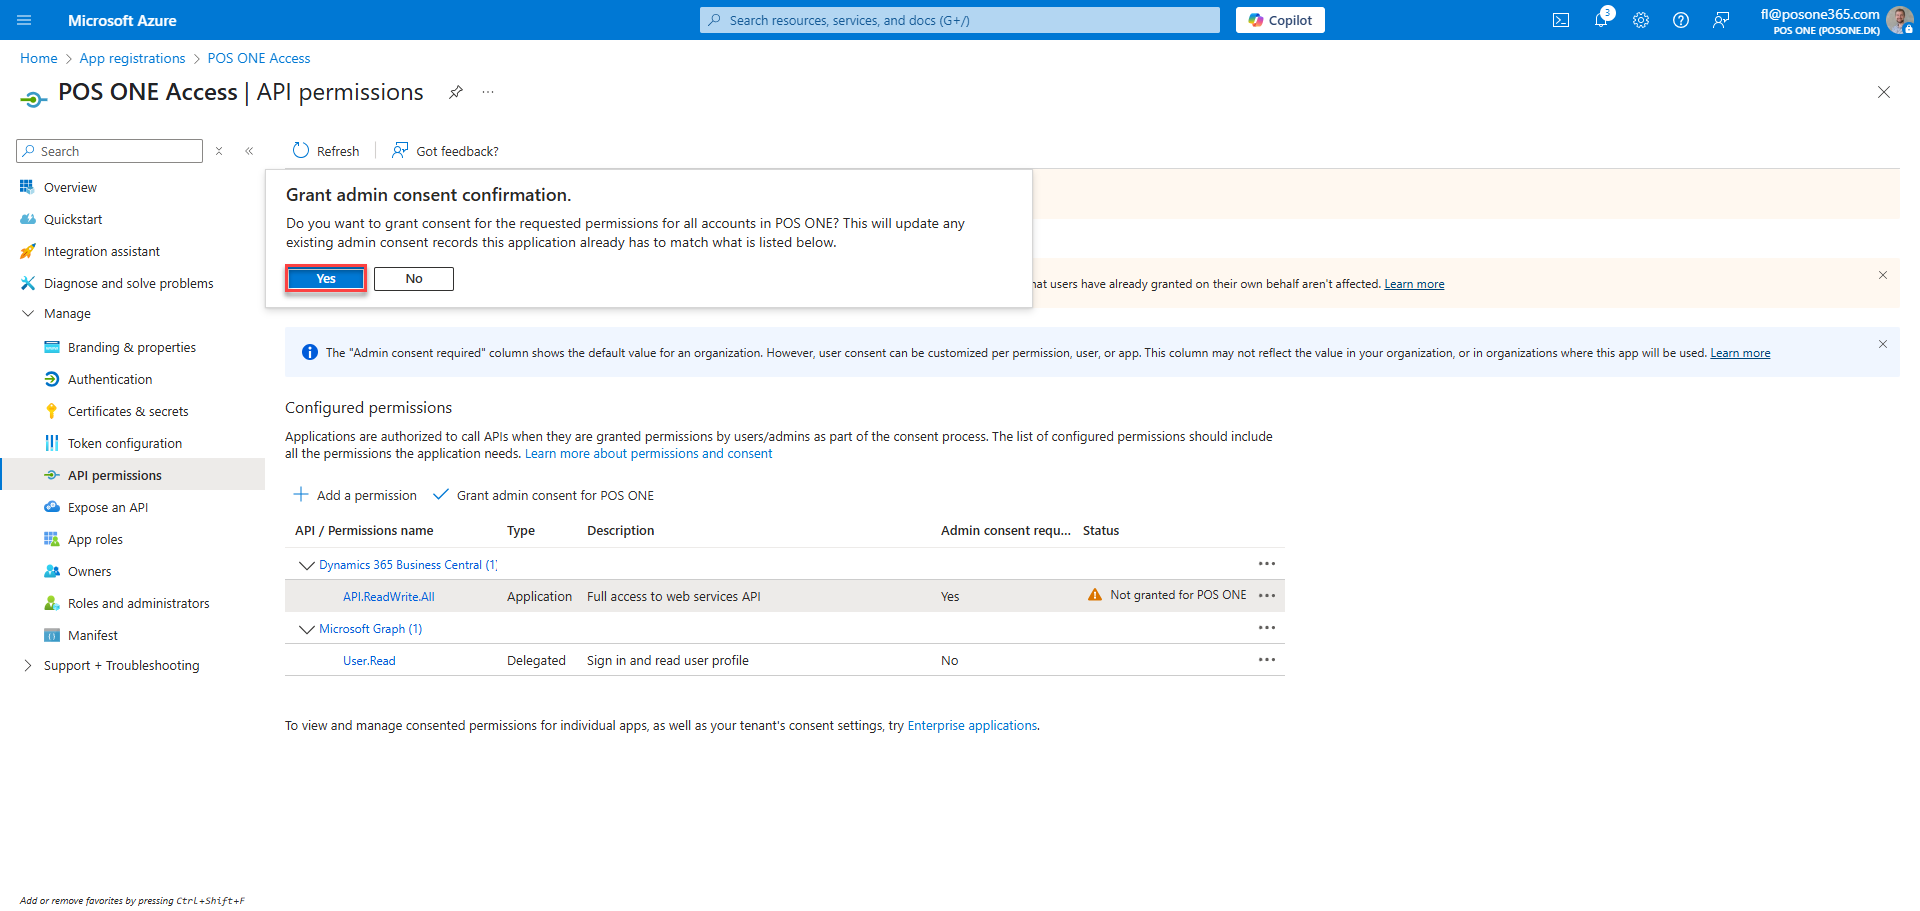
Click 'Yes'
Step 13: Business Central credentials
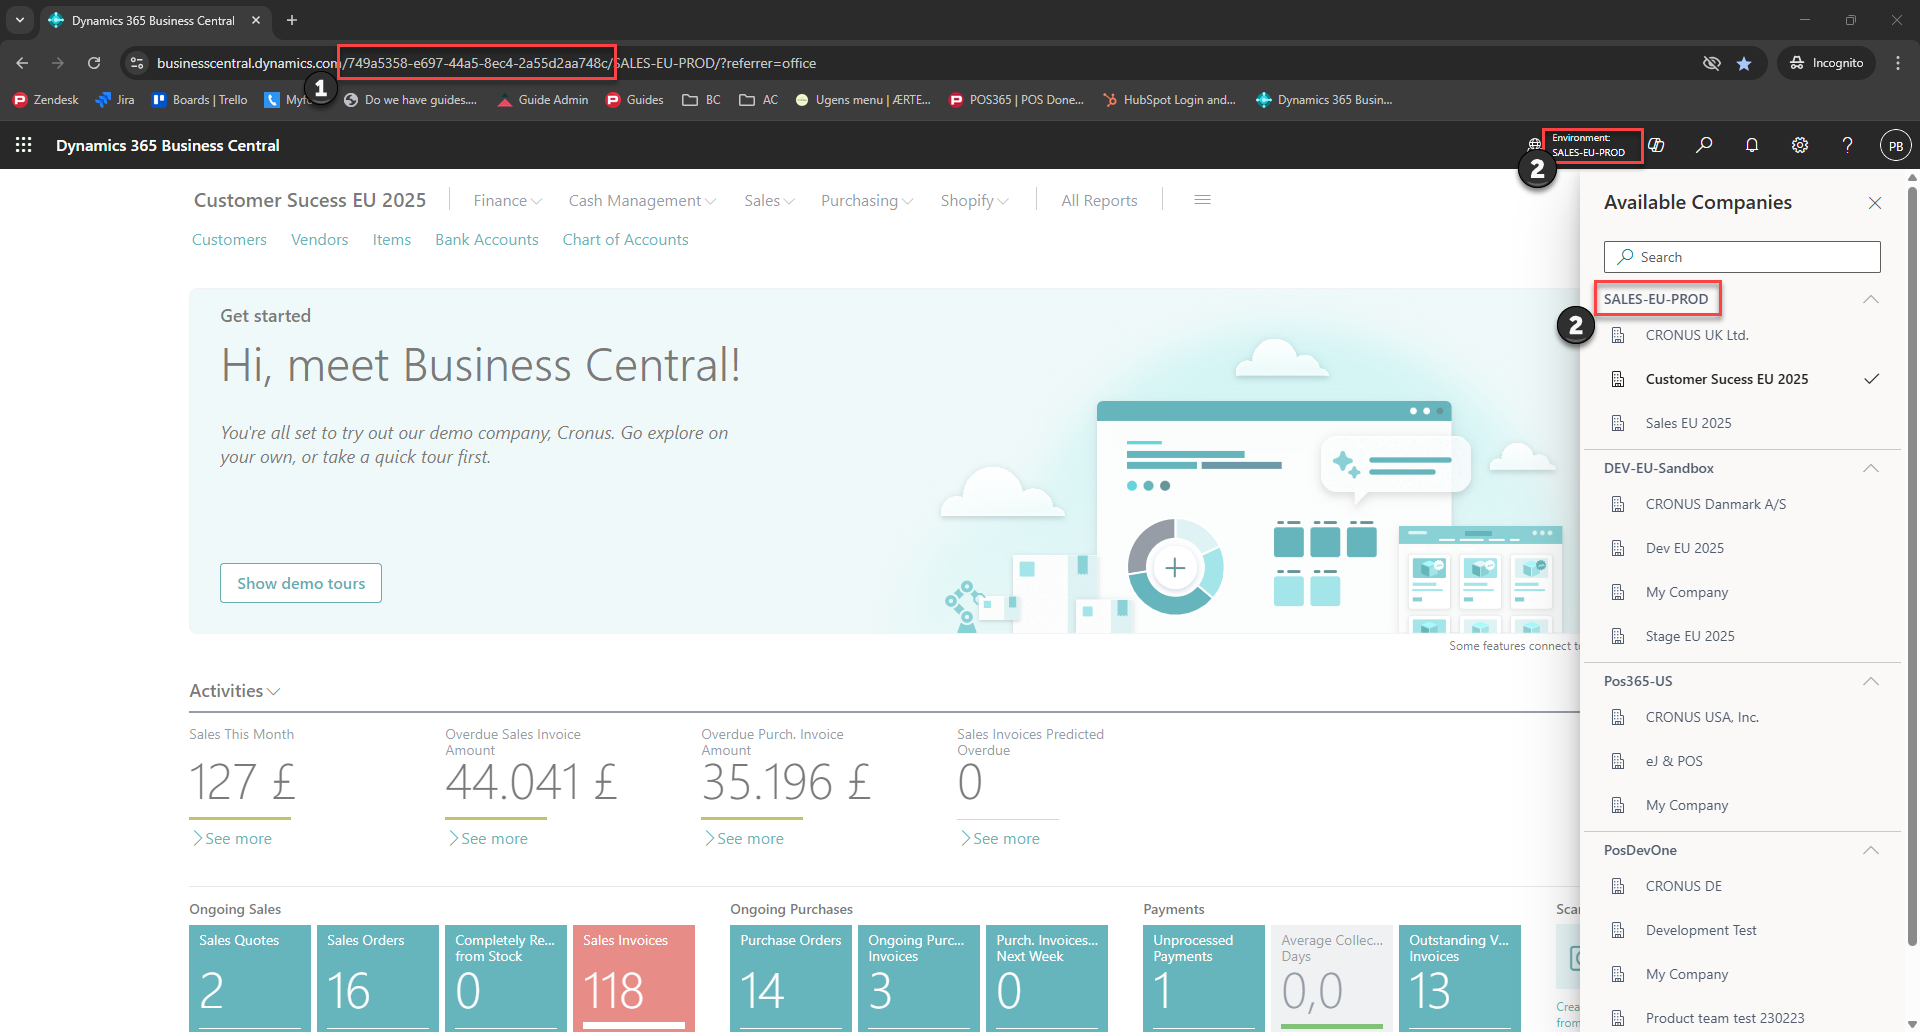
1) The "BC Tenant ID" is displayed in between the two // in the URL.
2) The "BC Environment Name" is displayed in the top, right corner, and can easily be copied by clicking at the environment to open the 'Companies' view
Step 14:
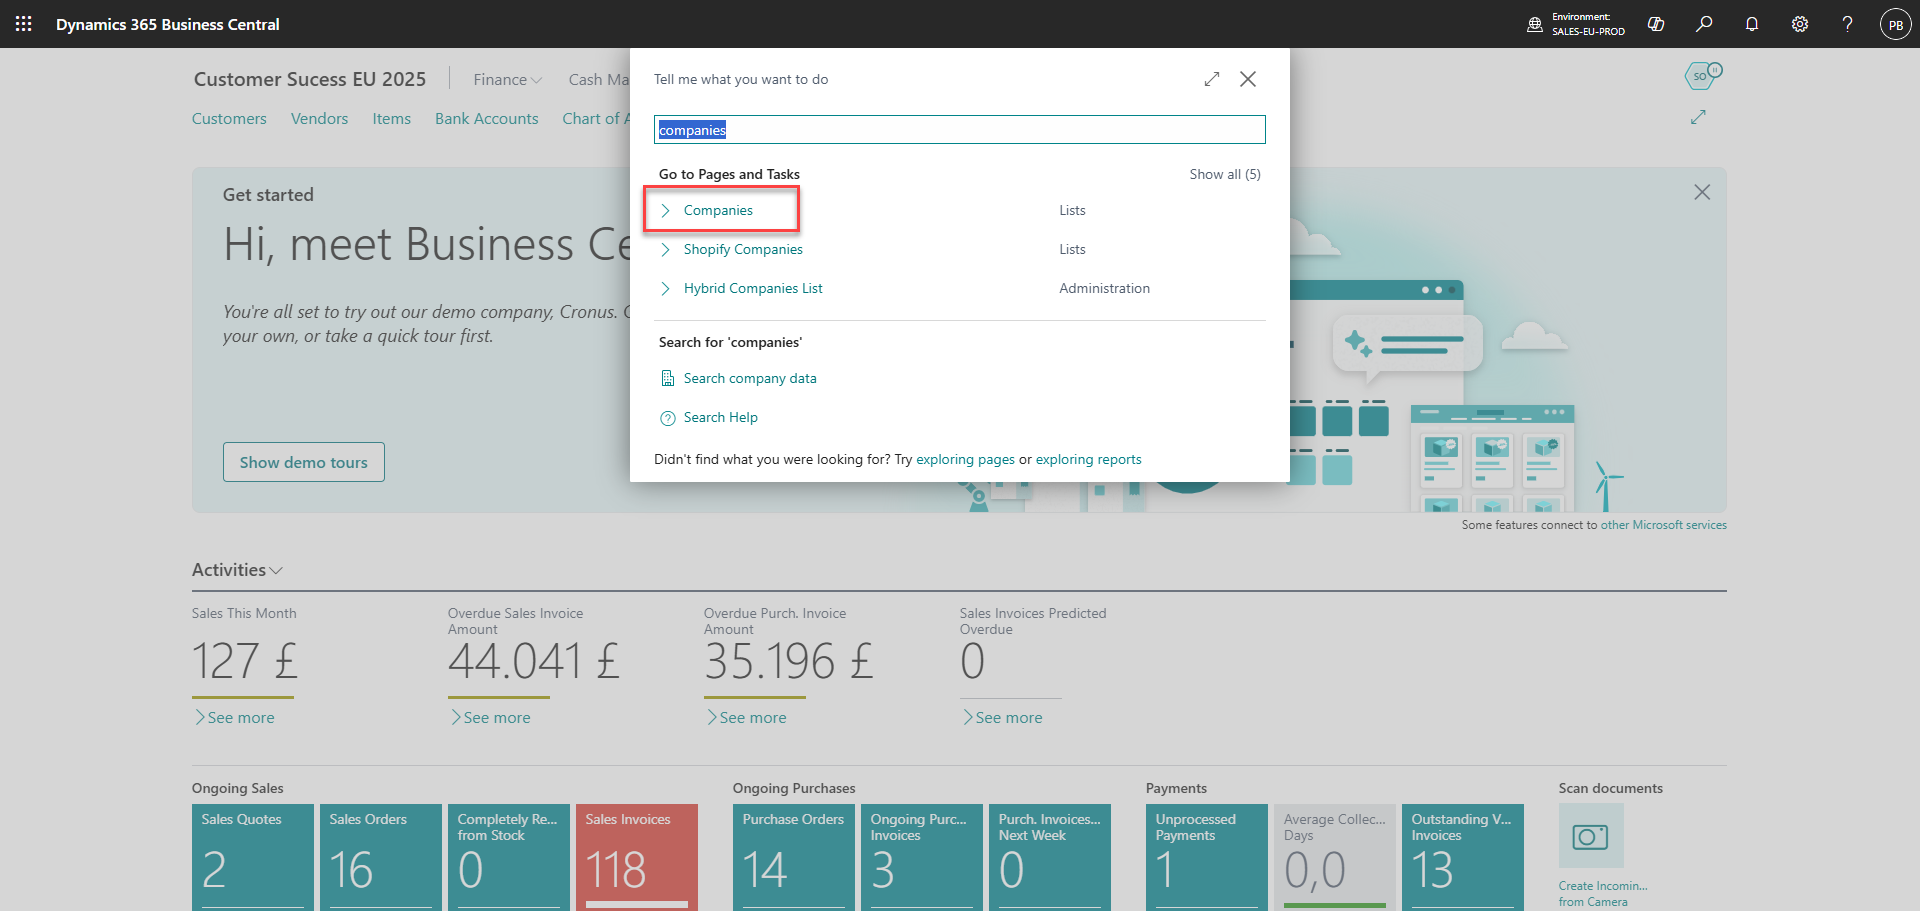
Search for 'Companies' and open the list
Step 15:
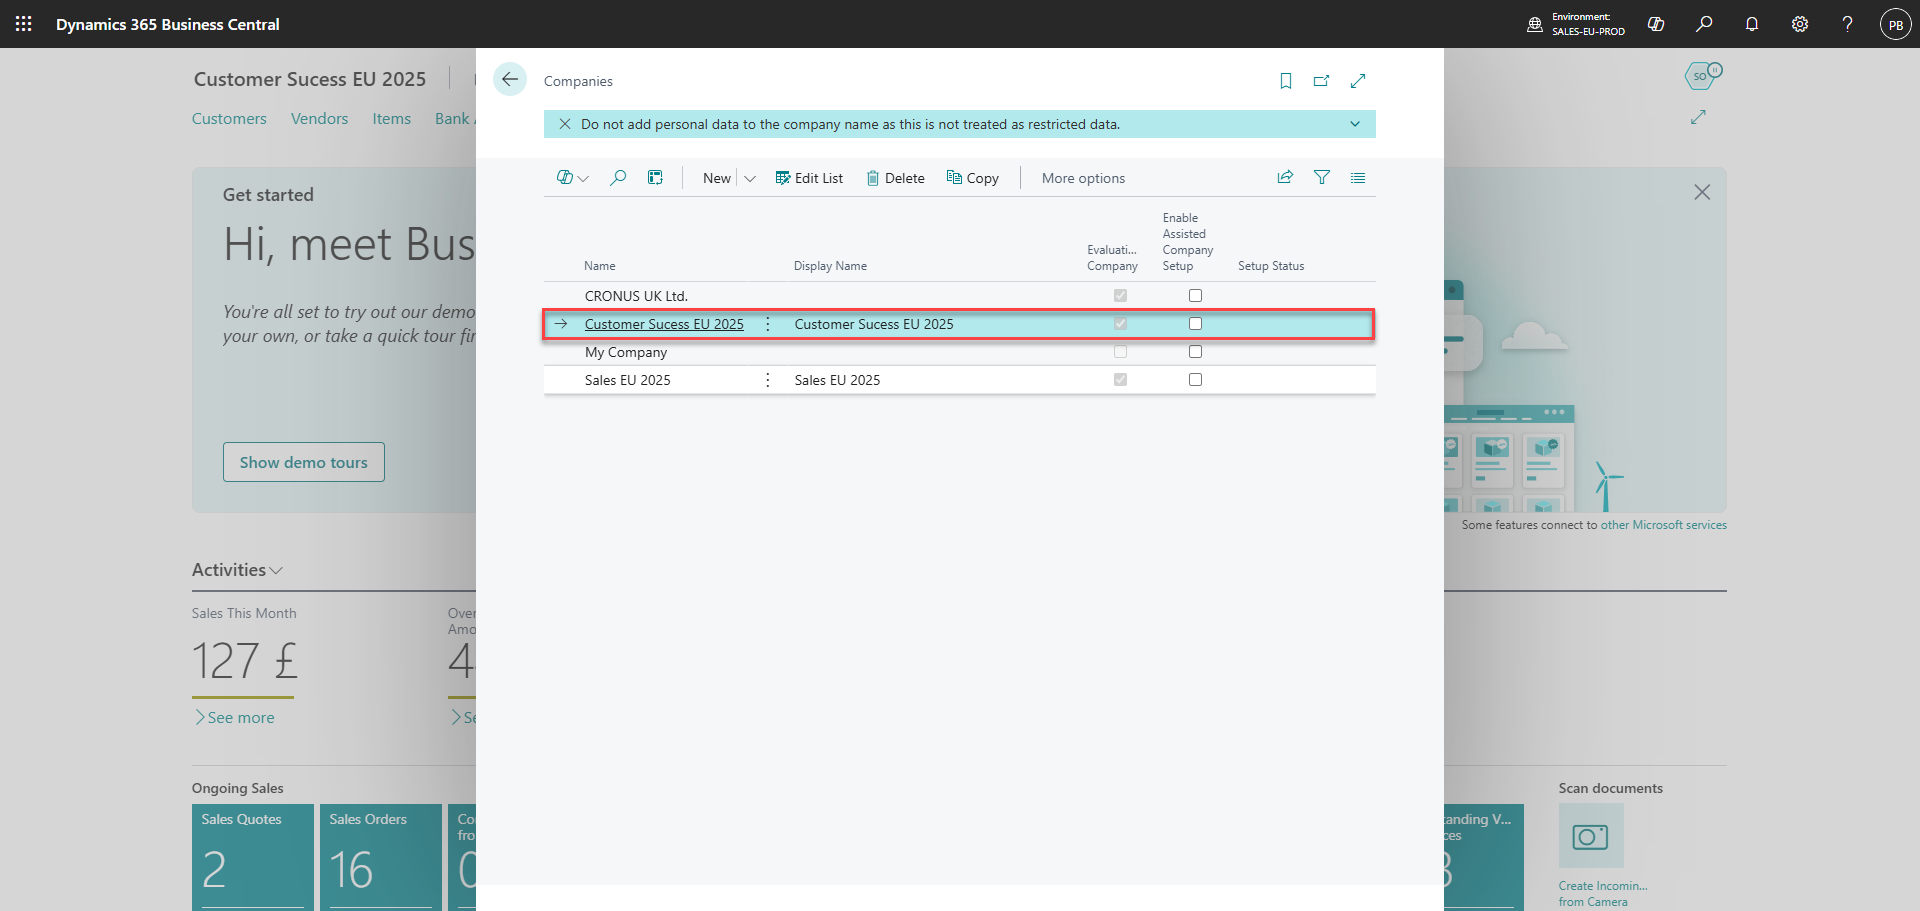
Click on the company that you want to set up an integration with. Once it is marked with blue, the company has been selected
Step 16:
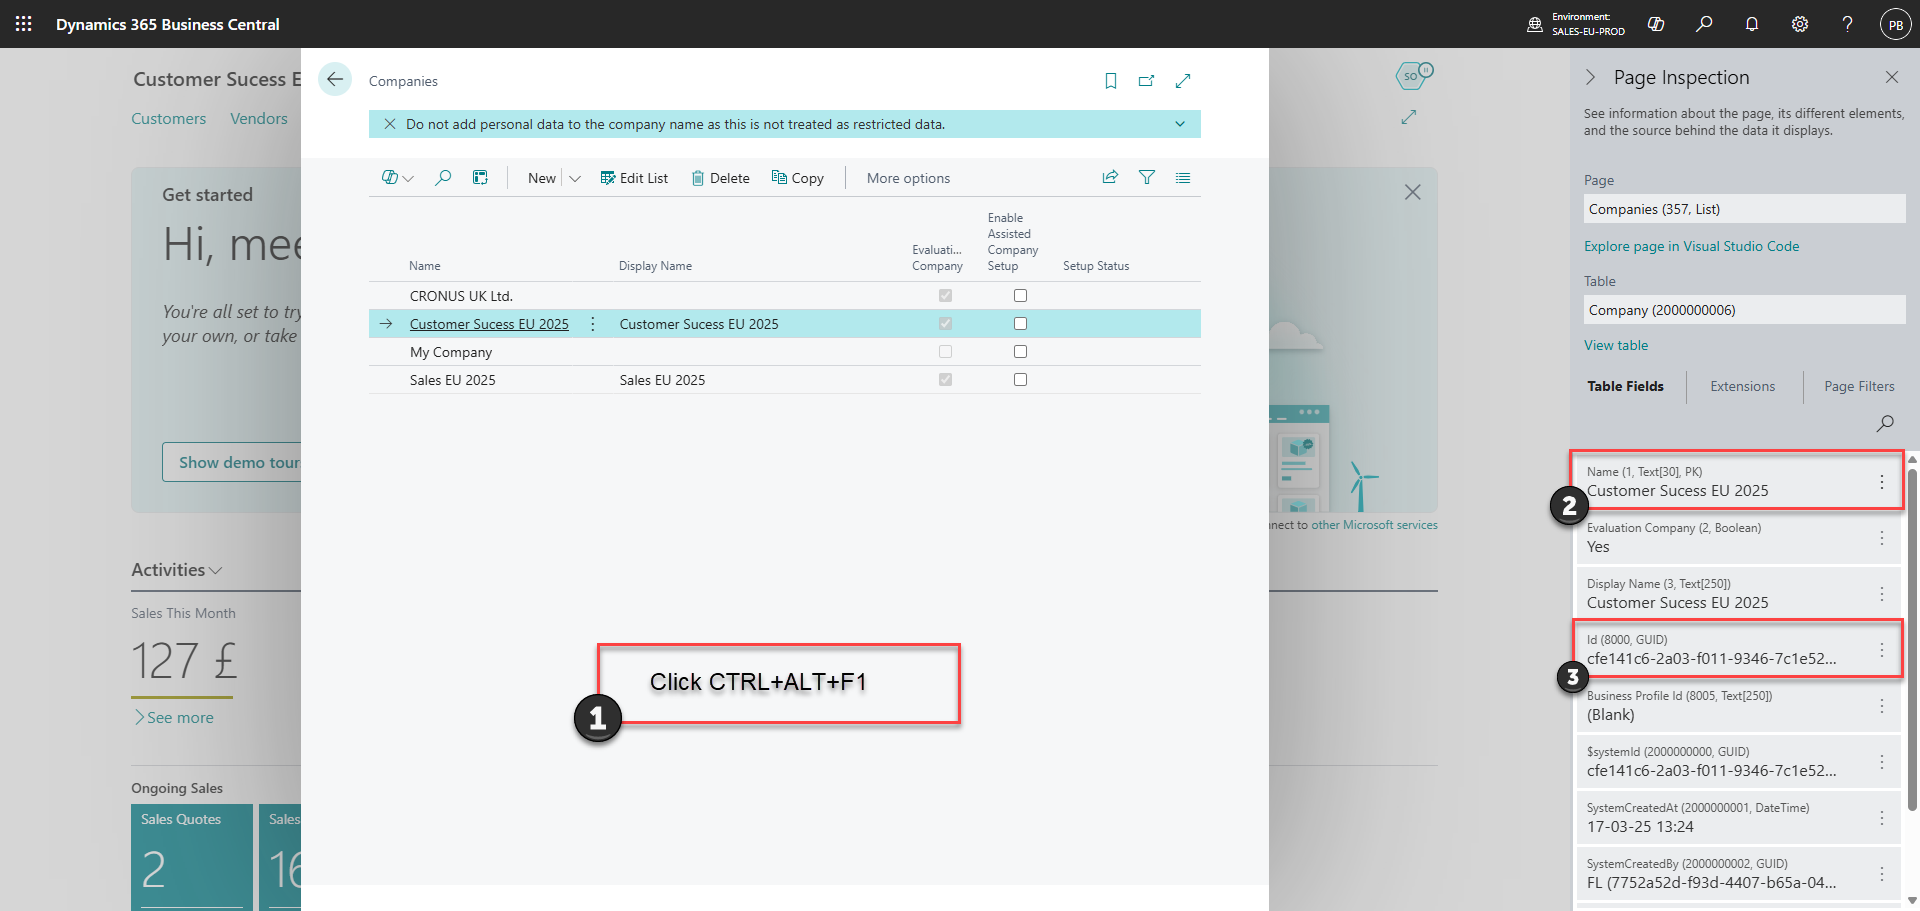
1) Click CTRL+ALT+F1 on the keyboard to open the 'Page Inspection' at the right side of the screen
2) The "BC Cloud Company Name" is displayed under 'Name' in the Page Inspection view
3) The "BC Cloud Company ID" is displayed under the 'Id' in the Page Inspection view
For the next step, press "here"
Note: To copy the ID, triple click with the mouse on the ID to select all of it. Ensure that all of the ID is copied before sending it to POS-ONE.