This guide walks you through how to build and connect layouts in the Admin Center so your POS becomes faster, clearer, and tailored to how you actually sell. The goal is to help you create an intuitive flow where staff can quickly find items and navigate between screens.
Step 1:
Create a new layout that will act as the foundation for how items are displayed in POS. You define the structure and start building buttons that represent your products.
For more information, see here:
Create and configure a layout
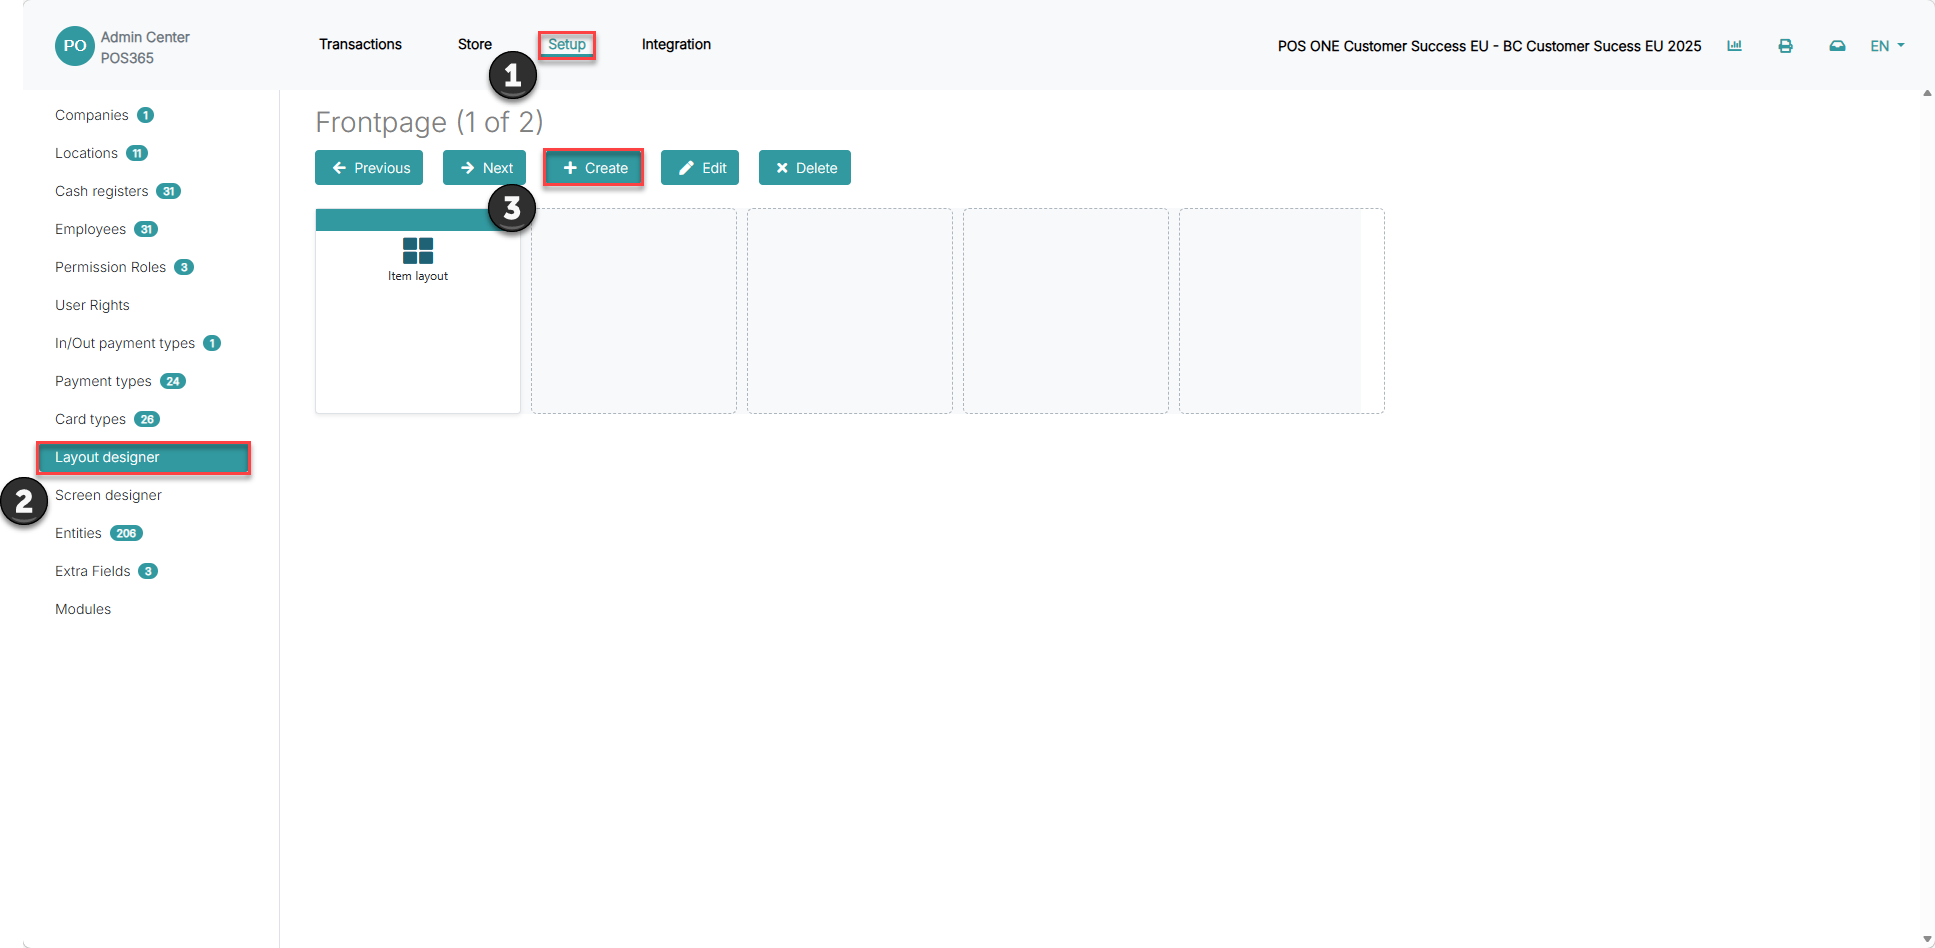
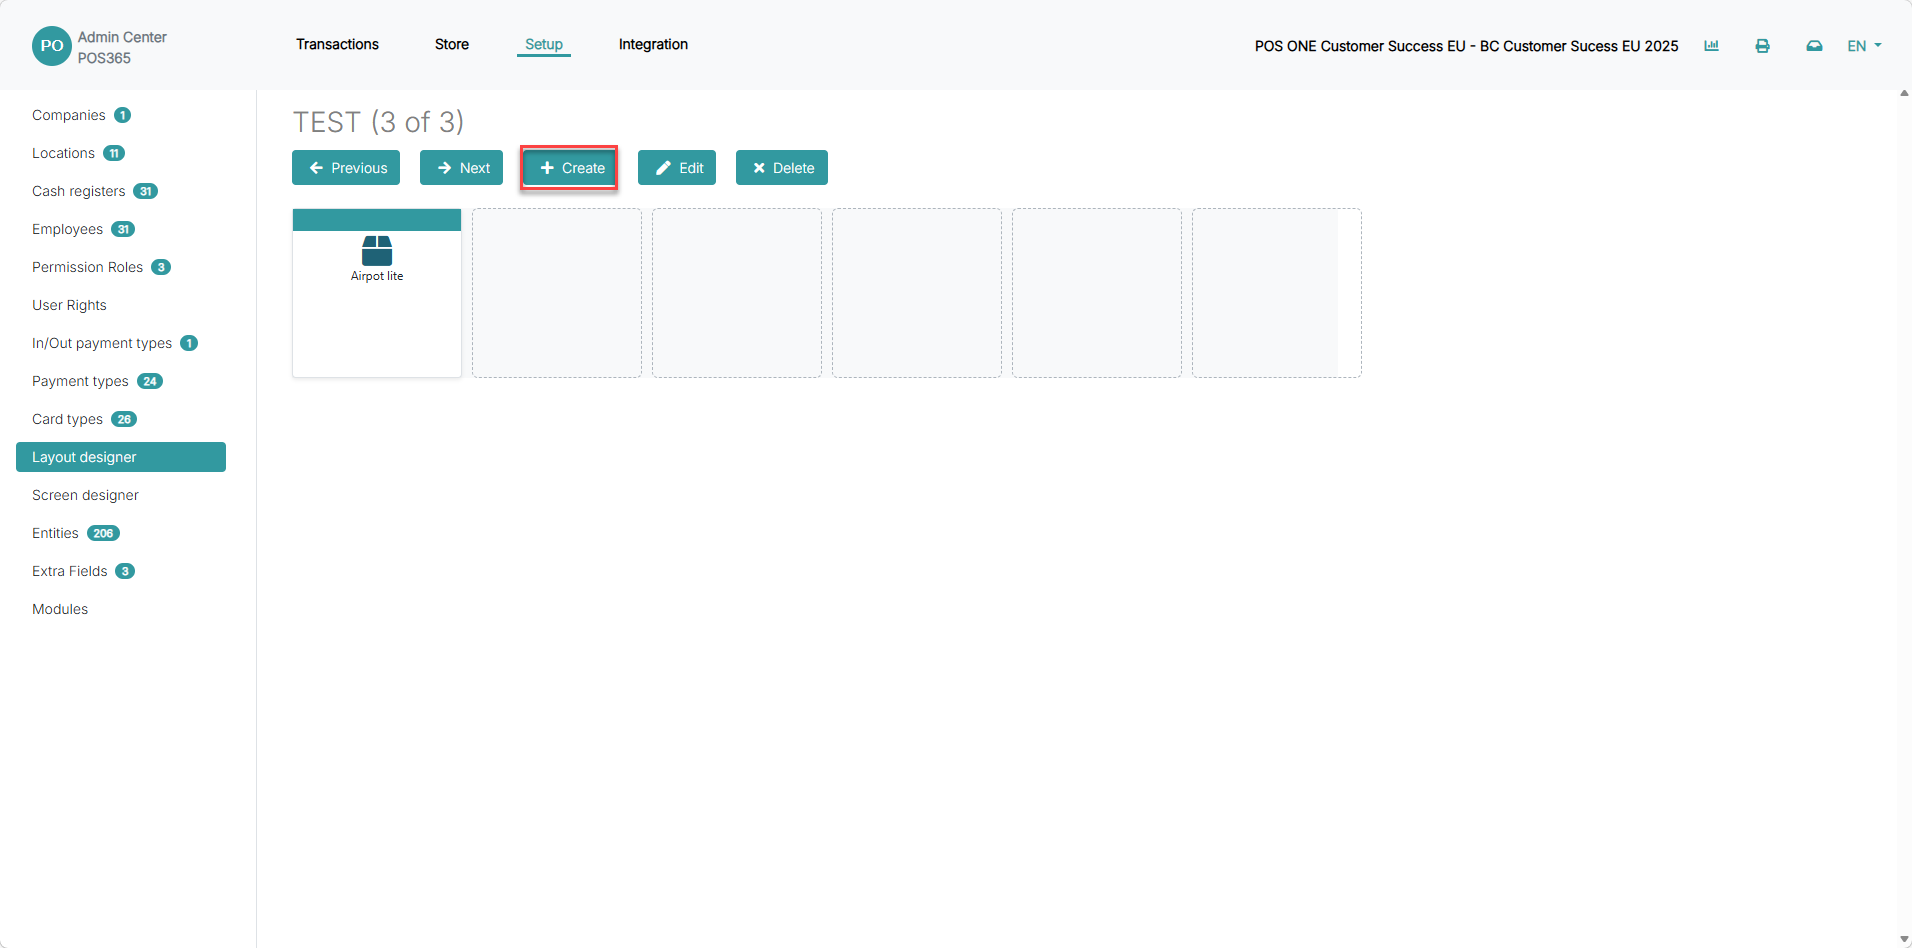
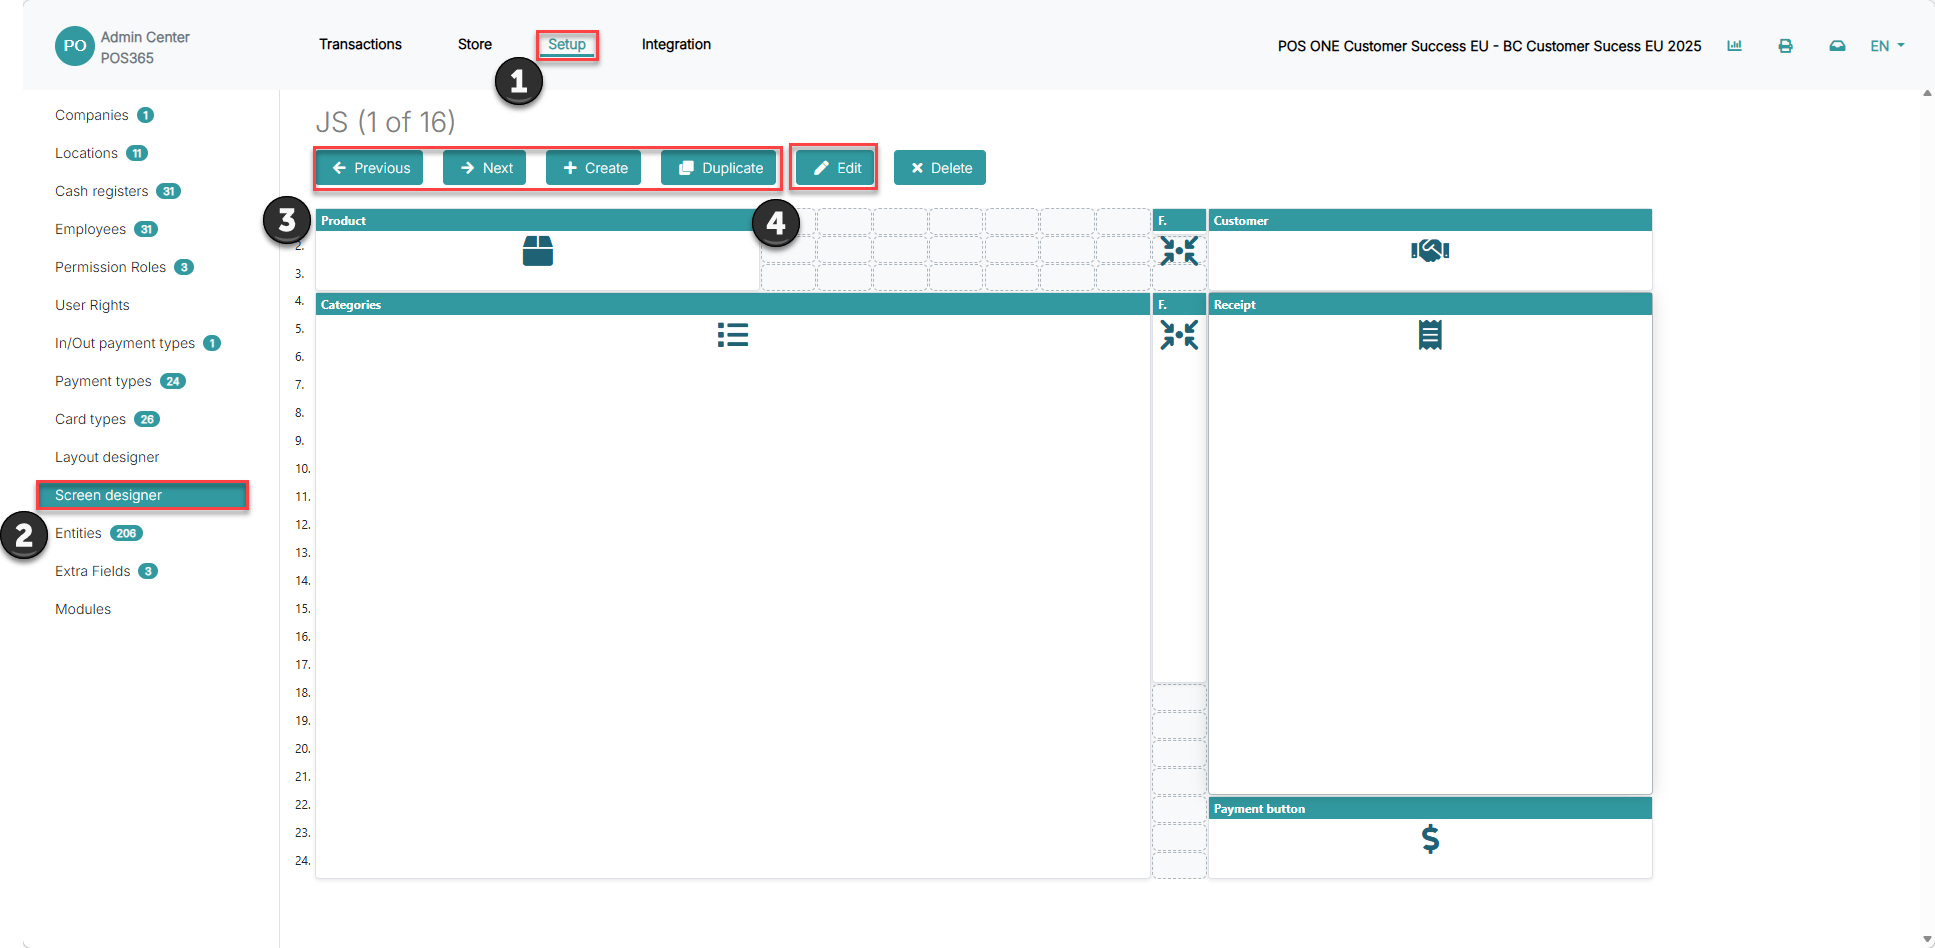
1) Go to 'Setup'
2) Open 'Layout designer'
3) Click 'Create'
Step 2:
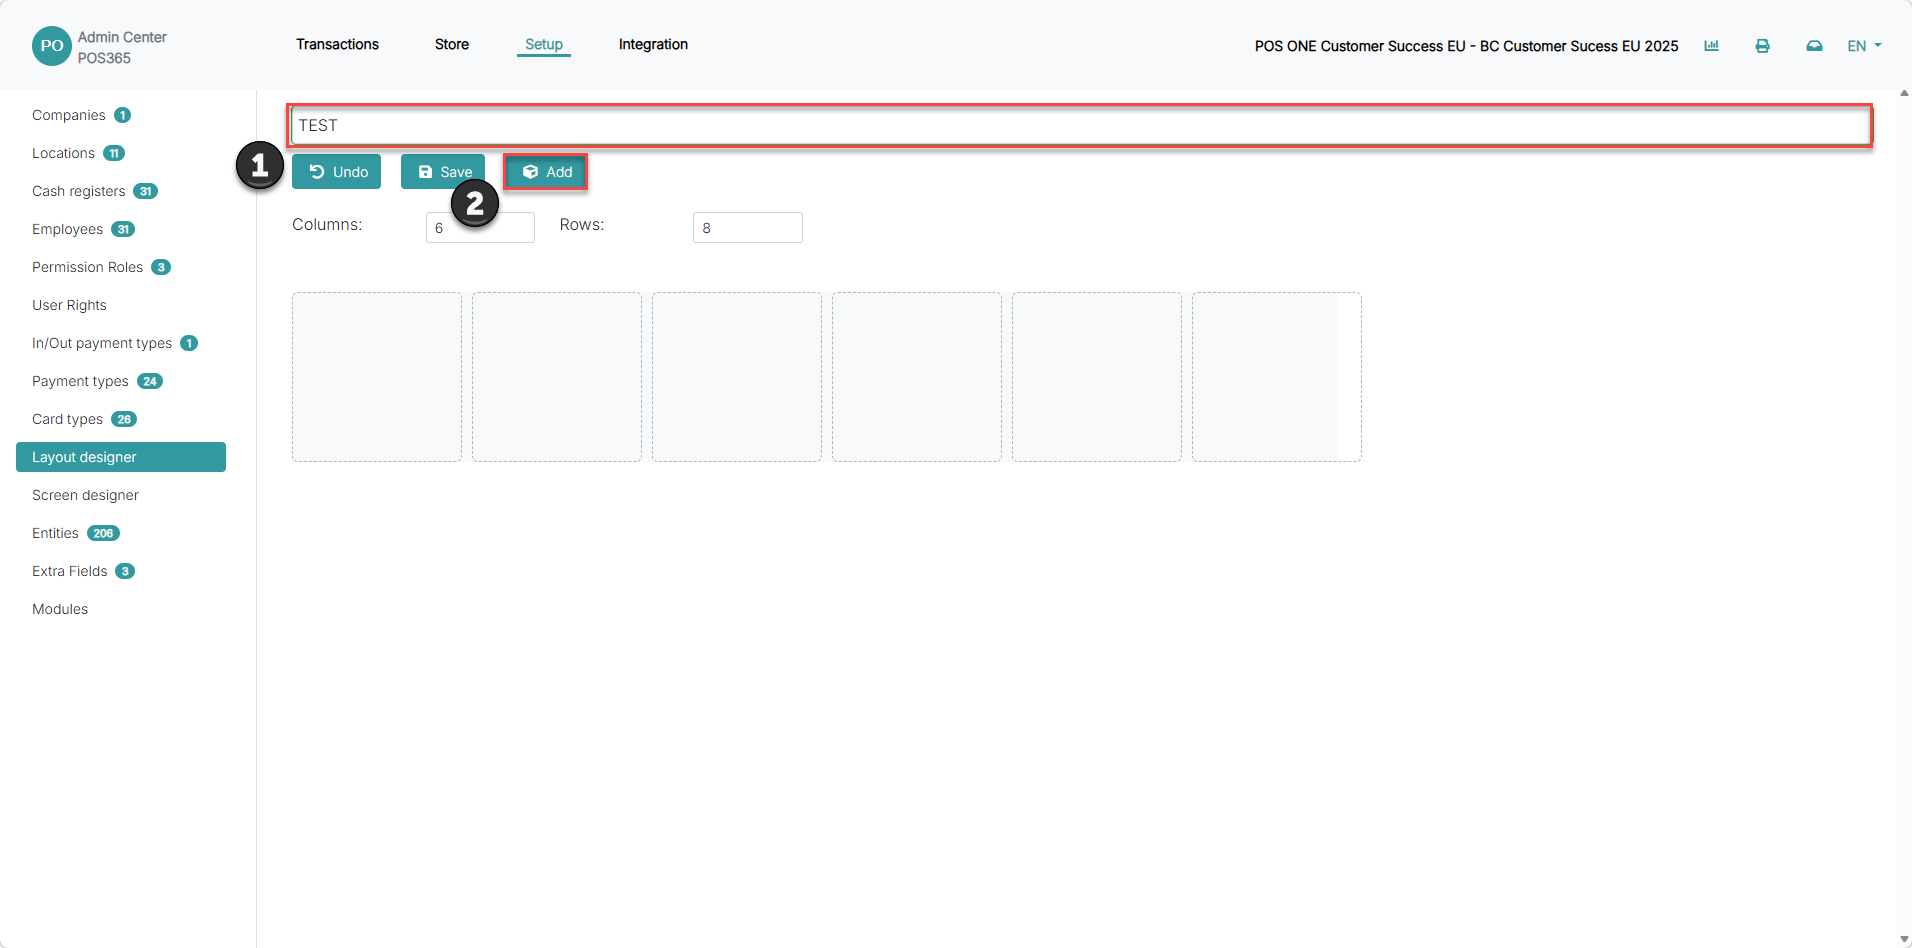
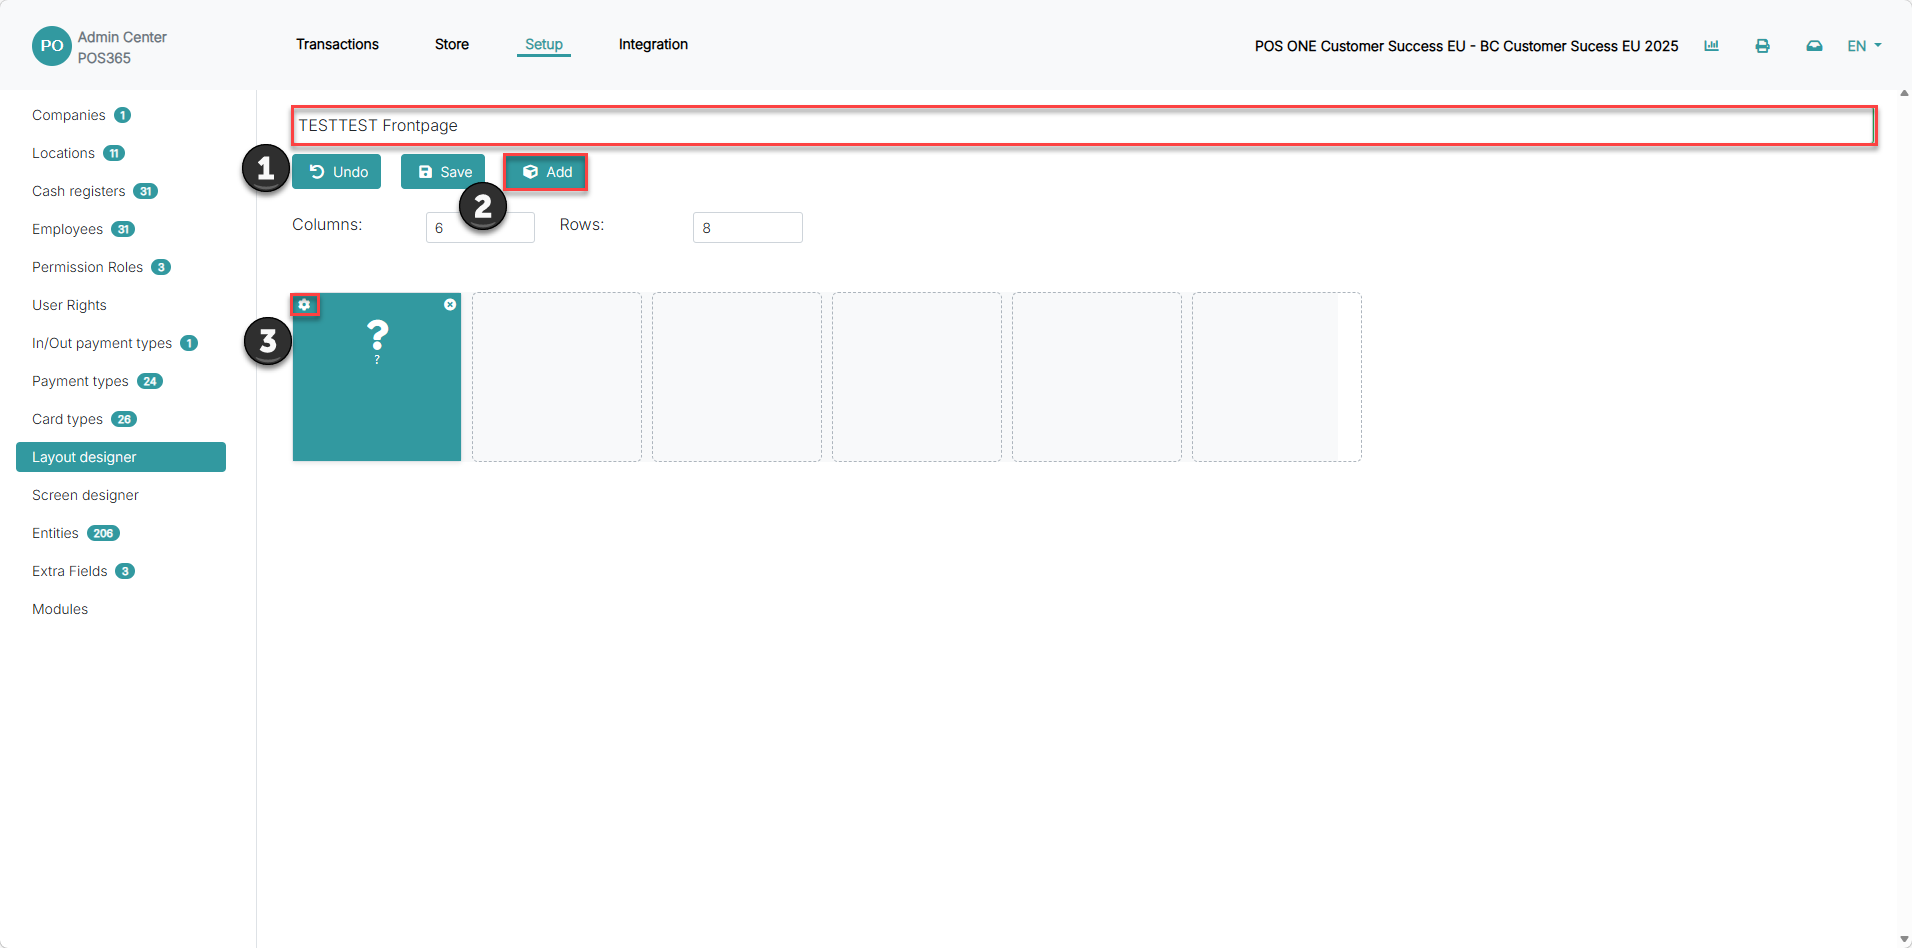
1) Enter a recognizable name
2) Click 'Add' to start building buttons
Step 3:
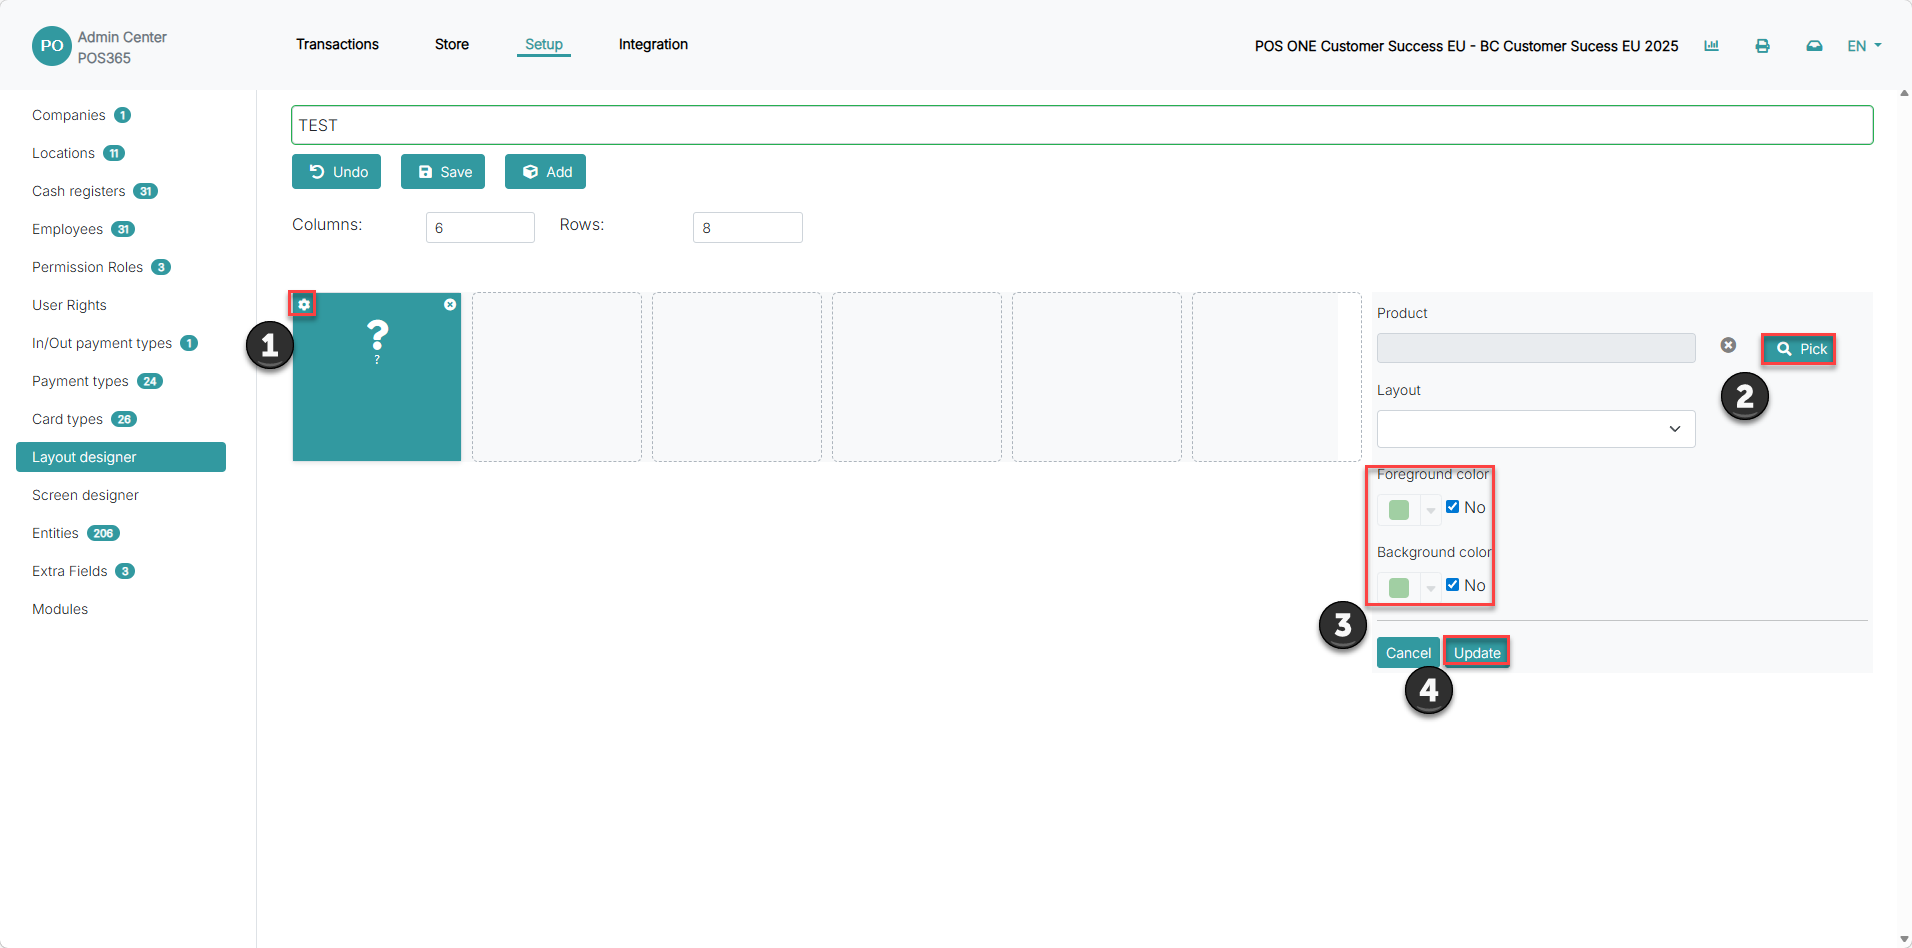
1) Click the settings icon on a button
2) Click 'Pick' to assign an item
3) Choose a color for better visual overview
4) Click 'Update'
Step 4:
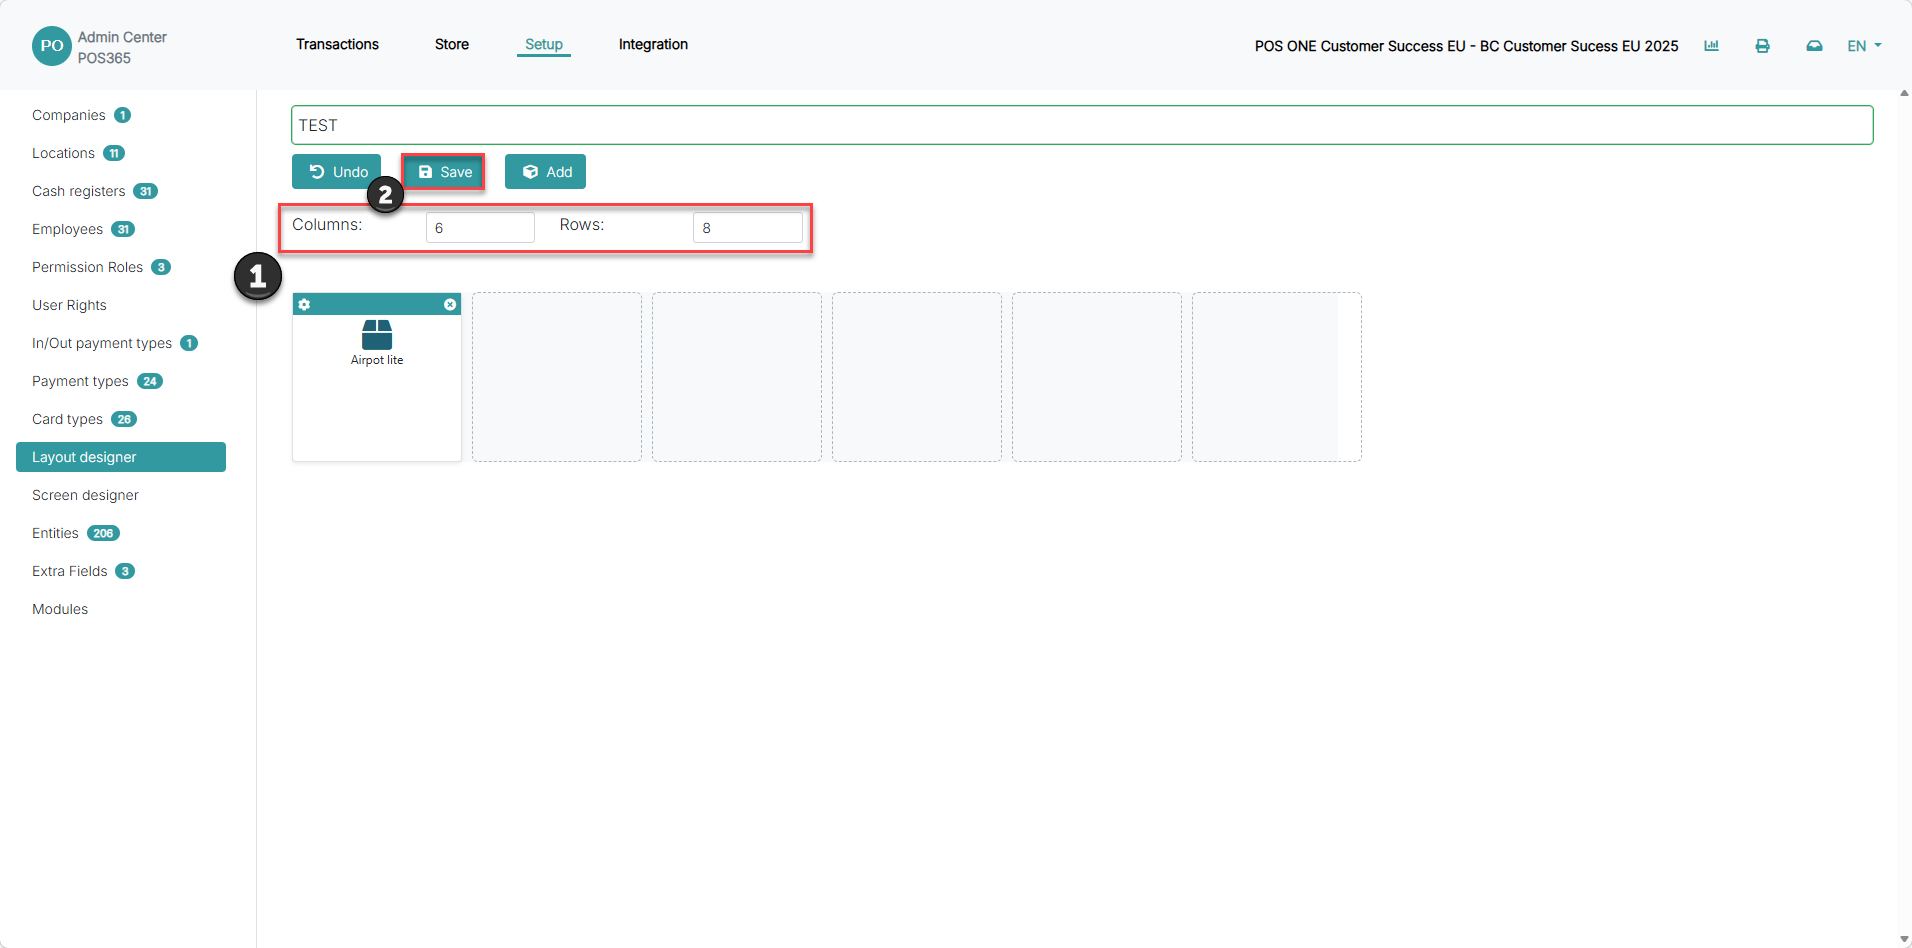
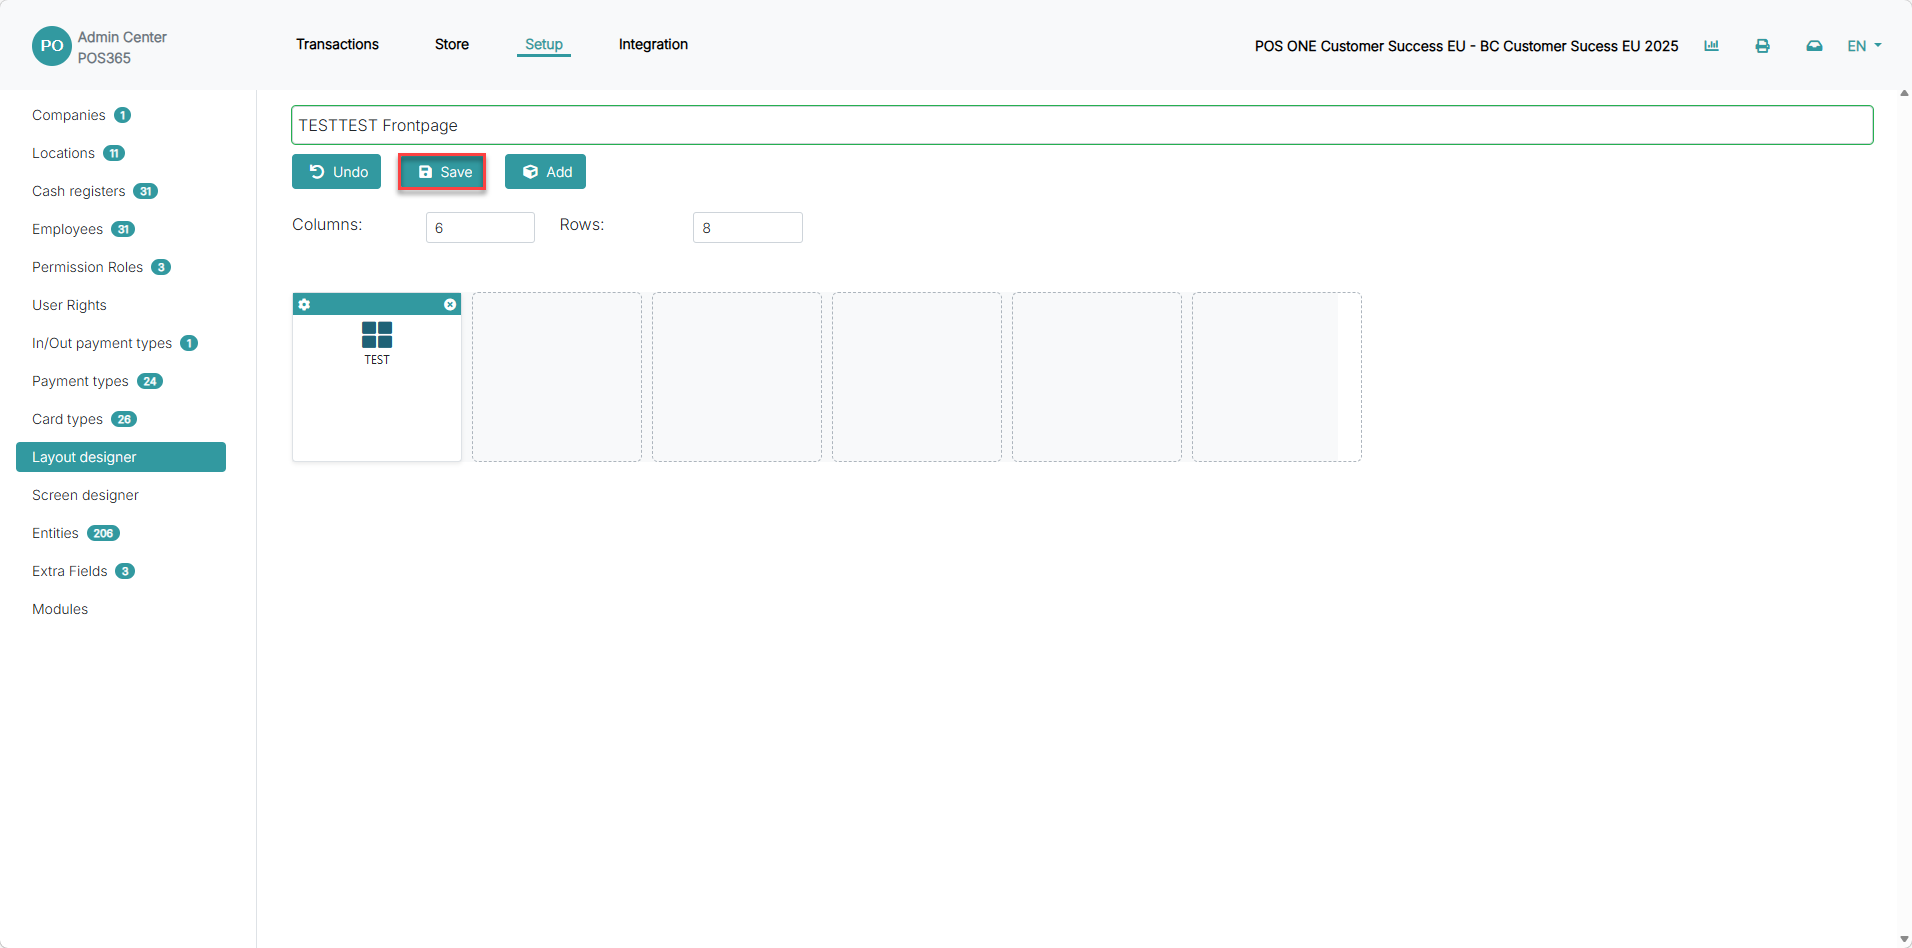
1) Adjust rows and columns to control button size
2) Click 'Save'
Step 5:
1) Click 'Create'
Step 6:
1) Name the layout
2) Click 'Add'
3) Open button settings
Step 7:
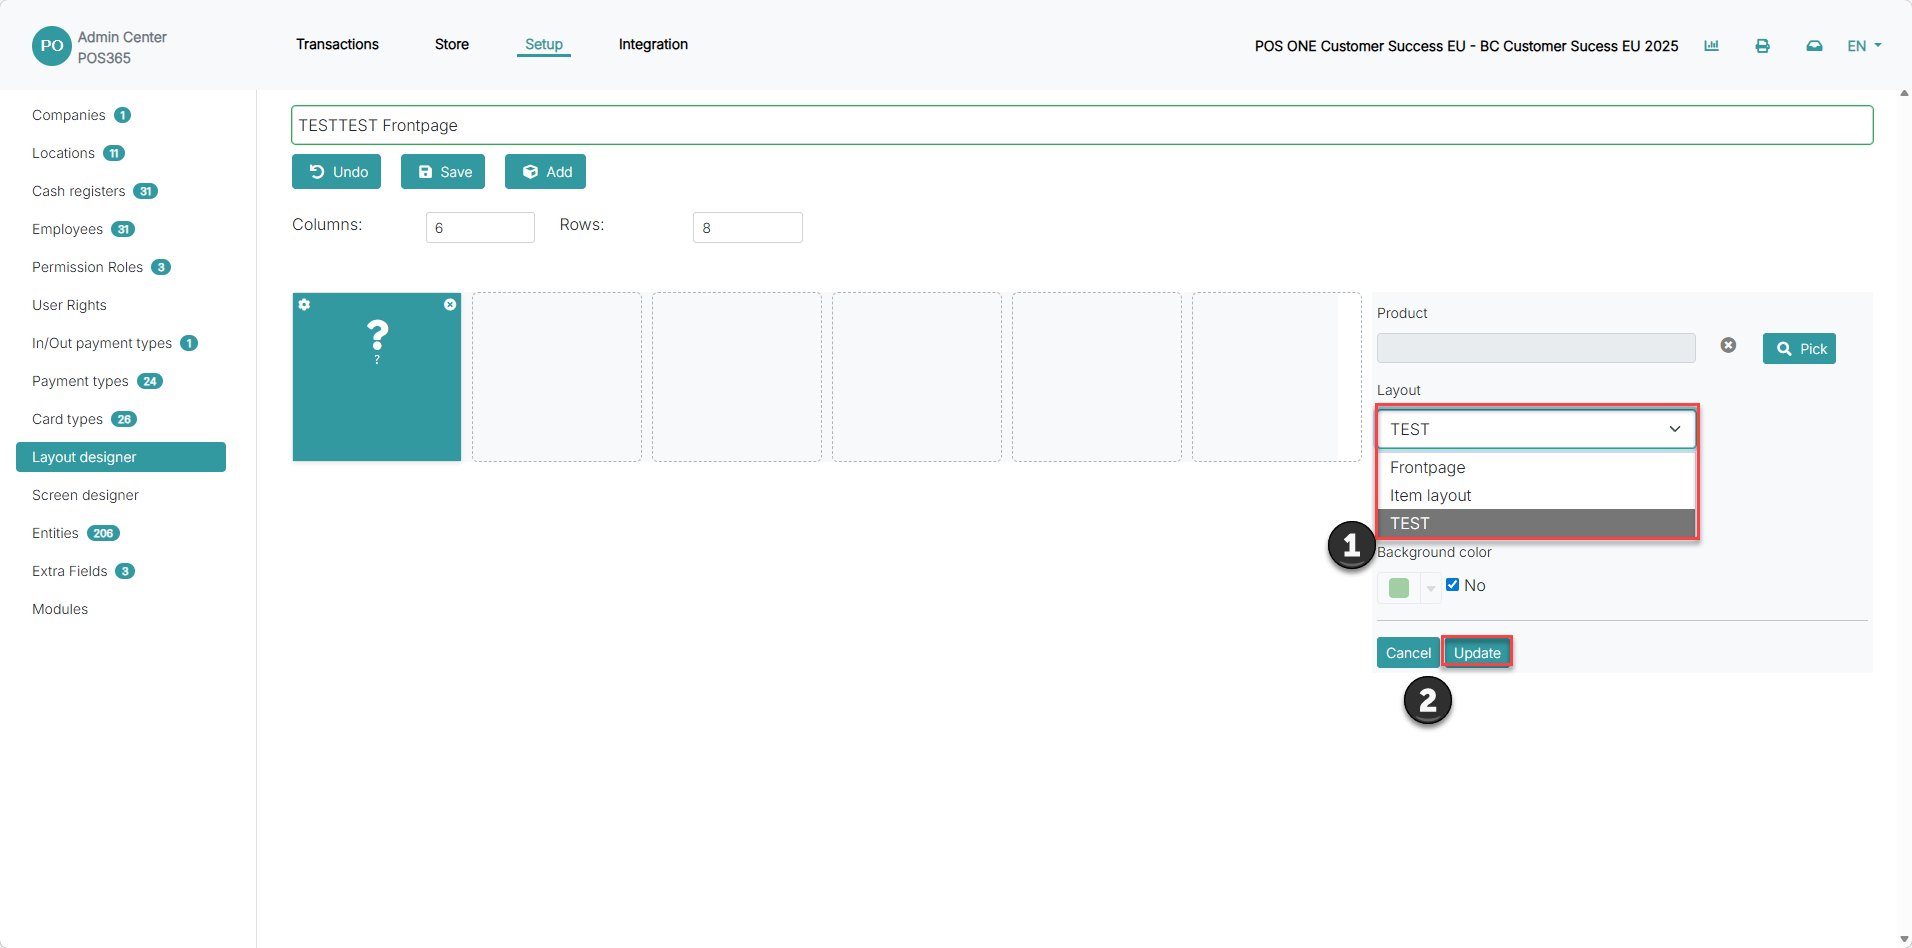
1) Use the 'Layout' dropdown to link to another layout
2) Click 'Update'
Step 8:
1) Click 'Save'
Note:
Think of layouts as layers. Your frontpage leads to sub-layouts, helping staff move quickly between categories without searching.
Step 2:
Connect your layout to a screen design so it becomes visible in POS. This ensures your buttons appear exactly where staff expect them on the sales screen.
For more information, see here:
Connect layout to screen design
Step 1:
1) Go to 'Setup'
2) Open 'Screen designer'
3) Create or duplicate a screen
4) Click 'Edit'
Step 2:
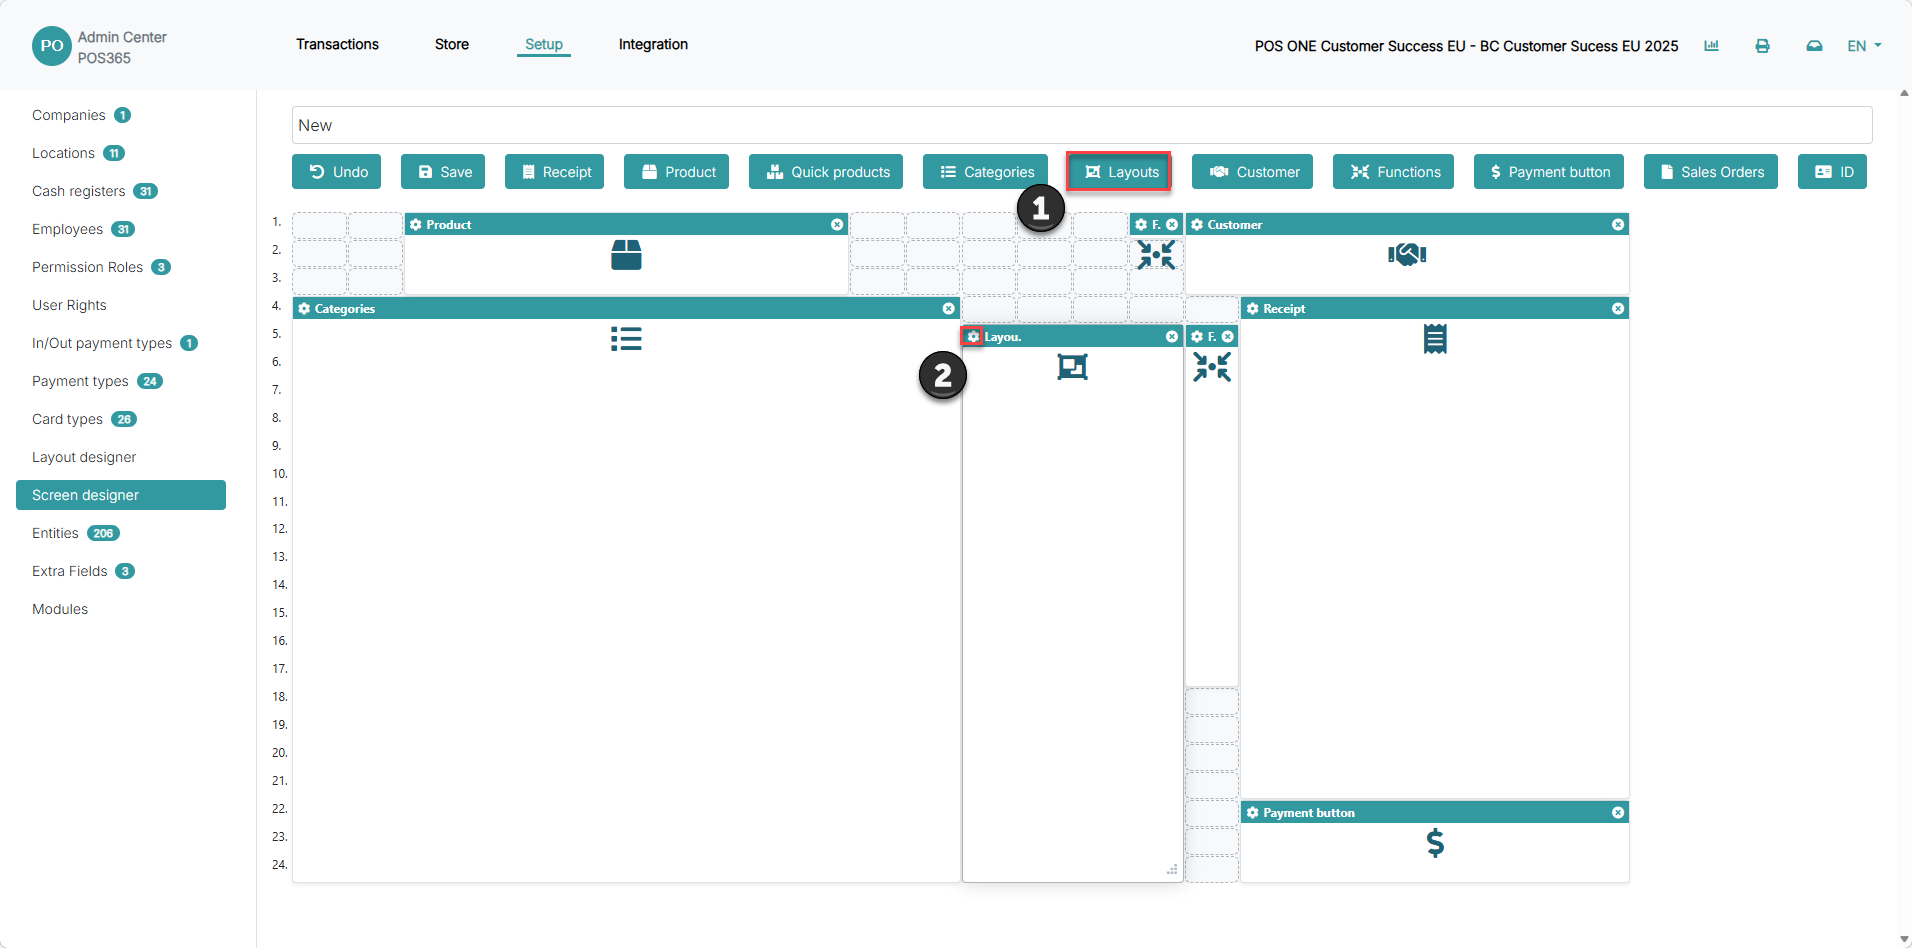
1) Add a layout box if not already present
2) Open the settings icon
Step 3:
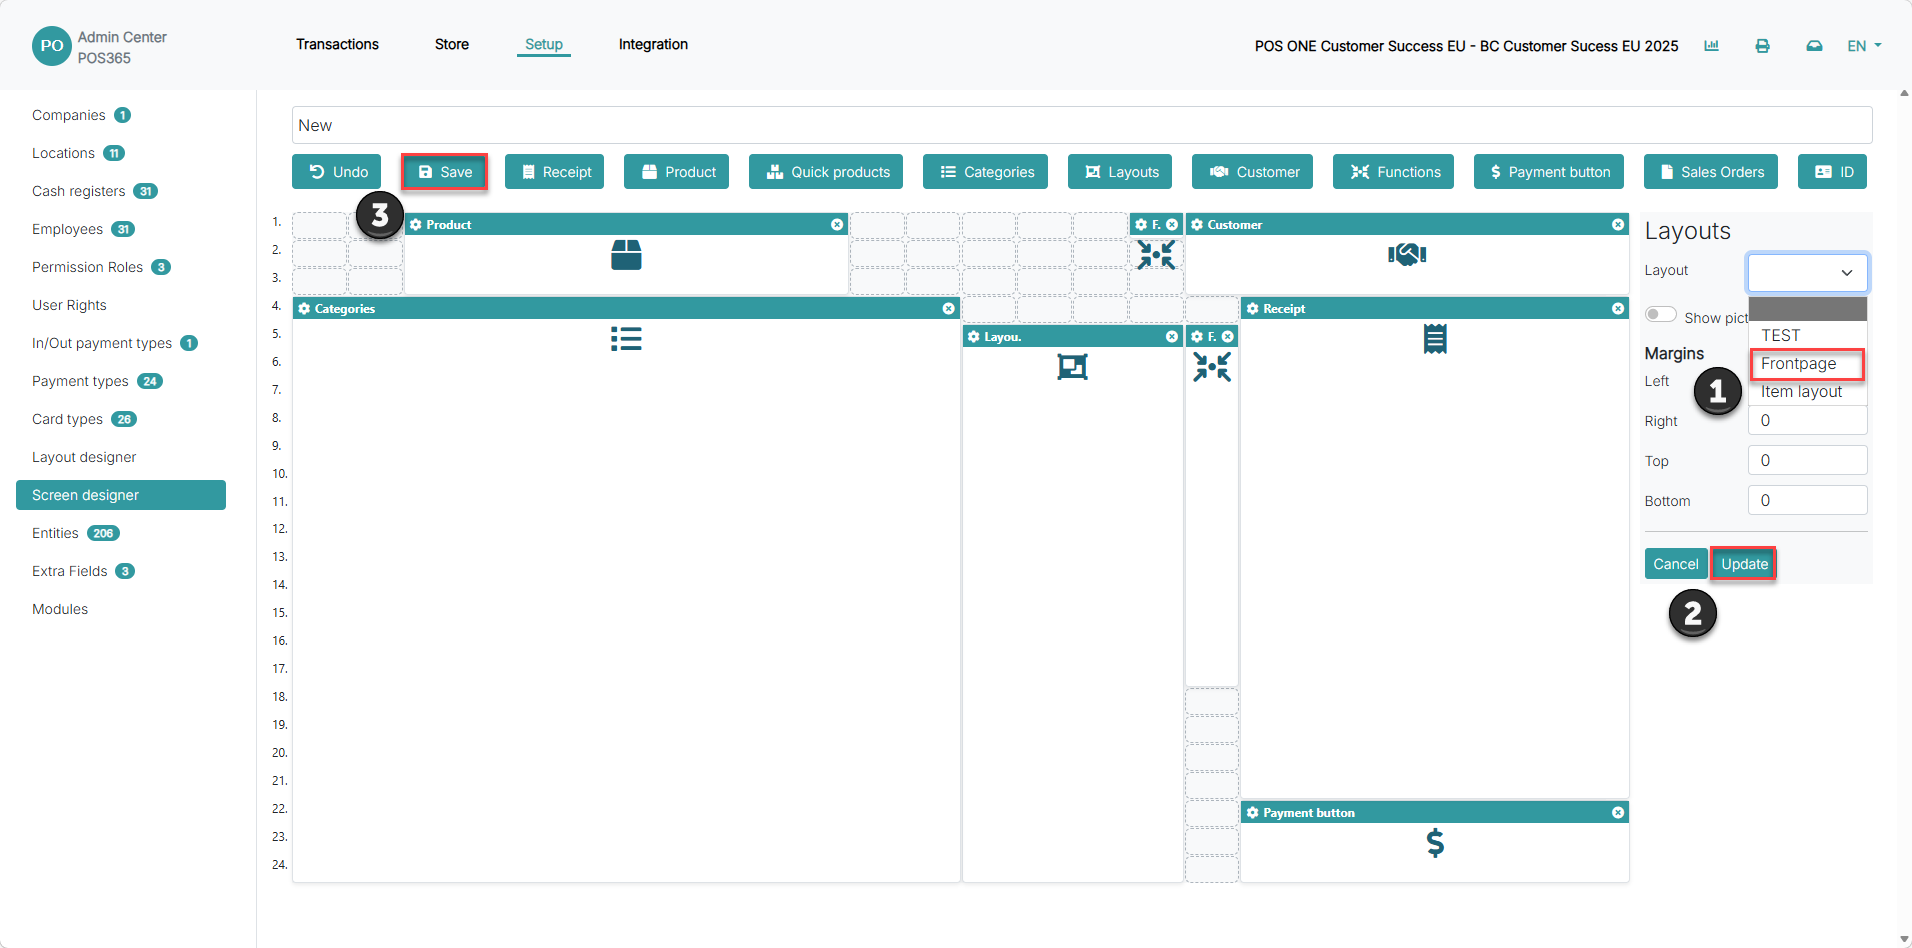
1) Select your layout in the 'Layout' dropdown
2) Click 'Update'
3) Click 'Save'
Note:
The selected layout becomes the visual starting point for staff when using the POS screen.
Step 3:
Assign the layout to the cash register so it becomes active in daily use. This step ensures the correct layout is loaded when staff open the POS.
For more information, see here:
Assign layout to cash register
Step 1:
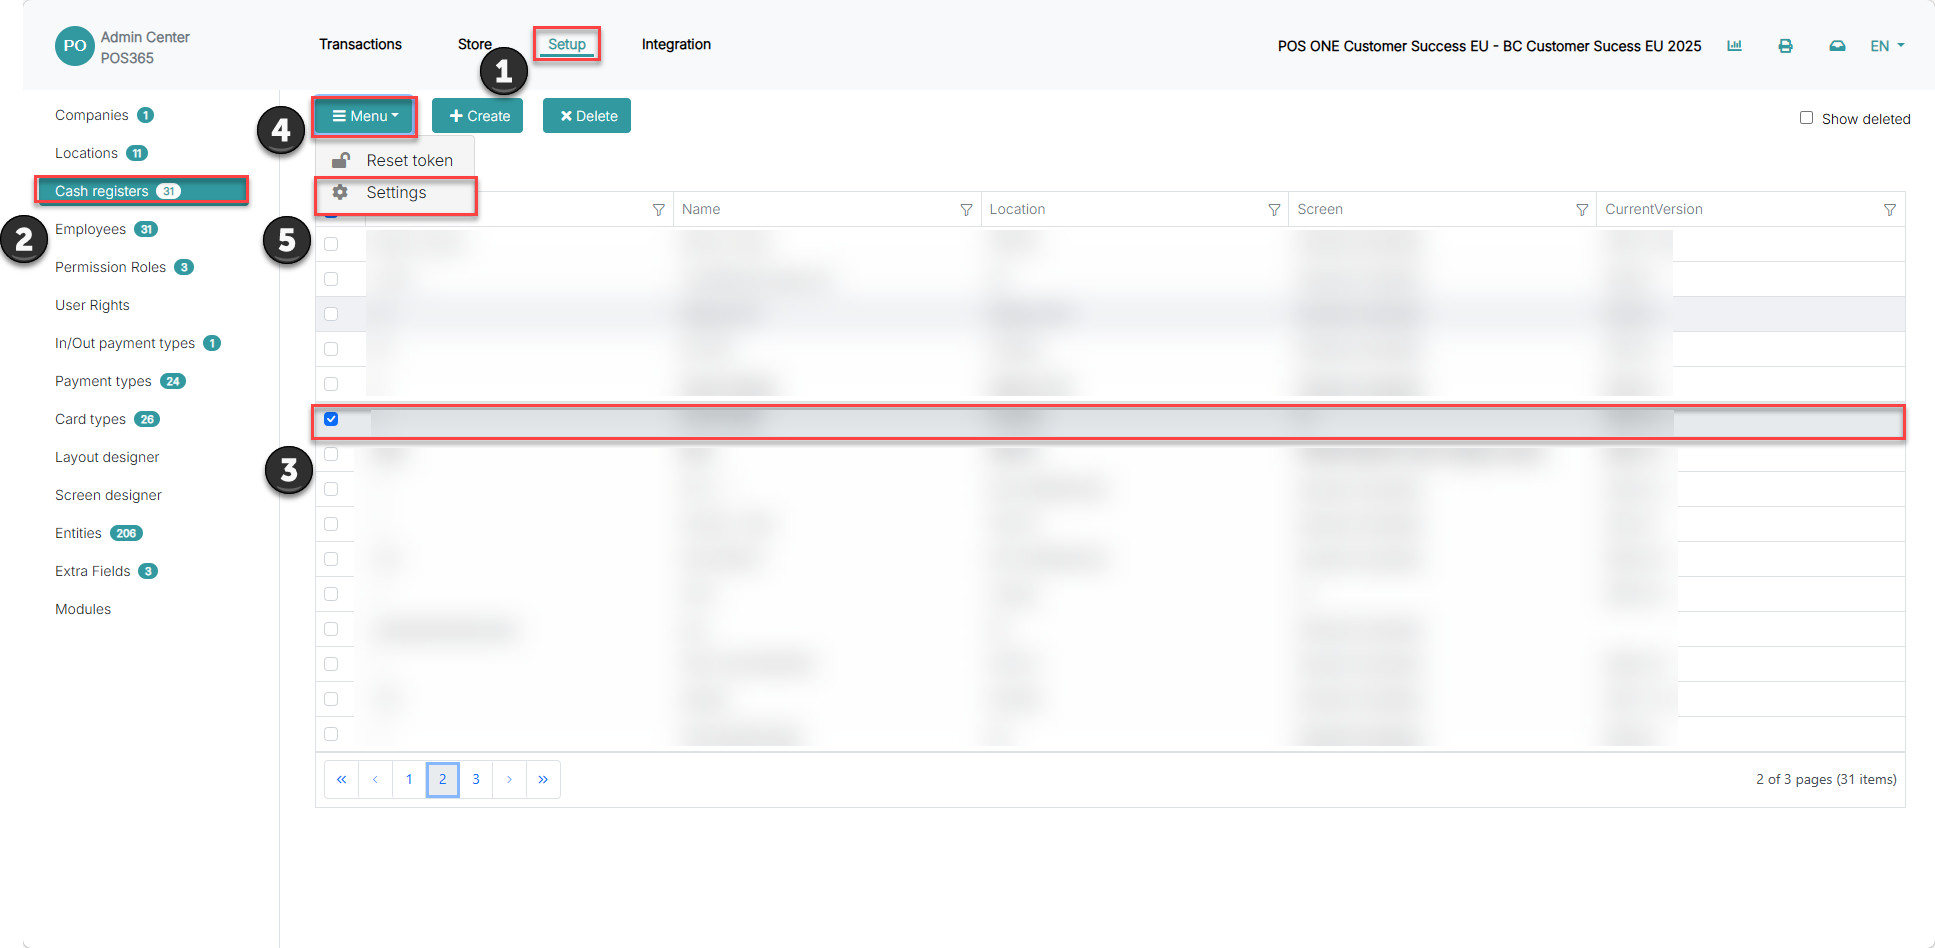
1) Go to 'Setup'
2) Open 'Cash registers'
3) Select your register
4) Click 'Menu'
5) Open 'Settings'
Step 2:
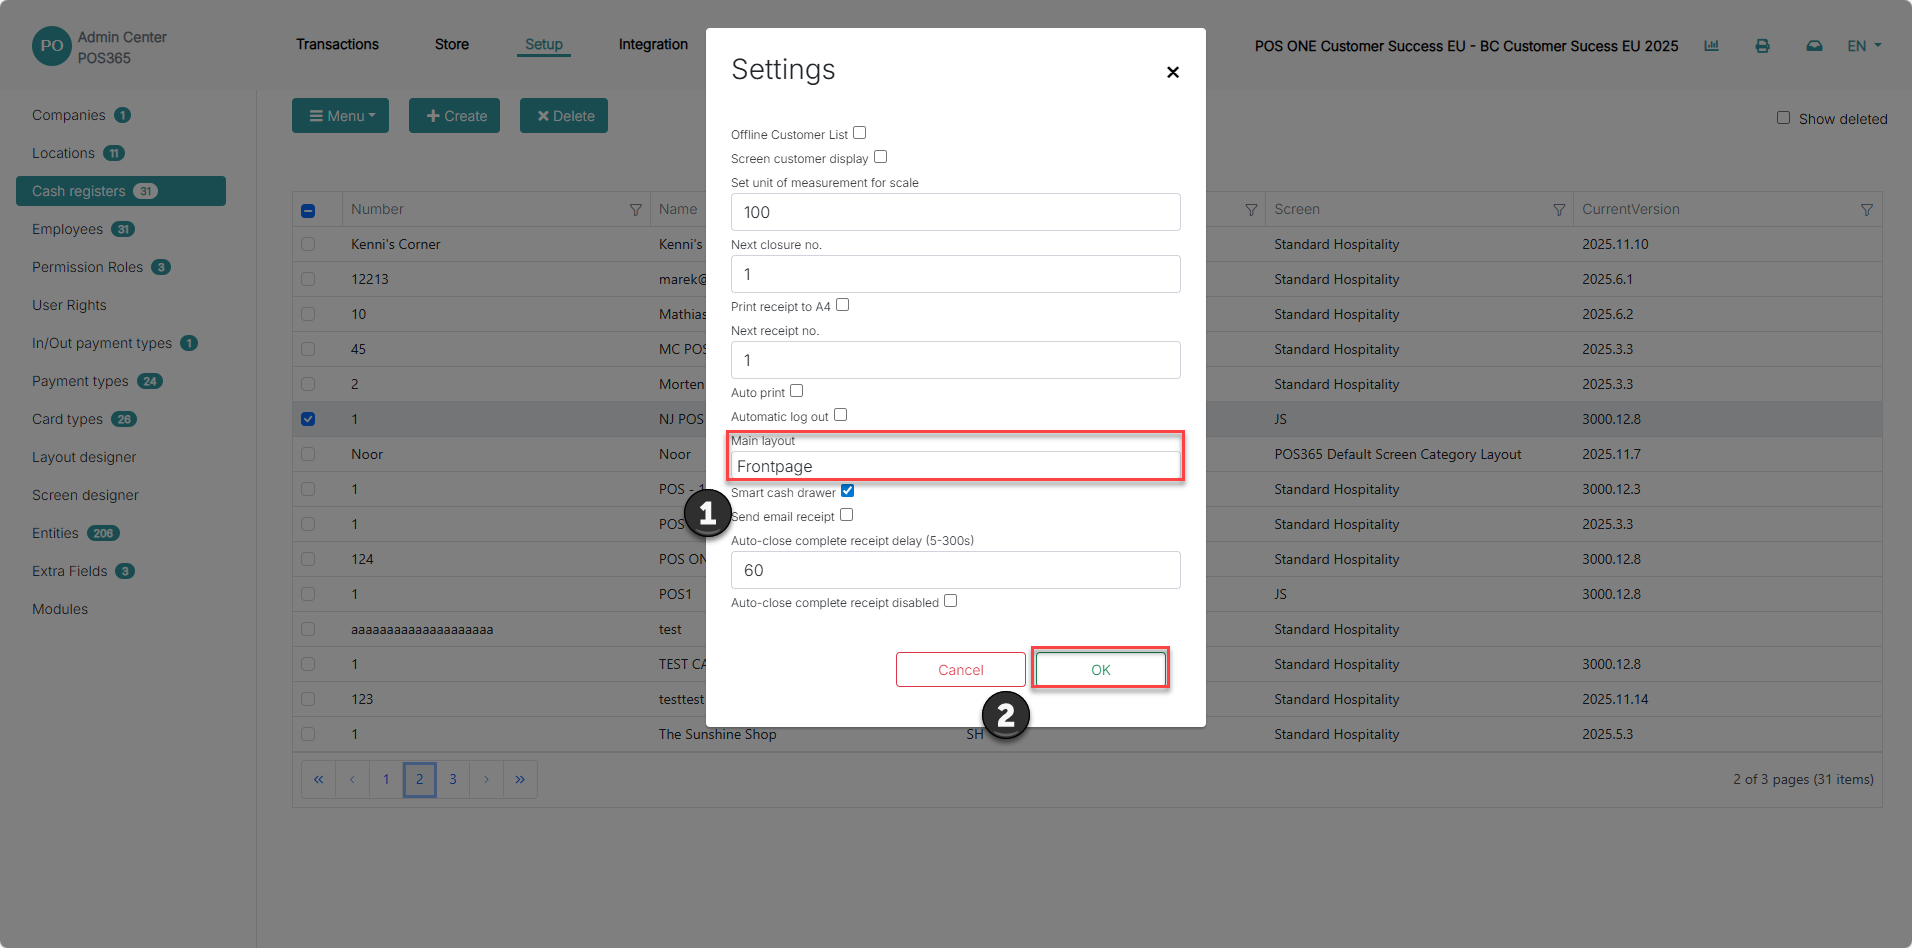
1) Select your layout as 'Main layout'
2) Click 'OK'
Note:
This must be set on each cash register. Otherwise, the layout will not appear in POS.
Step 4:
Access your layouts directly in POS to navigate between categories and speed up the sales flow.
For more information, see here:
Open layouts in POS
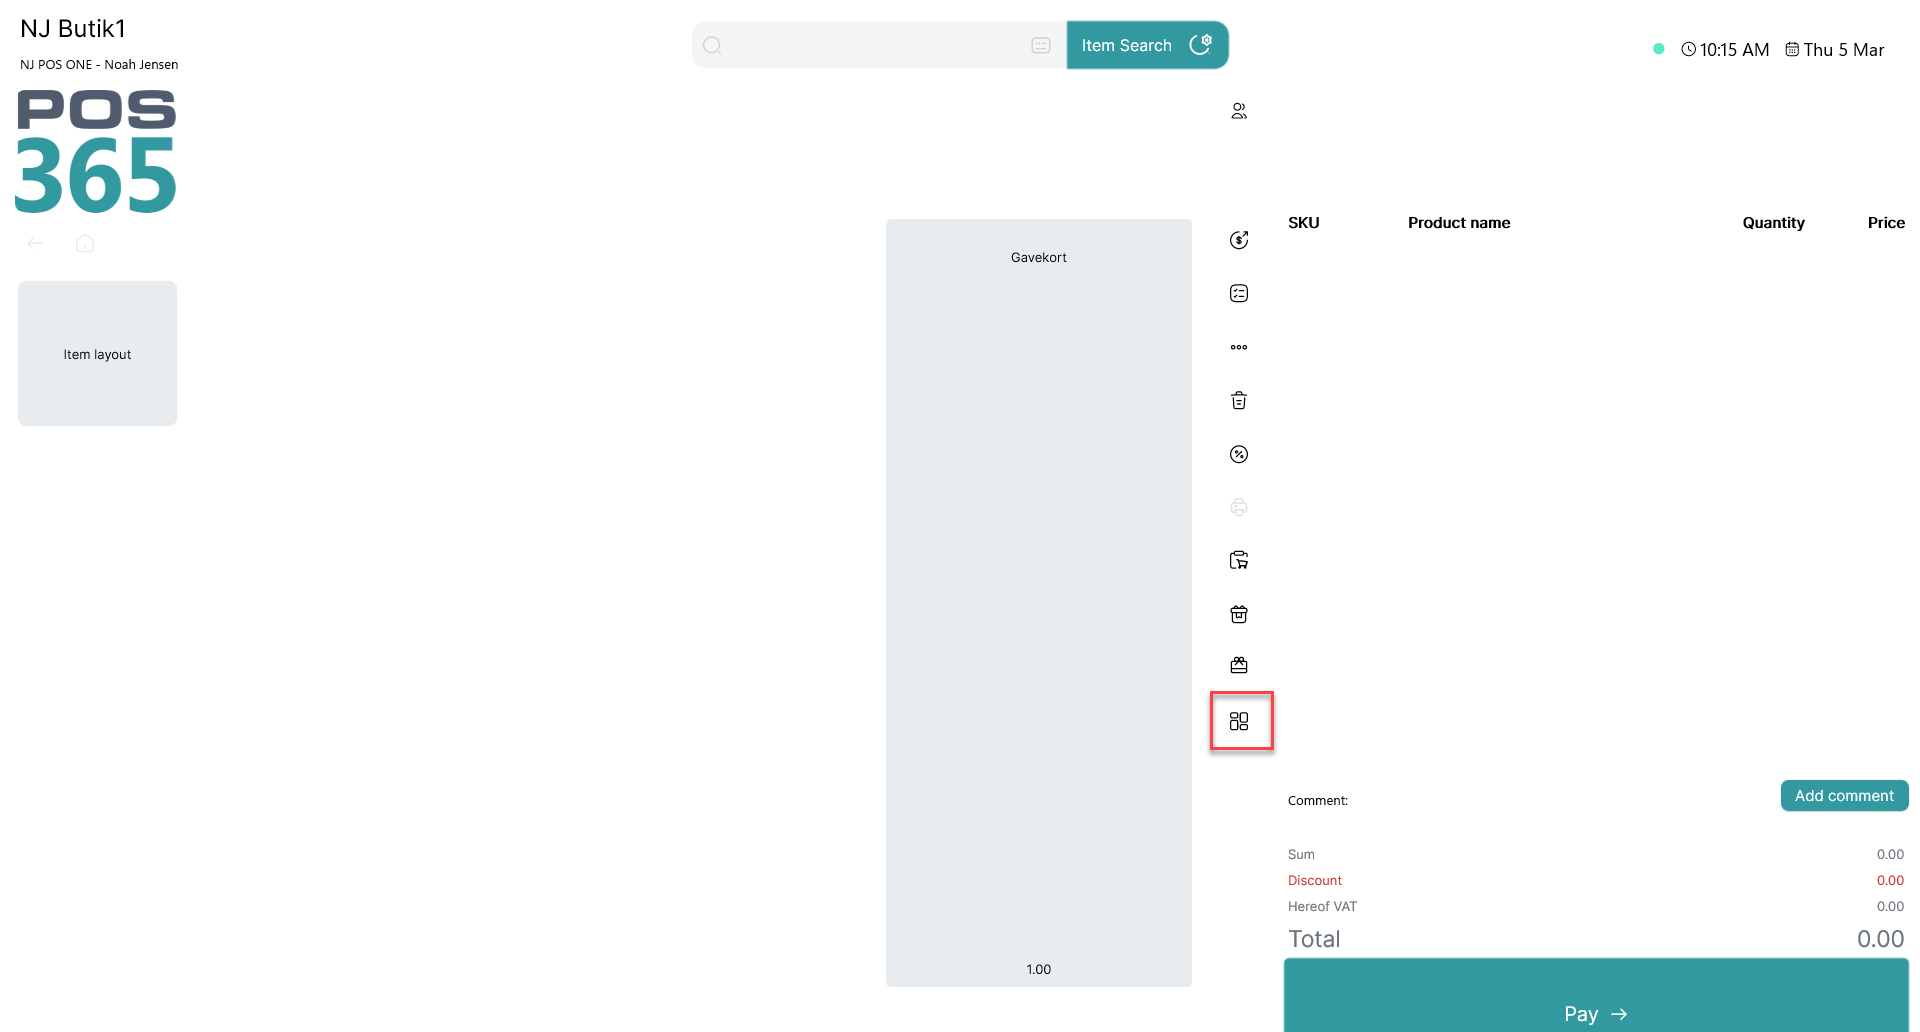
1) Click the layout button
2) Navigate between your created layouts
Note:
Layouts help reduce clicks and make it easier for staff to find items quickly during busy sales situations.