This guide shows you how to create a new company in the Admin Center (with Business Central integration)
Business Central On-Prem 25
Step 1: Create company
For more information, see here:
Create new company and enter basic information
Step 1:
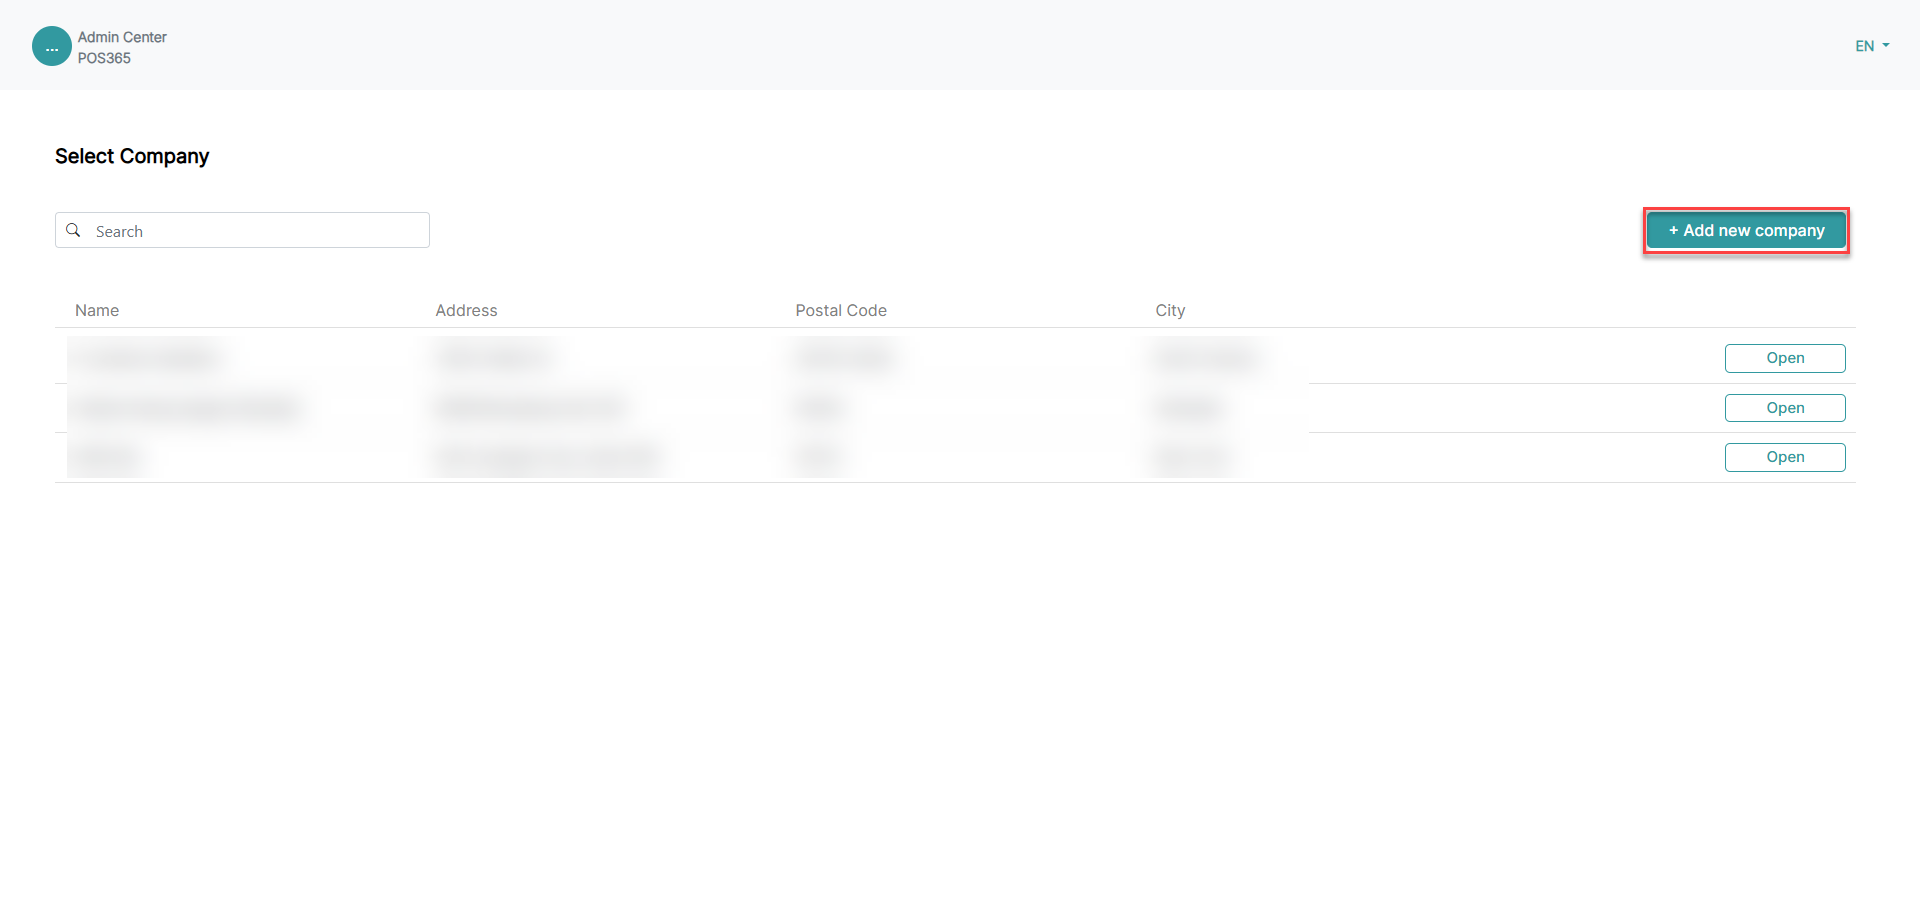
1) Click on '+ Add new company'
Step 2:

1) Enter company information
2) Choose between Cloud and On Prem Business Central
3) Choose whether the company is a sandbox or a production environment
4) Click 'Create new company'
Note:
- For billing purposes, fill in address, postal code, city and email.
Step 2: Select modules & number of cash registers
For more information, see here:
Activate modules and select POS licenses
Step 1:
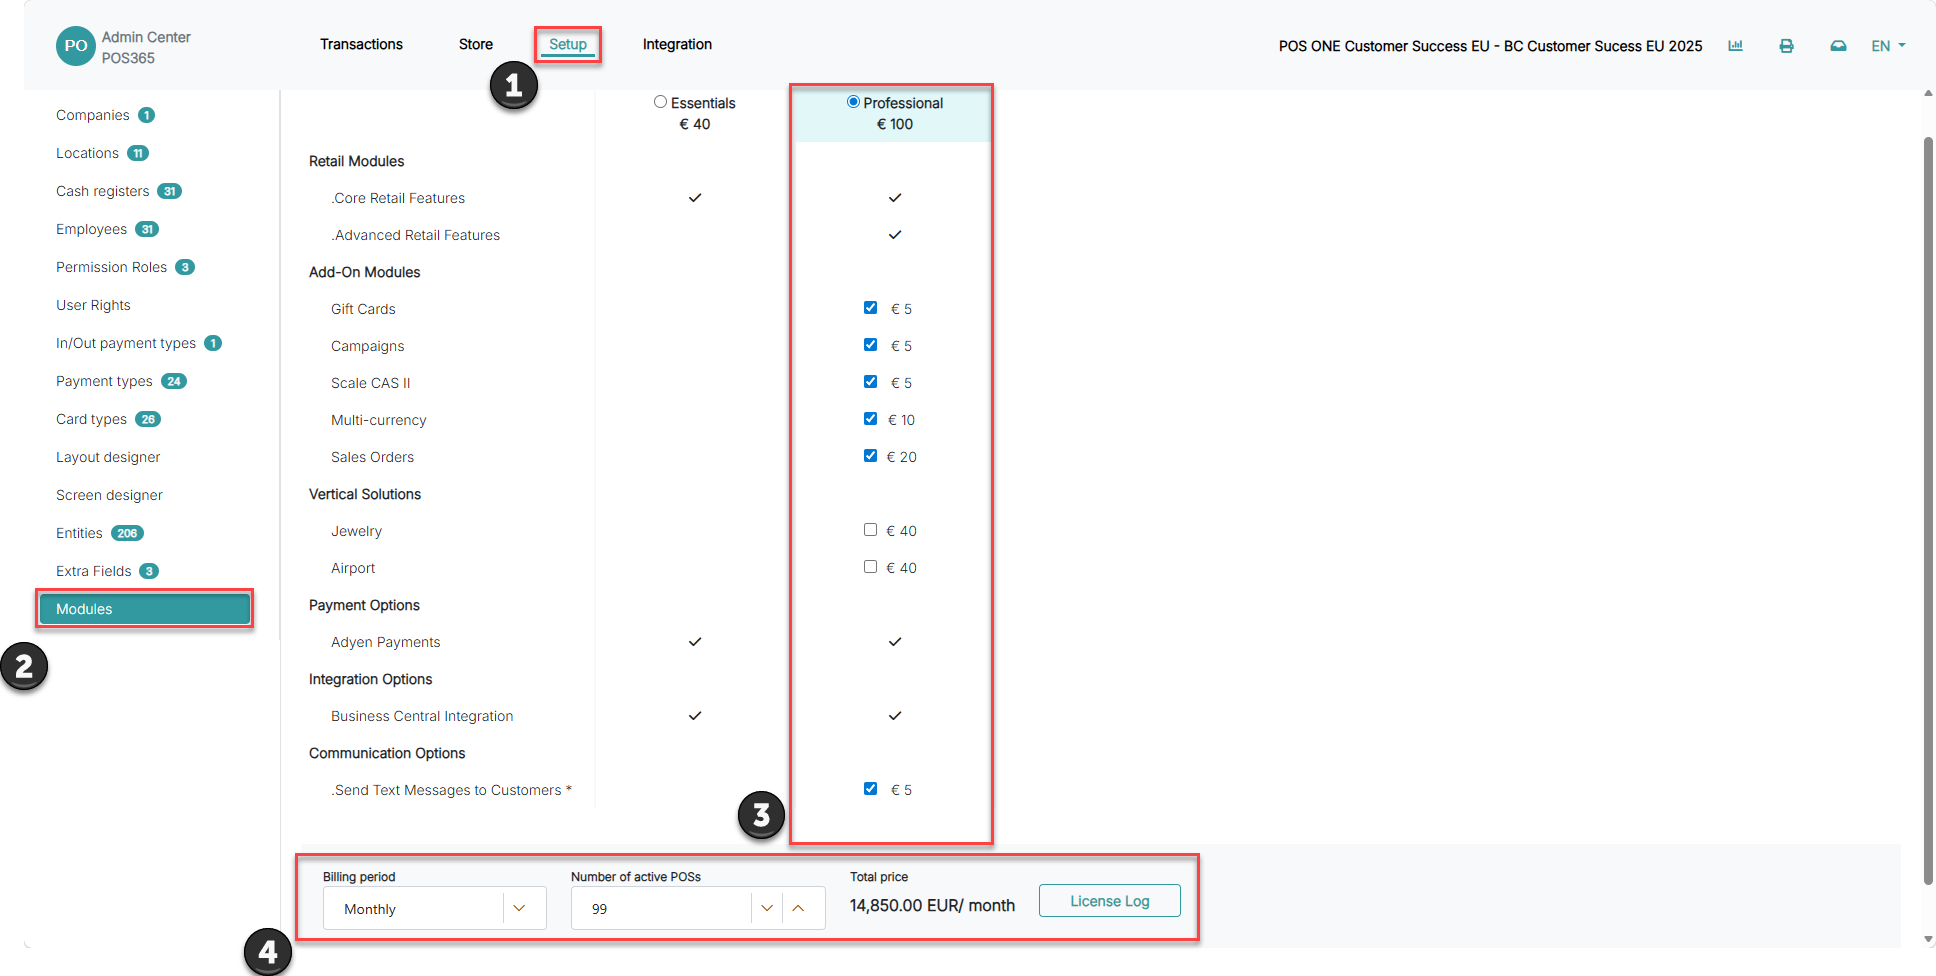
1) Go to 'Setup'
2) Click on 'Modules'
3) Select/deselect the modules you want to be active
4) Select the number of POS's you want to be active and how often you want to be billed
Step 3: Set up integration with Business Central
For more information, see here:
Configure Business Central integration and API token
Step 1:
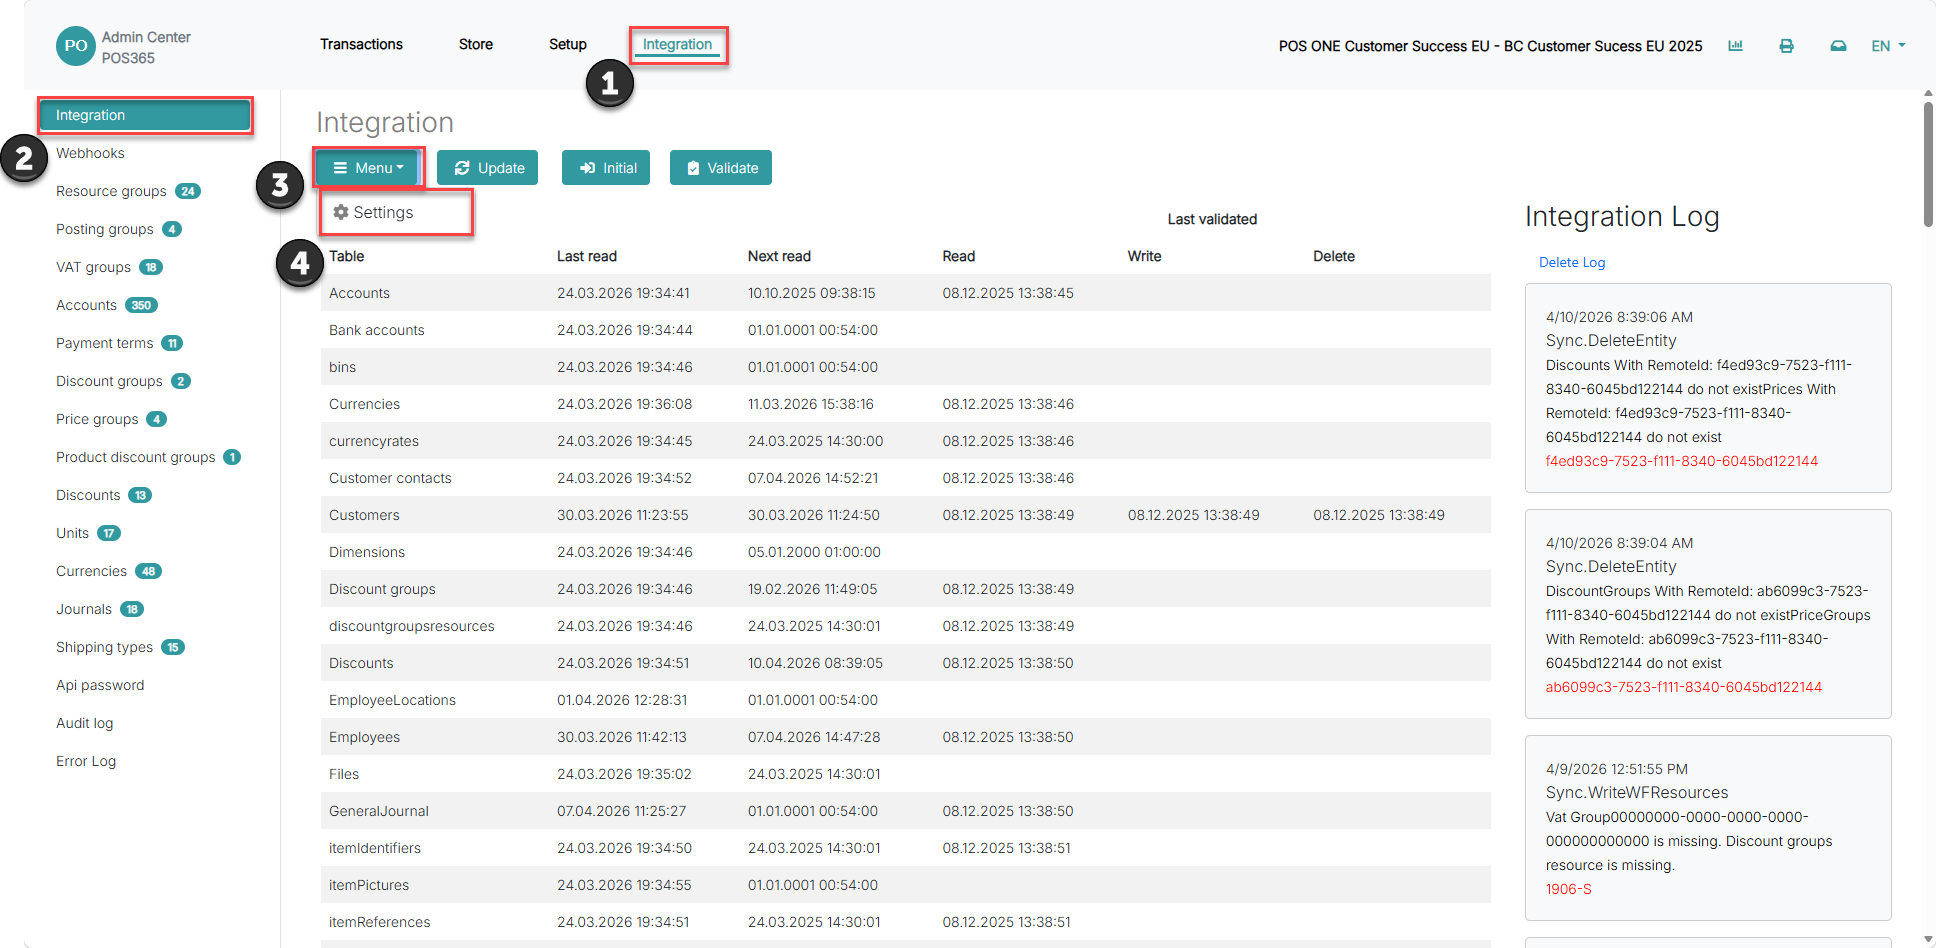
1) Go to 'Integration'
2) Click on 'Integration'
3) Open 'Menu'
4) Go to 'Settings'
Step 2:

1) Fill in the Business Central credentials (Obtained here)
2) Click 'Validate' to check whether the information is correct. Wait a few seconds.
3) If validation is successful, click 'OK'
Note: For On Prem companies, insert “http://” or “https://” in front of BC URL to match the BC setup
Step 4: Set up and start synchronization
For more information, see here:
Create webhook and integration to start synchronization
Step 1:
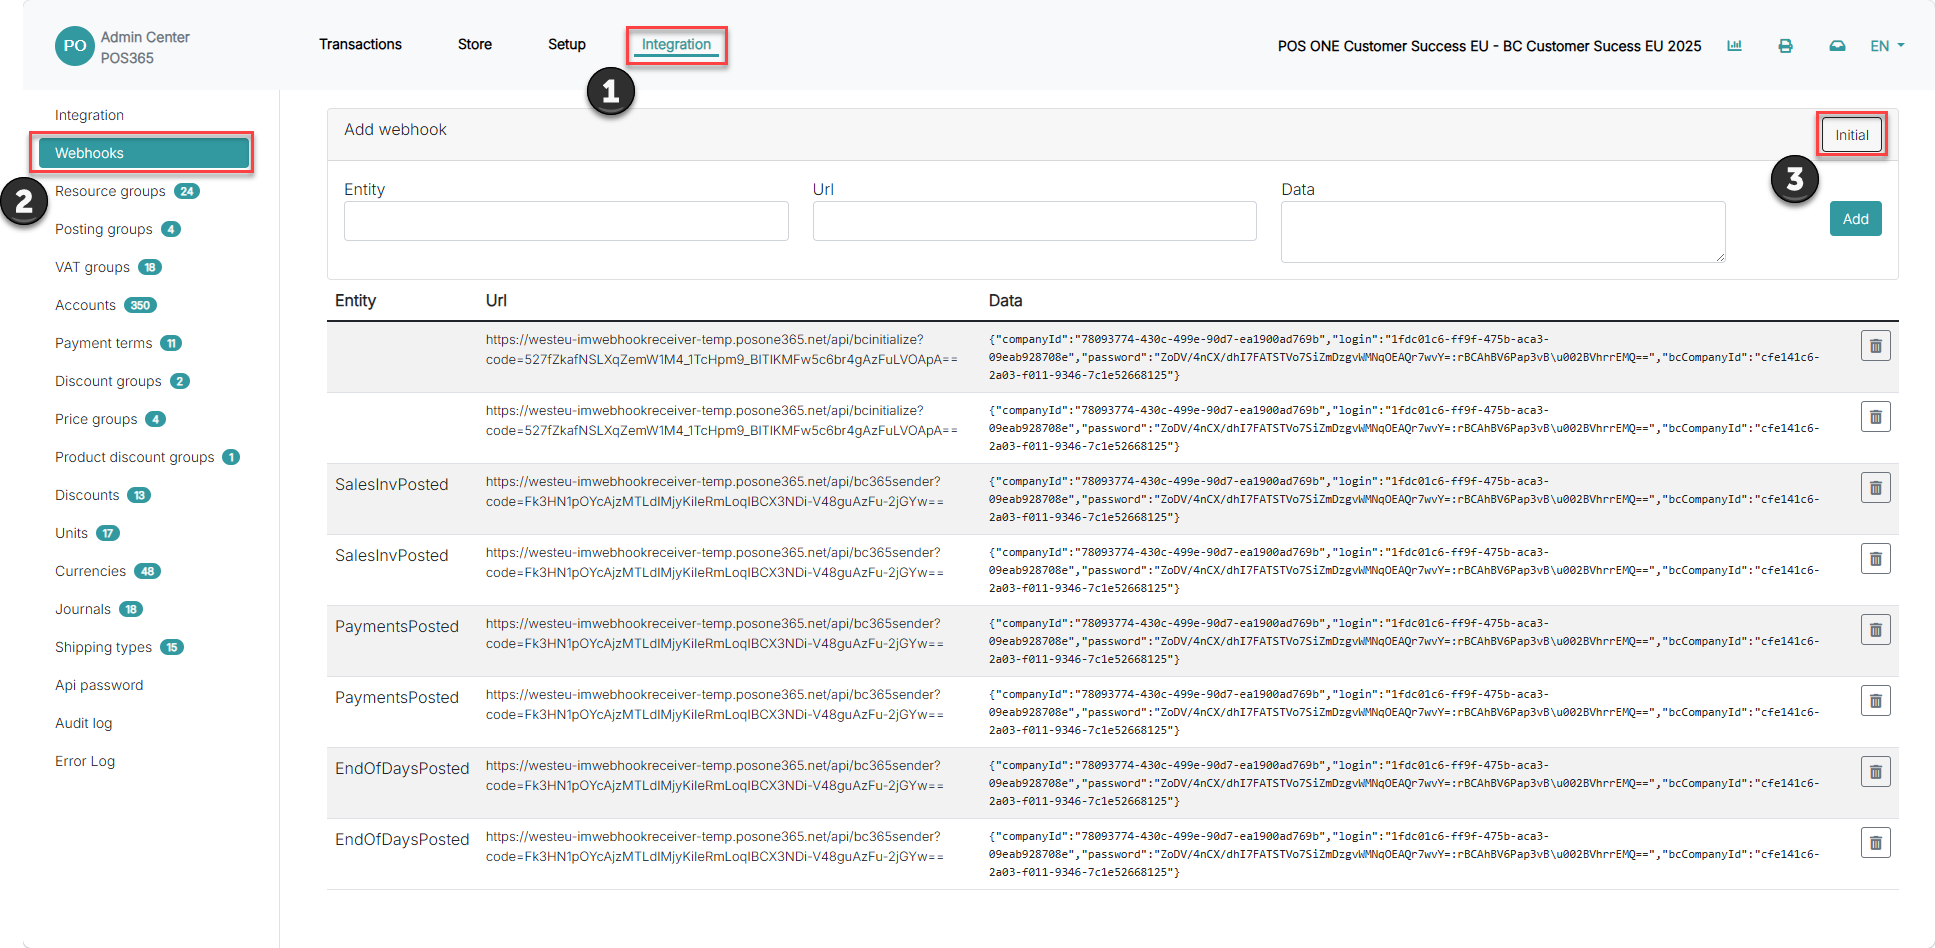
1) Go to 'Integration'
2) Open 'Webhooks'
3) Click on 'Initial'
Step 2:
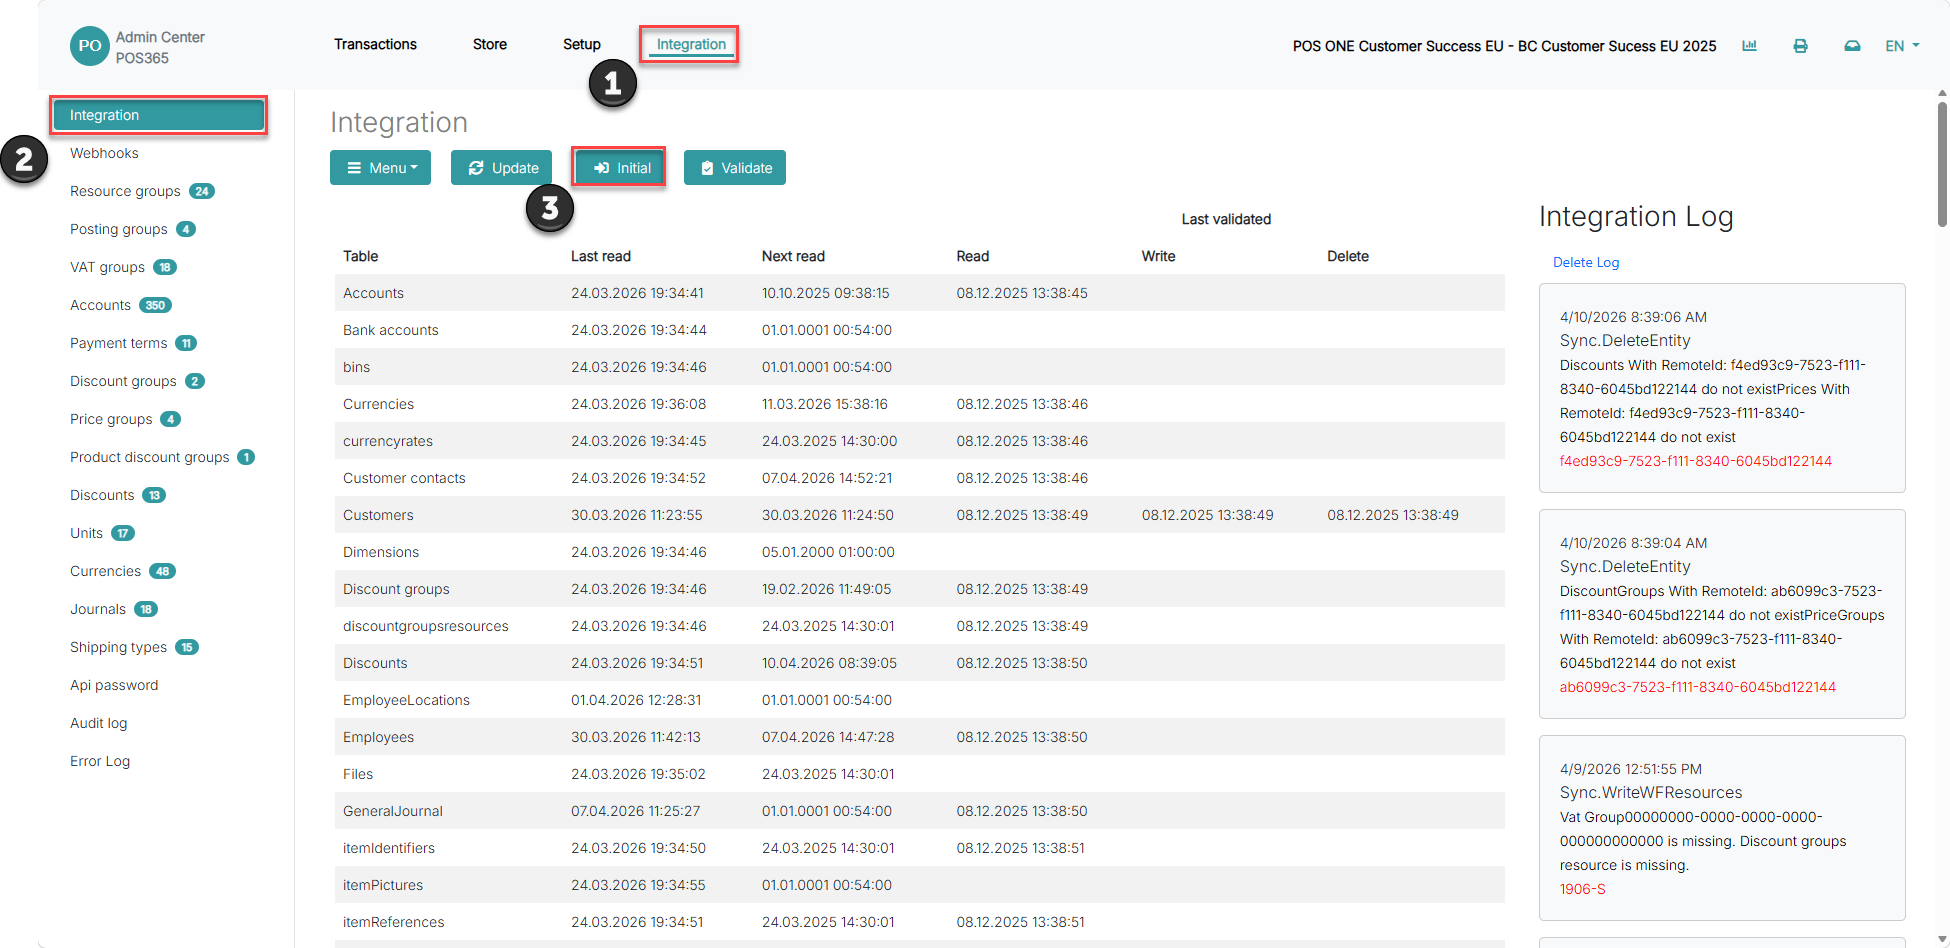
1) Go to 'Integration'
2) Click on 'Integration'
3) Press 'Initial'
Step 5: Select which locations should be used as POS locations
For more information, see here:
Enable locations for POS use
Step 1:
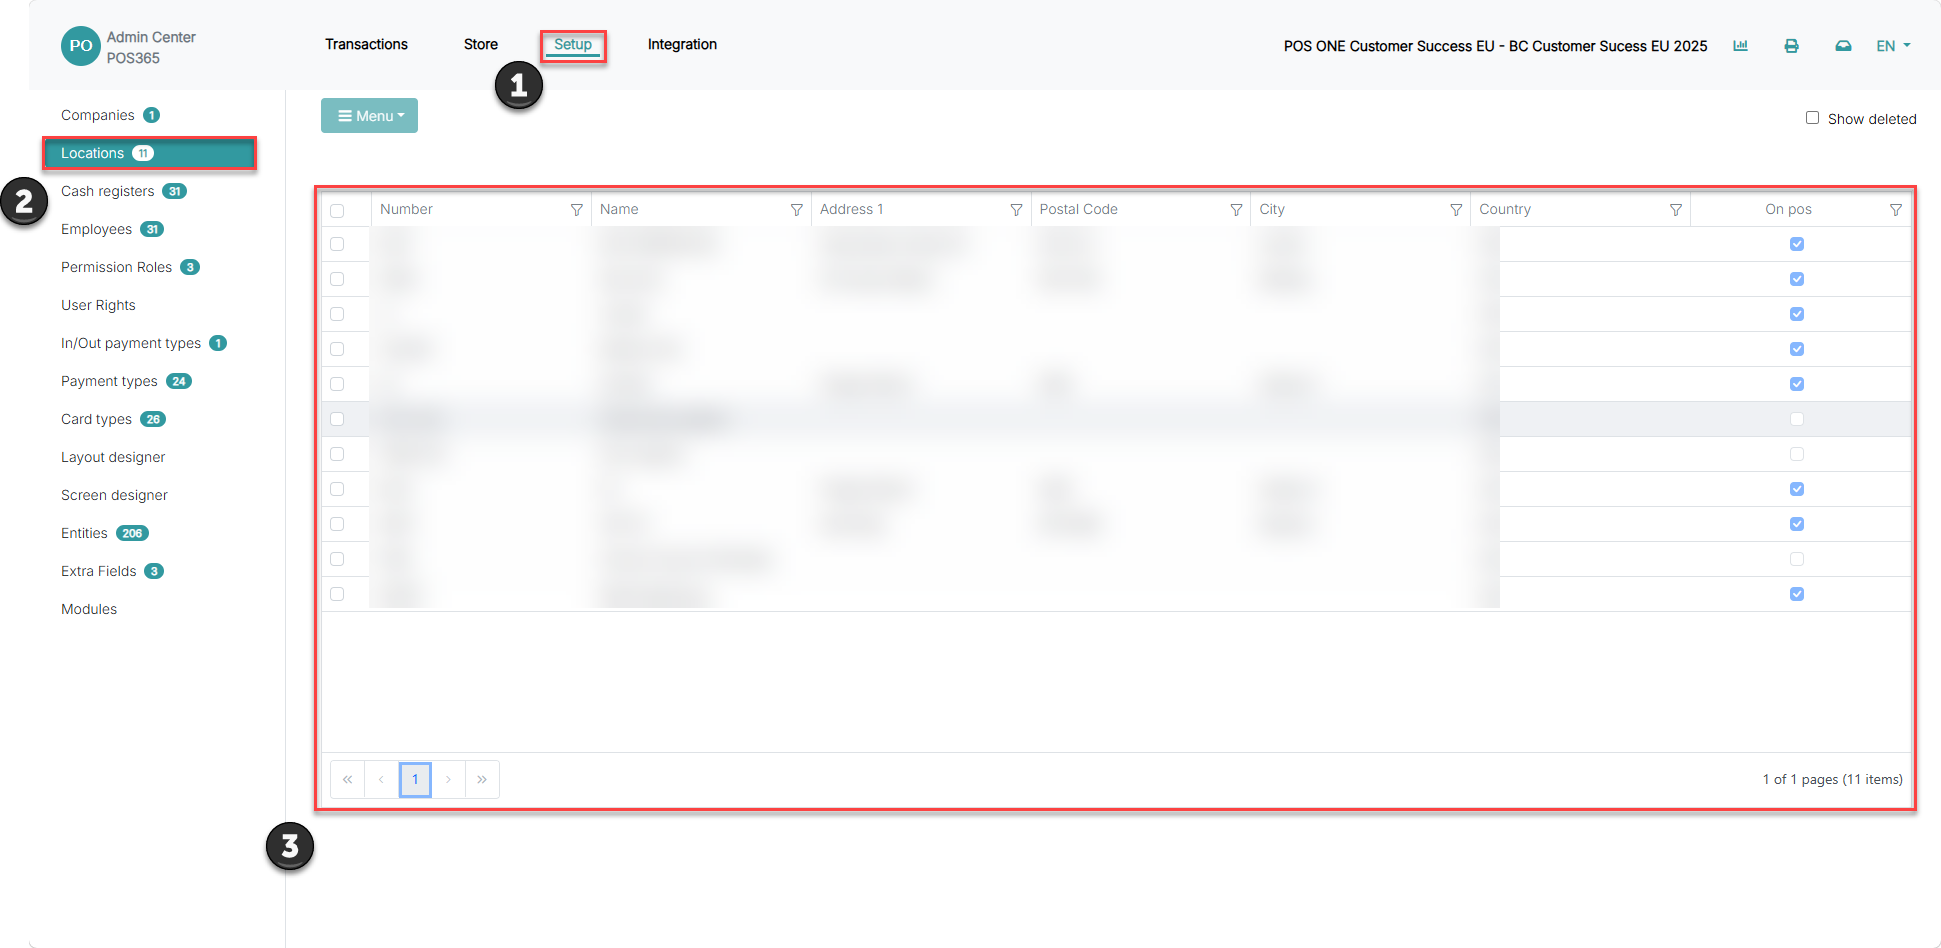
1) Go to 'Setup'
2) Click on 'Locations'
3) Click on your specific location

1) Turn 'OnPos' on
2) Click 'save'
Note:
Locations are synchronized from Business Central 'Locations'. At least one location is needed. To create a location, follow this guide.
Step 6: Set up payment types
For more information, see here:
Configure payment types for POS
Step 1:
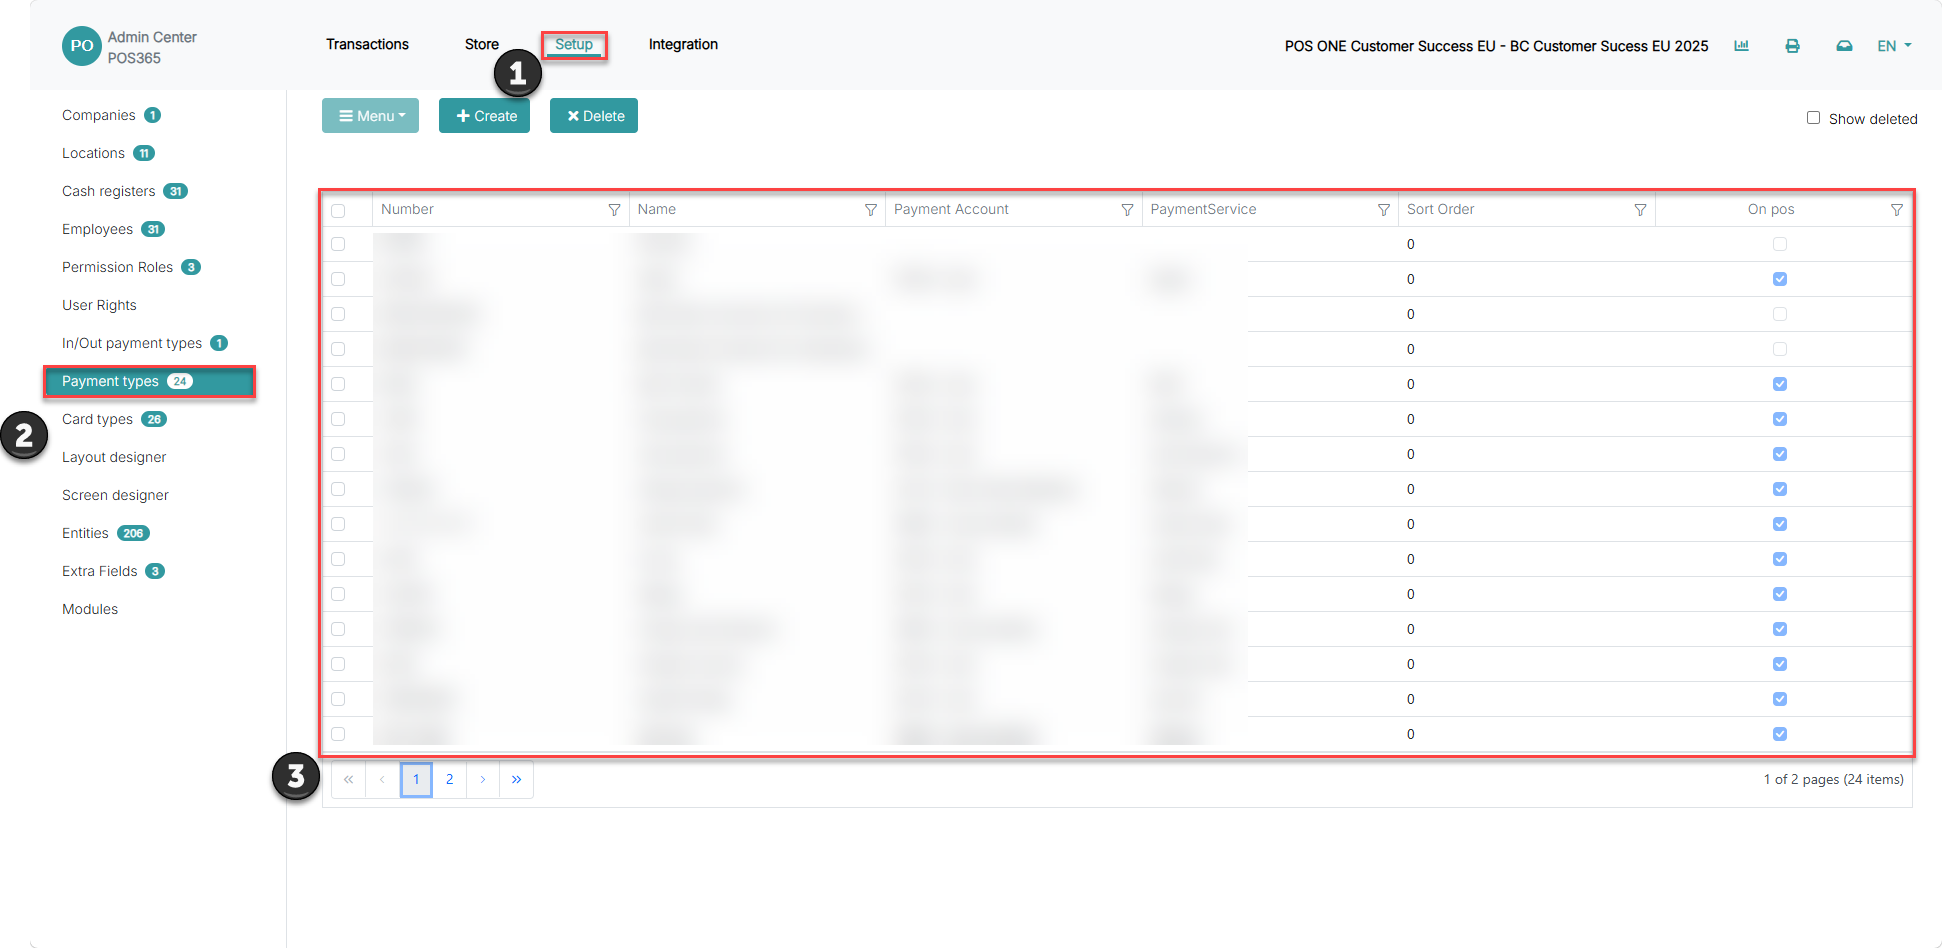
1) Go to 'Setup'
2) Click on 'Payment types'
3) Search for and select the payment types needed on the POS and click on it
Step 2:

1) Turn 'OnPos' on
2) Click 'Save'
Note:
Payment types are synchronized from Business Central 'Payment methods'. To set up payment method, see here.
Step 7: Create cash registers and configure the settings
For more information, see here:
Create cash registers and add payment types
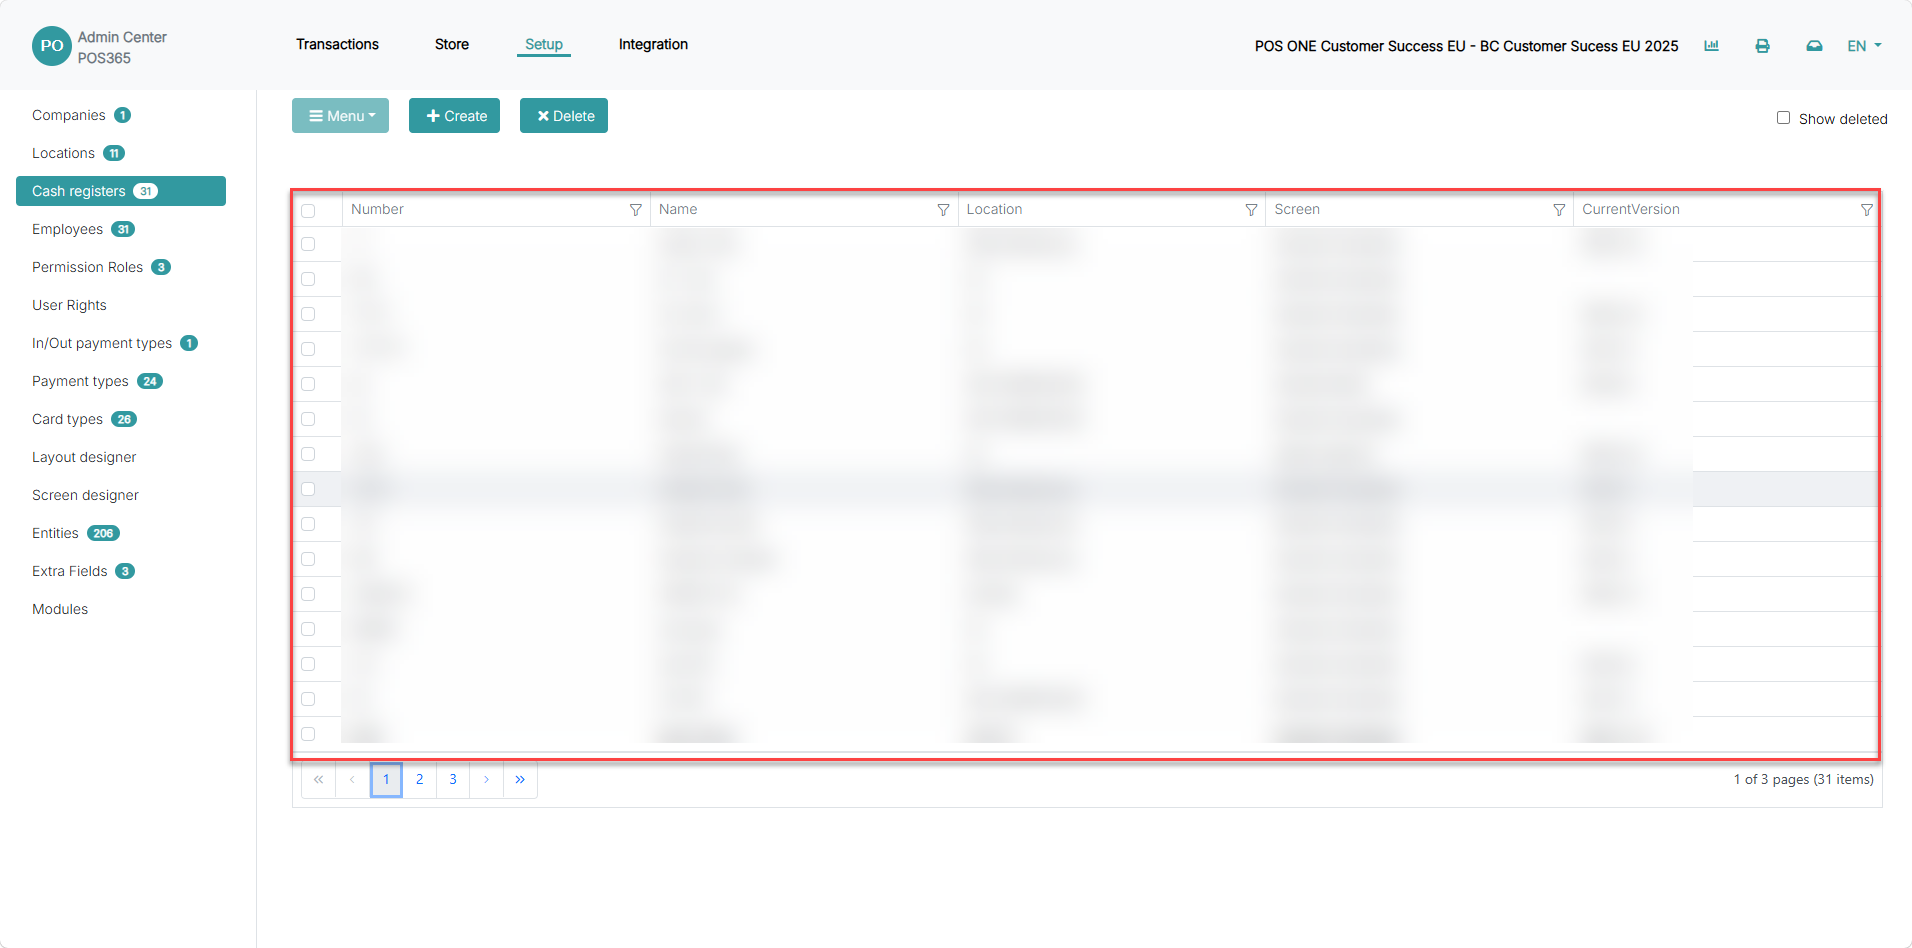
Step 1:
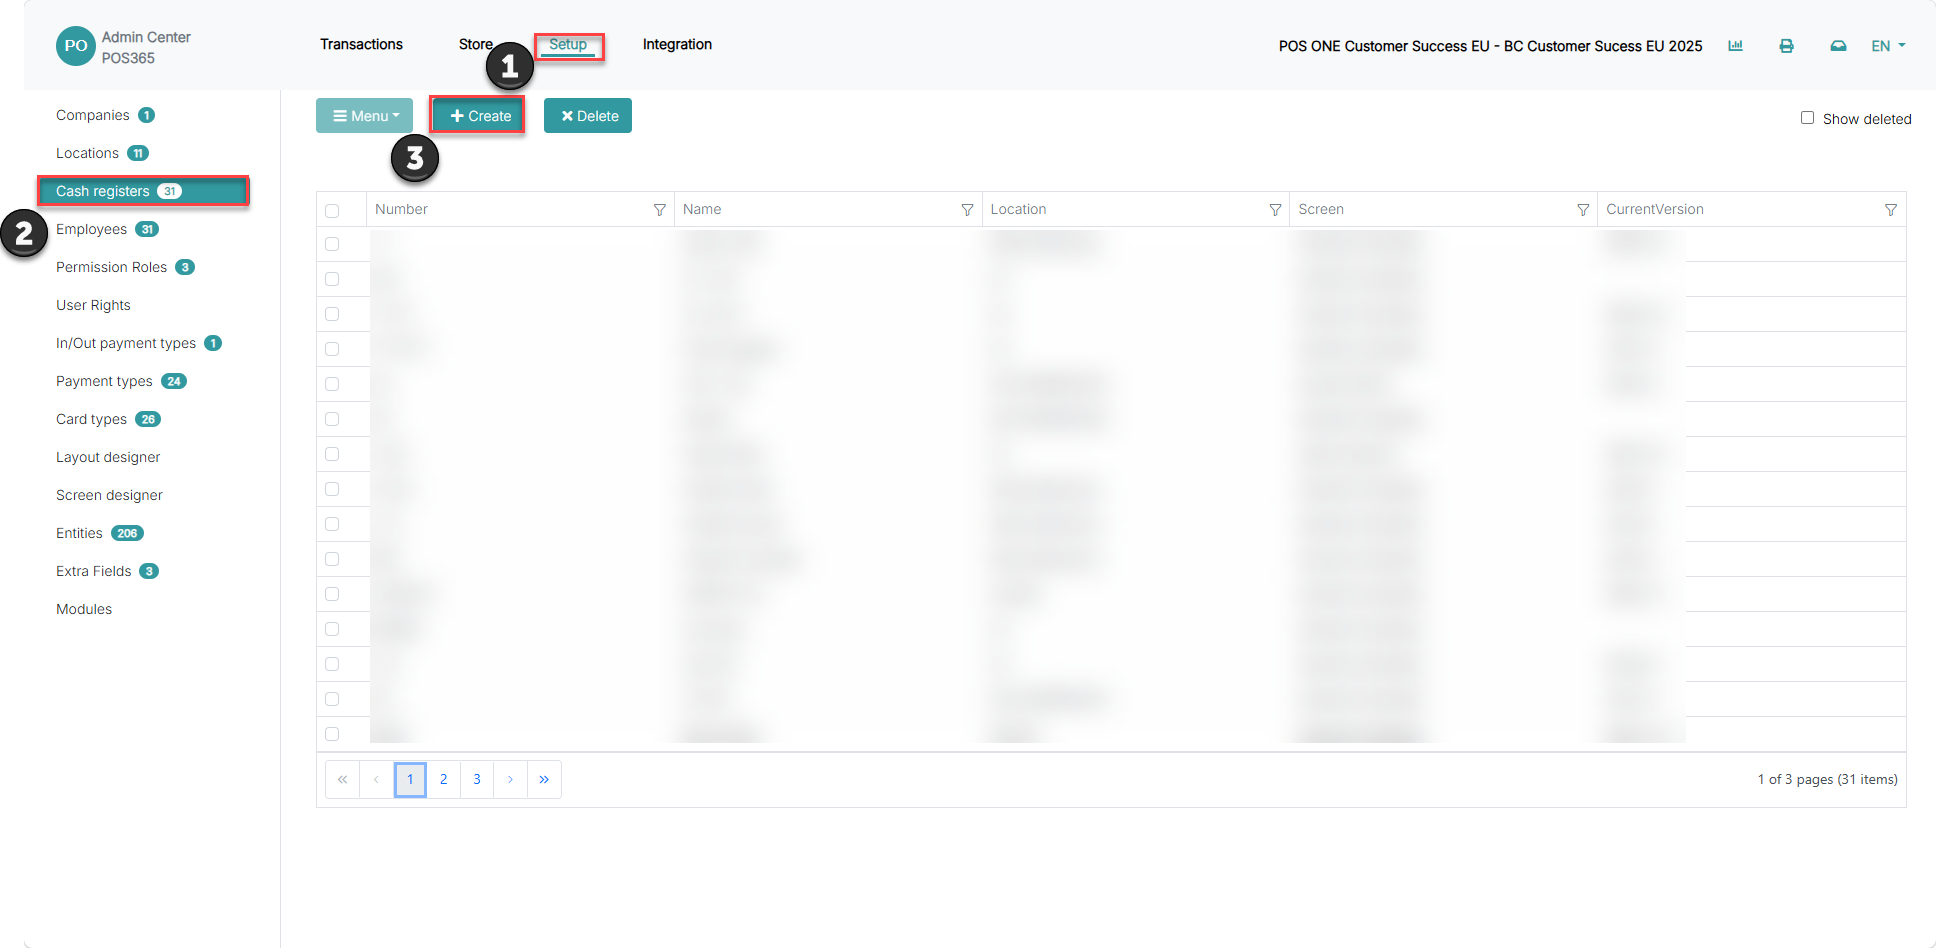
1) Go to 'Setup'
2) Click on 'Cash registers'
3) Click 'Create'
Step 2:
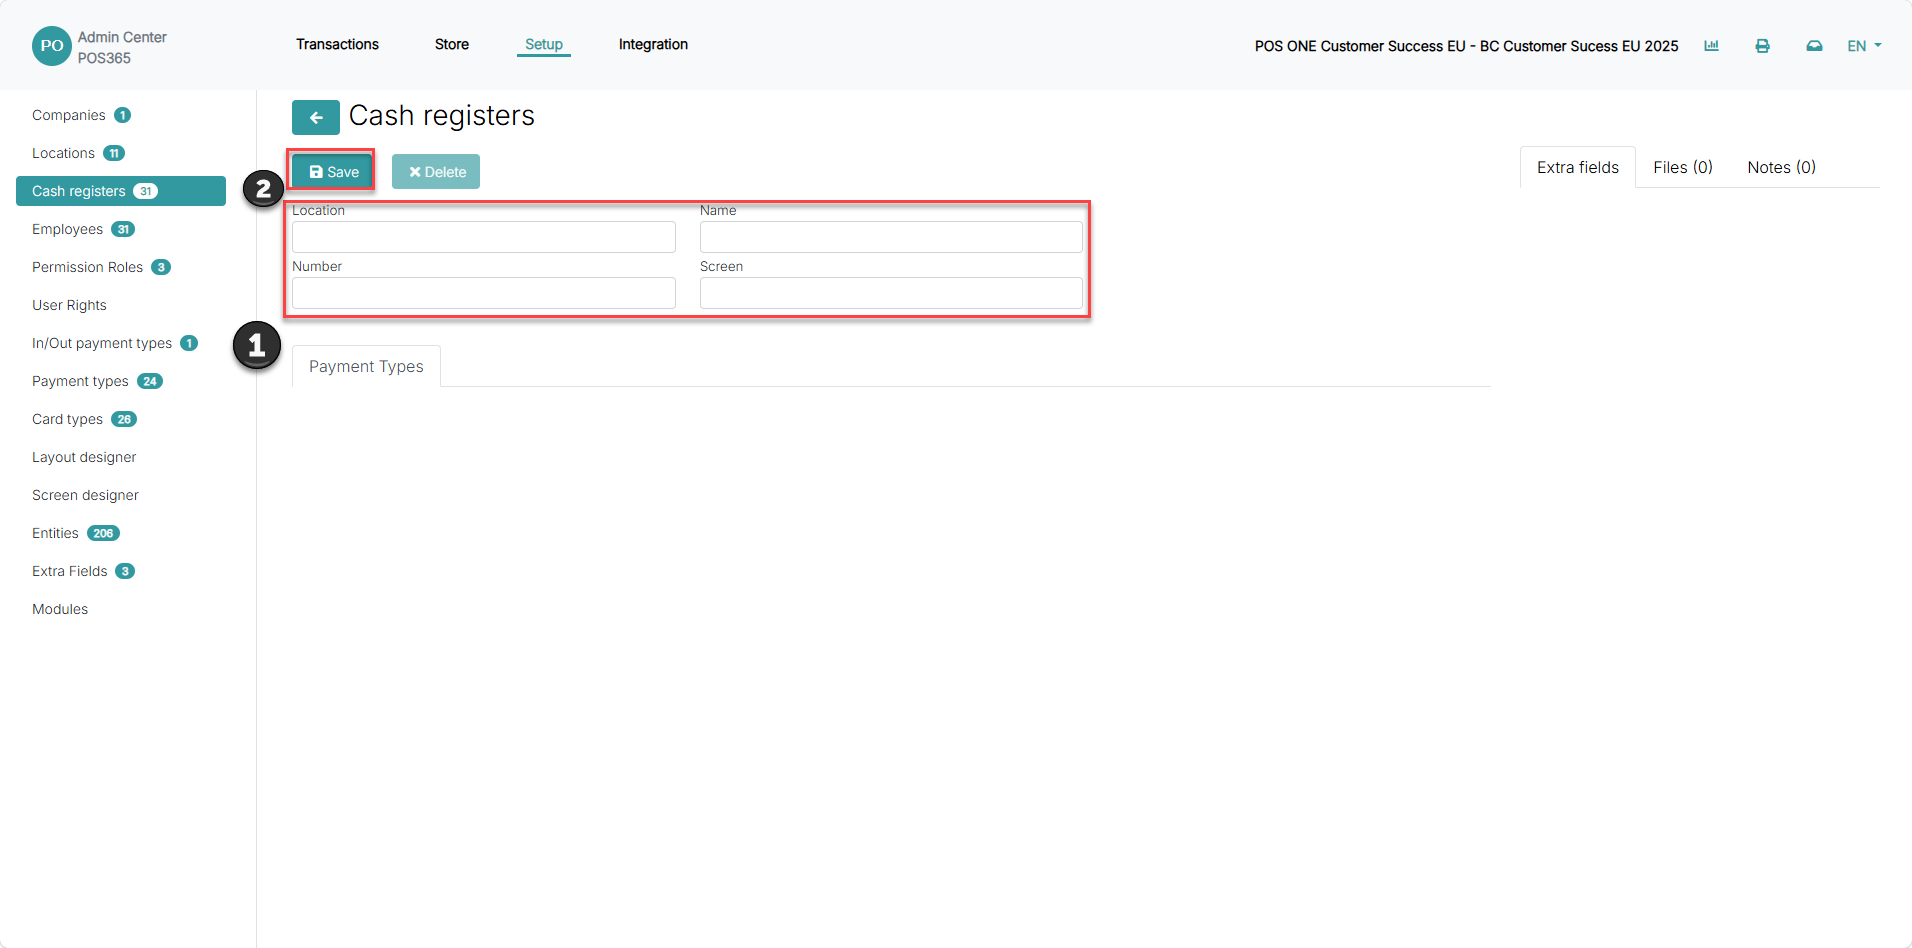
1) Fill in location, name, number and screen
2) Click 'Save'
Location: The location where the cash register is located.
Number: The ID of the cash register. ID must be unique.
Name: The name of the cash register. This is also displayed on the POS.
Screen: The screen layout used on the POS. A list of all available screens is shown. To create your own or edit existing ones, follow this guide.
Step 3:
1) Click on your newly created cash register
Step 4:
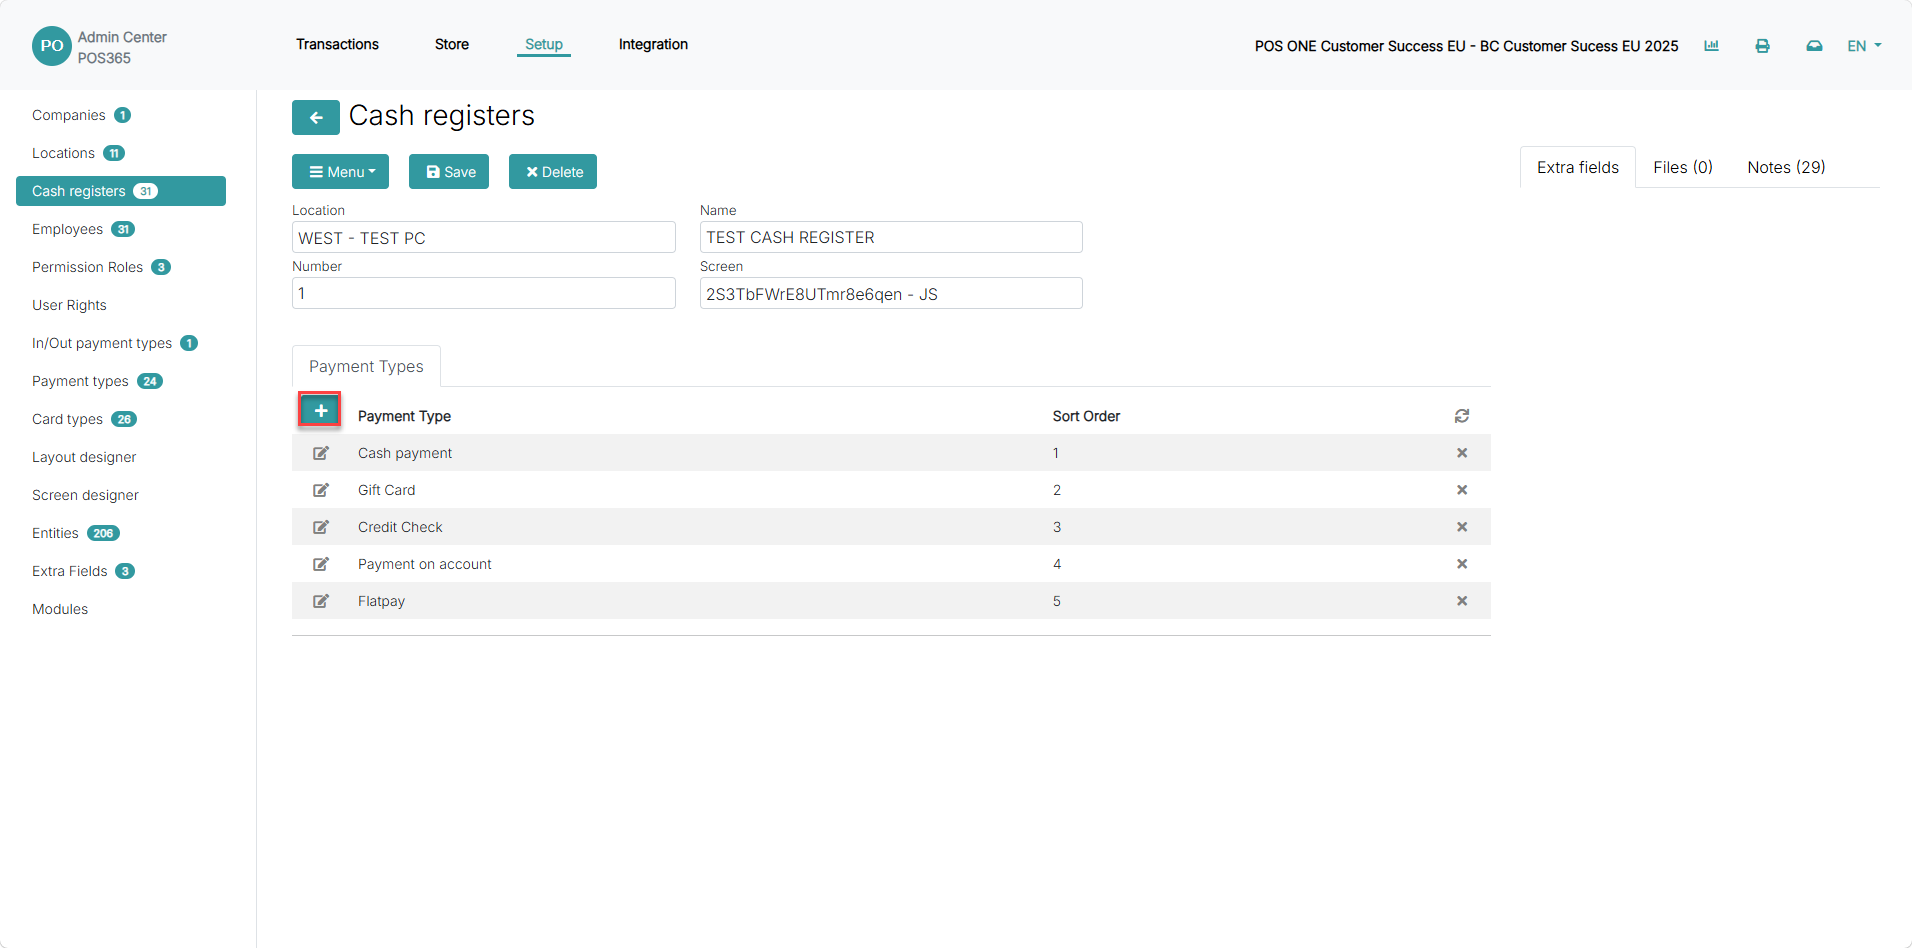
1) Click '+' to add a payment type
Step 5:

1) Set 'PaymentTypeId' and 'Sort order'
2) Click 'Ok'
PaymentTypeId: A list of all payment methods that are currently allowed as POS payment methods. To set up a new payment method, follow this guide.
Sort order: The order which the payment buttons on the POS are shown
Step 8: Set up currencies
For more information, see here:
Configure currencies and accounts
To setup currencies, follow this guide.
Step 9: Posting setup
For more information, see here:
Enter company and posting information
Step 1:
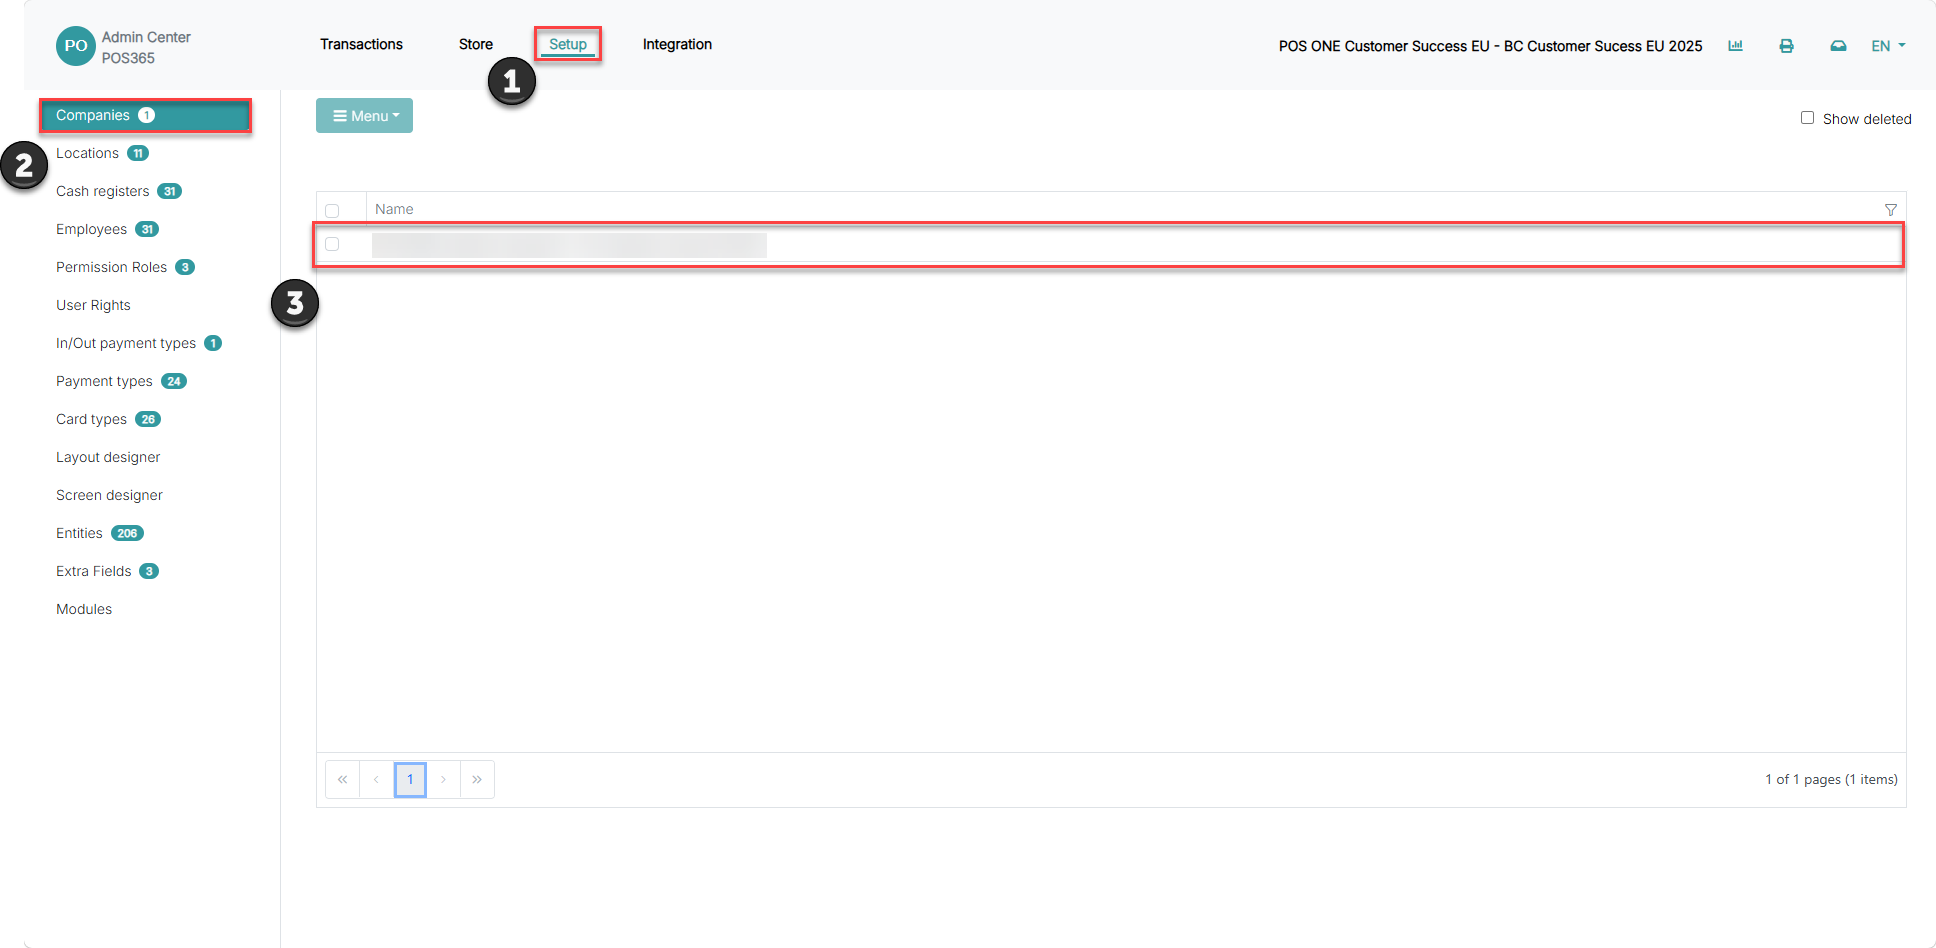
1) Go to 'Setup'
2) Select 'Companies'
3) Click on your company
Step 2:

1) Insert company information
Required fields:
- Address
- Postal Code
- City
- Currency: Select the standard/local currency
Step 3:
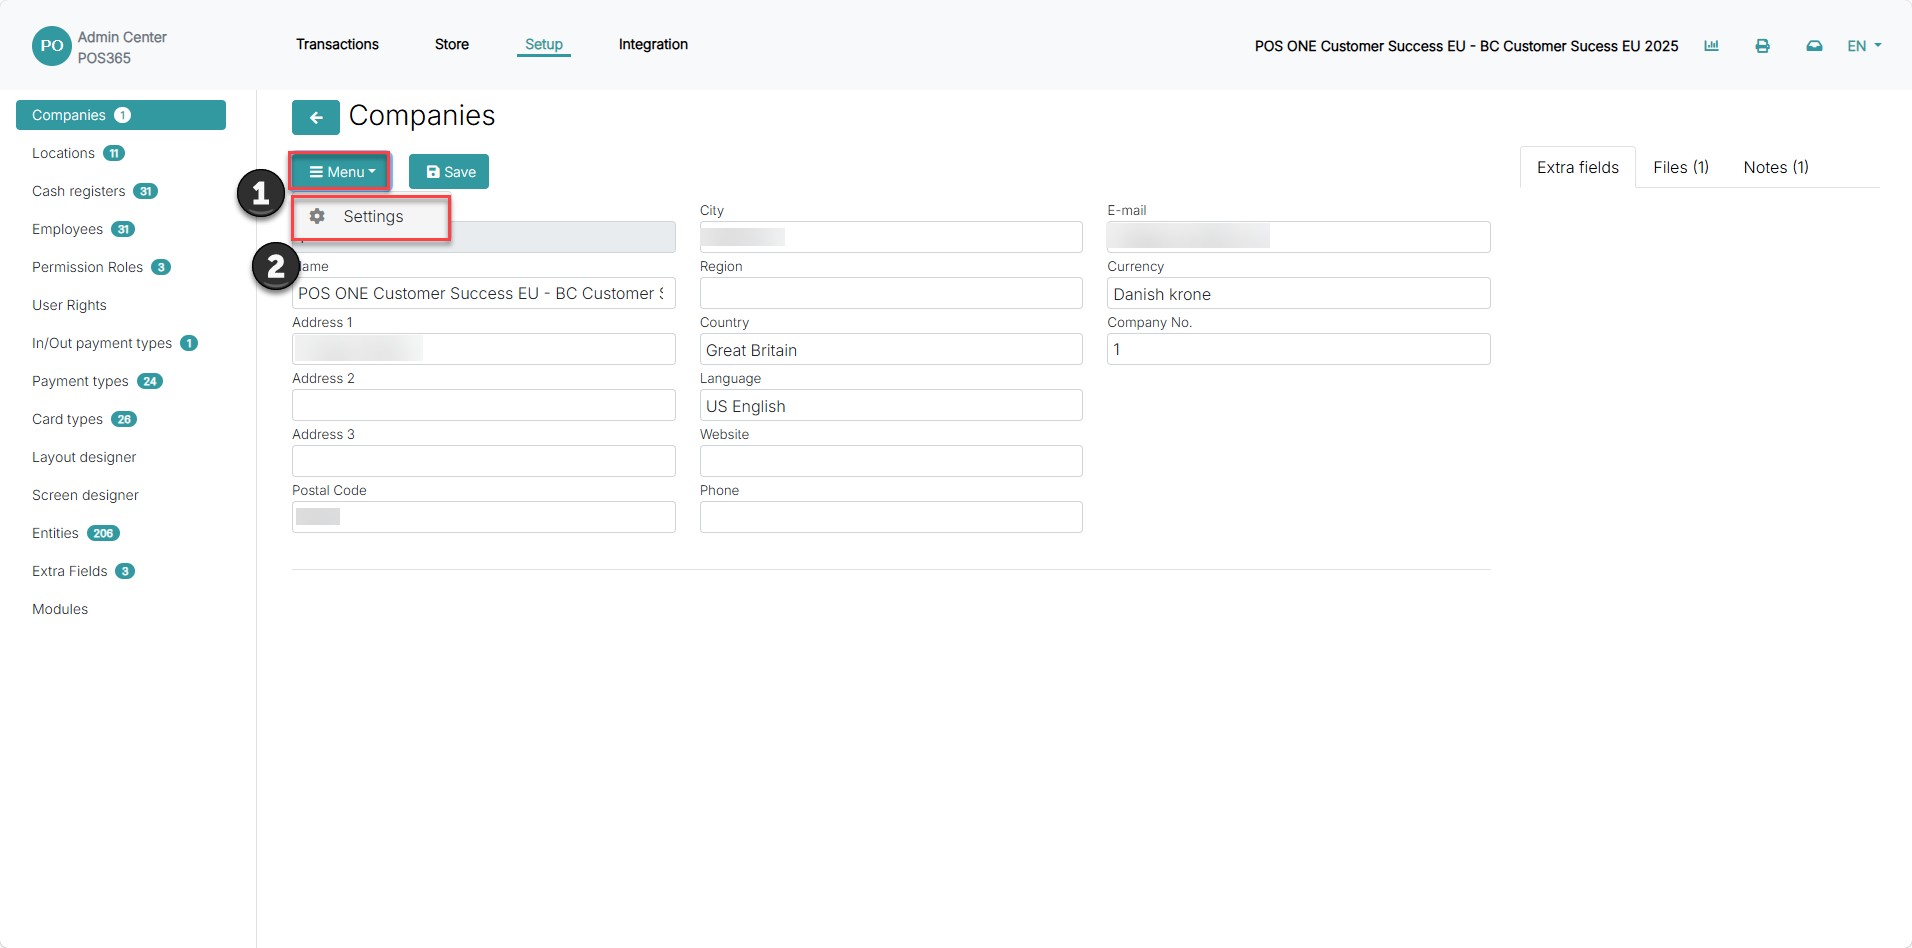
1) Click 'Menu'
2) Go to 'Settings'
Step 4:
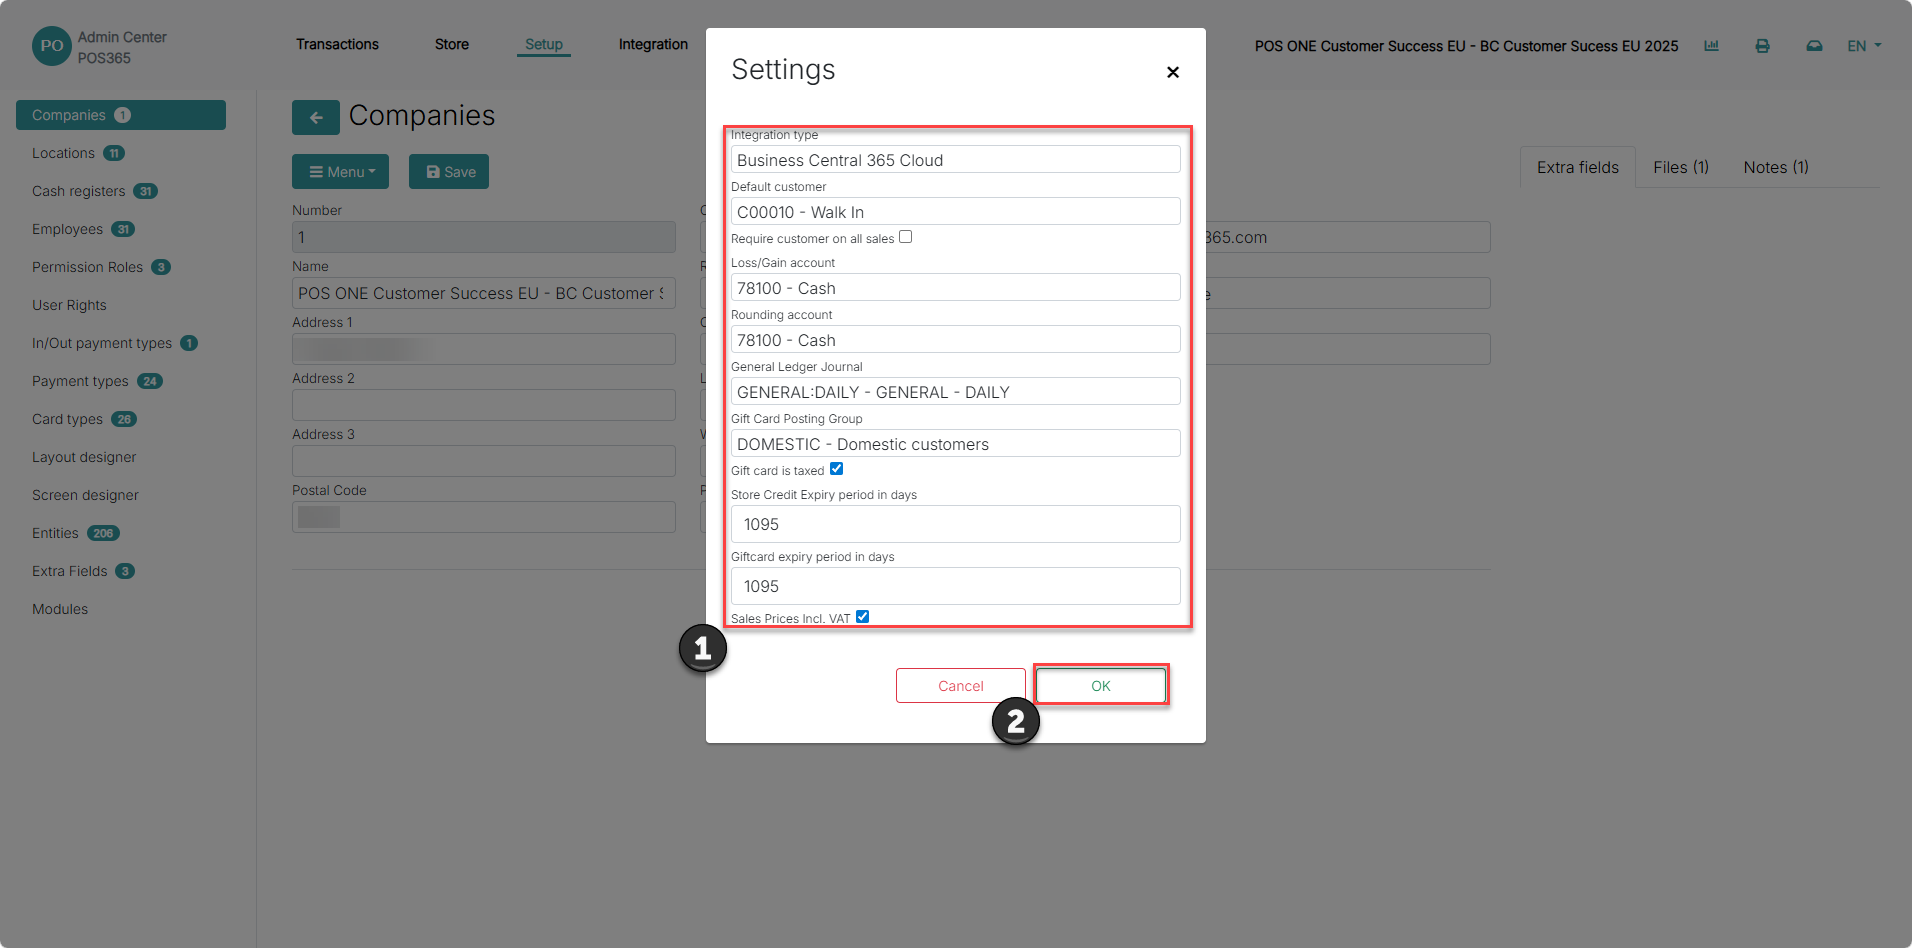
1) Go through posting setup and ensure that the correct accounts and journals have been selected
2) Click 'OK'
Step 10: Set up employee profile(s)
For more information, see here:
Create employee profile, select permissions and set POS password
Step 1:
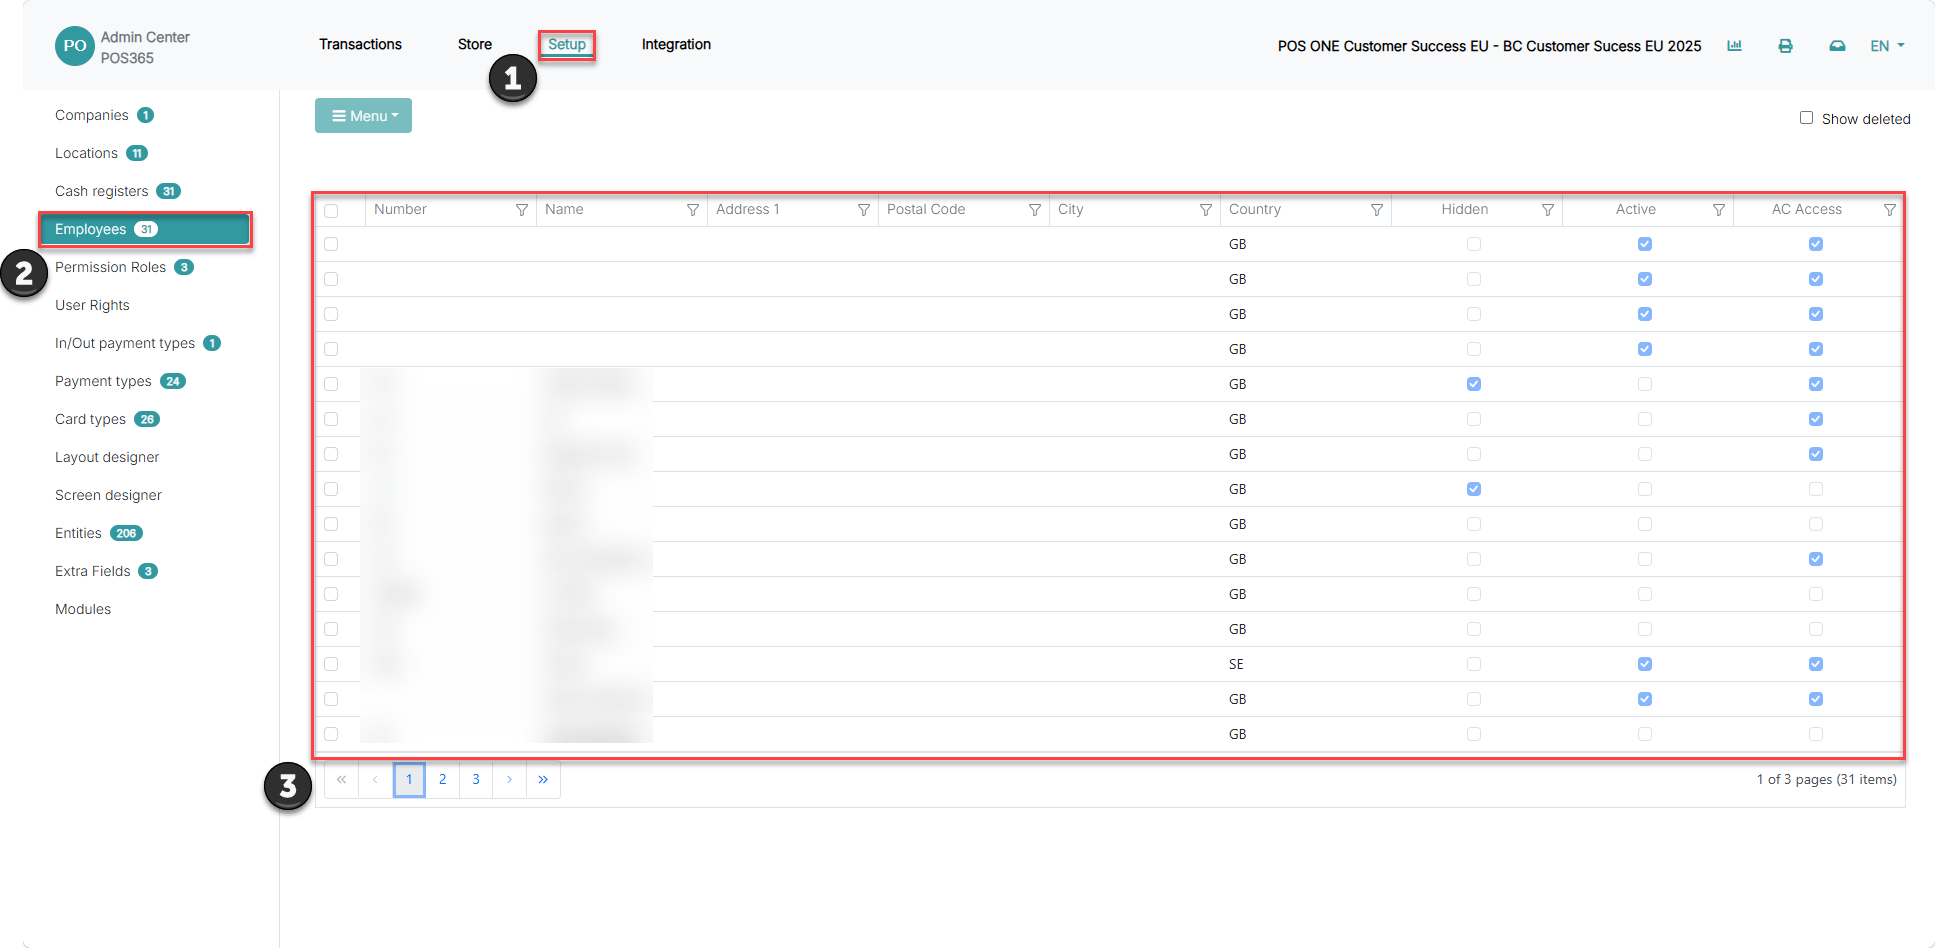
1) Click on 'Setup'
2) Click 'Employees'
3) Locate the specific employee and click on him/her
Step 2:

1)Set permission role (set 'Manager' role to ensure all functions are available)
2) Click 'Save'
Step 3:
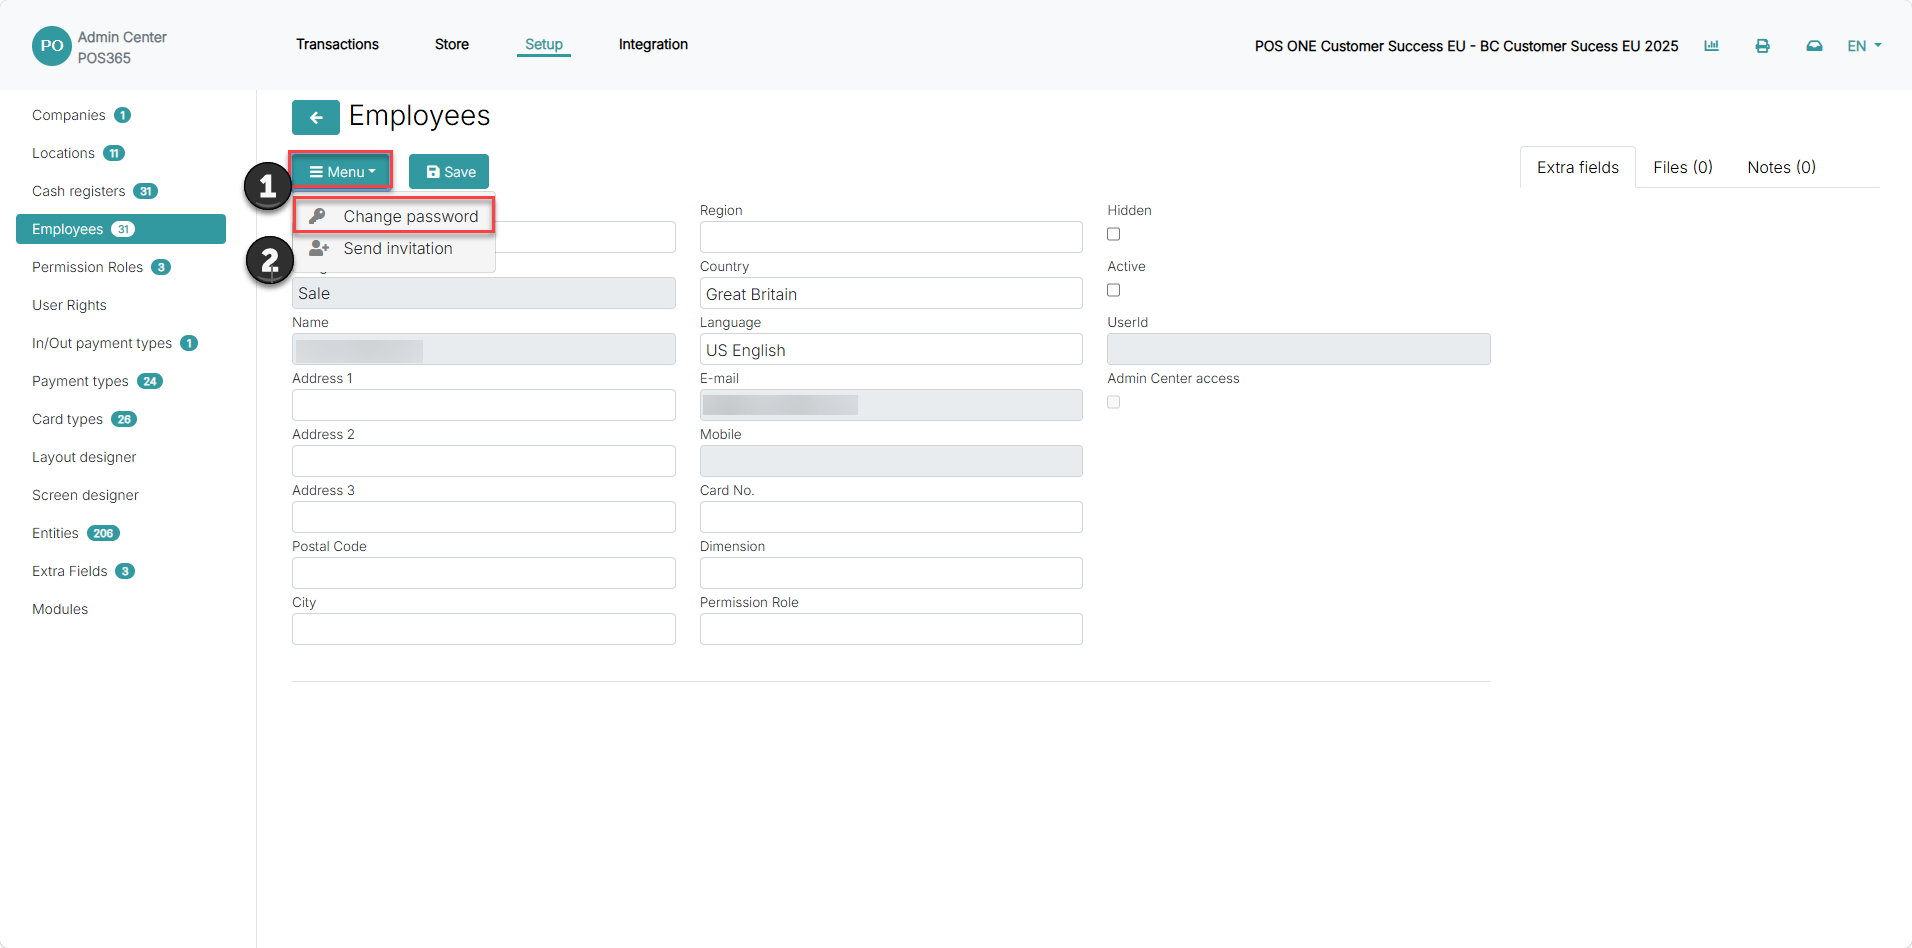
1) Click on 'Menu'
2) Press 'Change password'
Step 4:
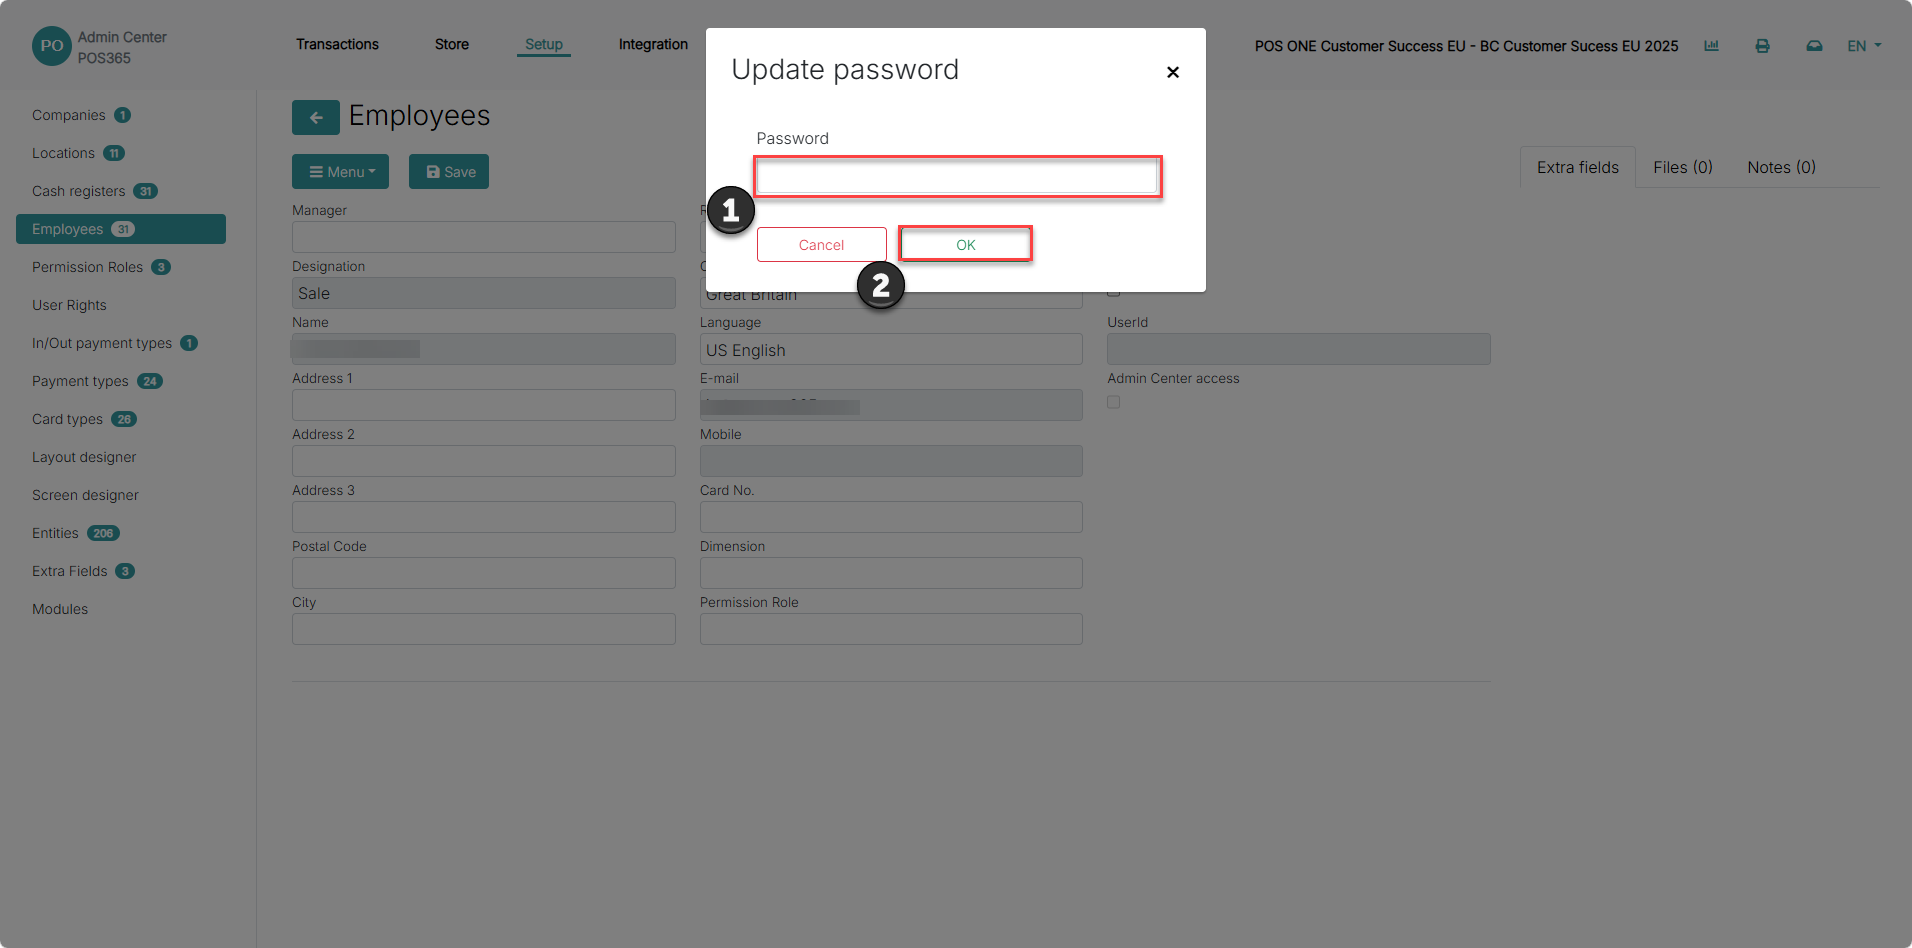
1) Type in a password for the employee when signing into the POS
2) Click 'OK'
For next step, press "here"