This guide explains how to create a new permission role. This function can be used to add or remove some functionalities from the POS365 app for specific users.
Step 1:
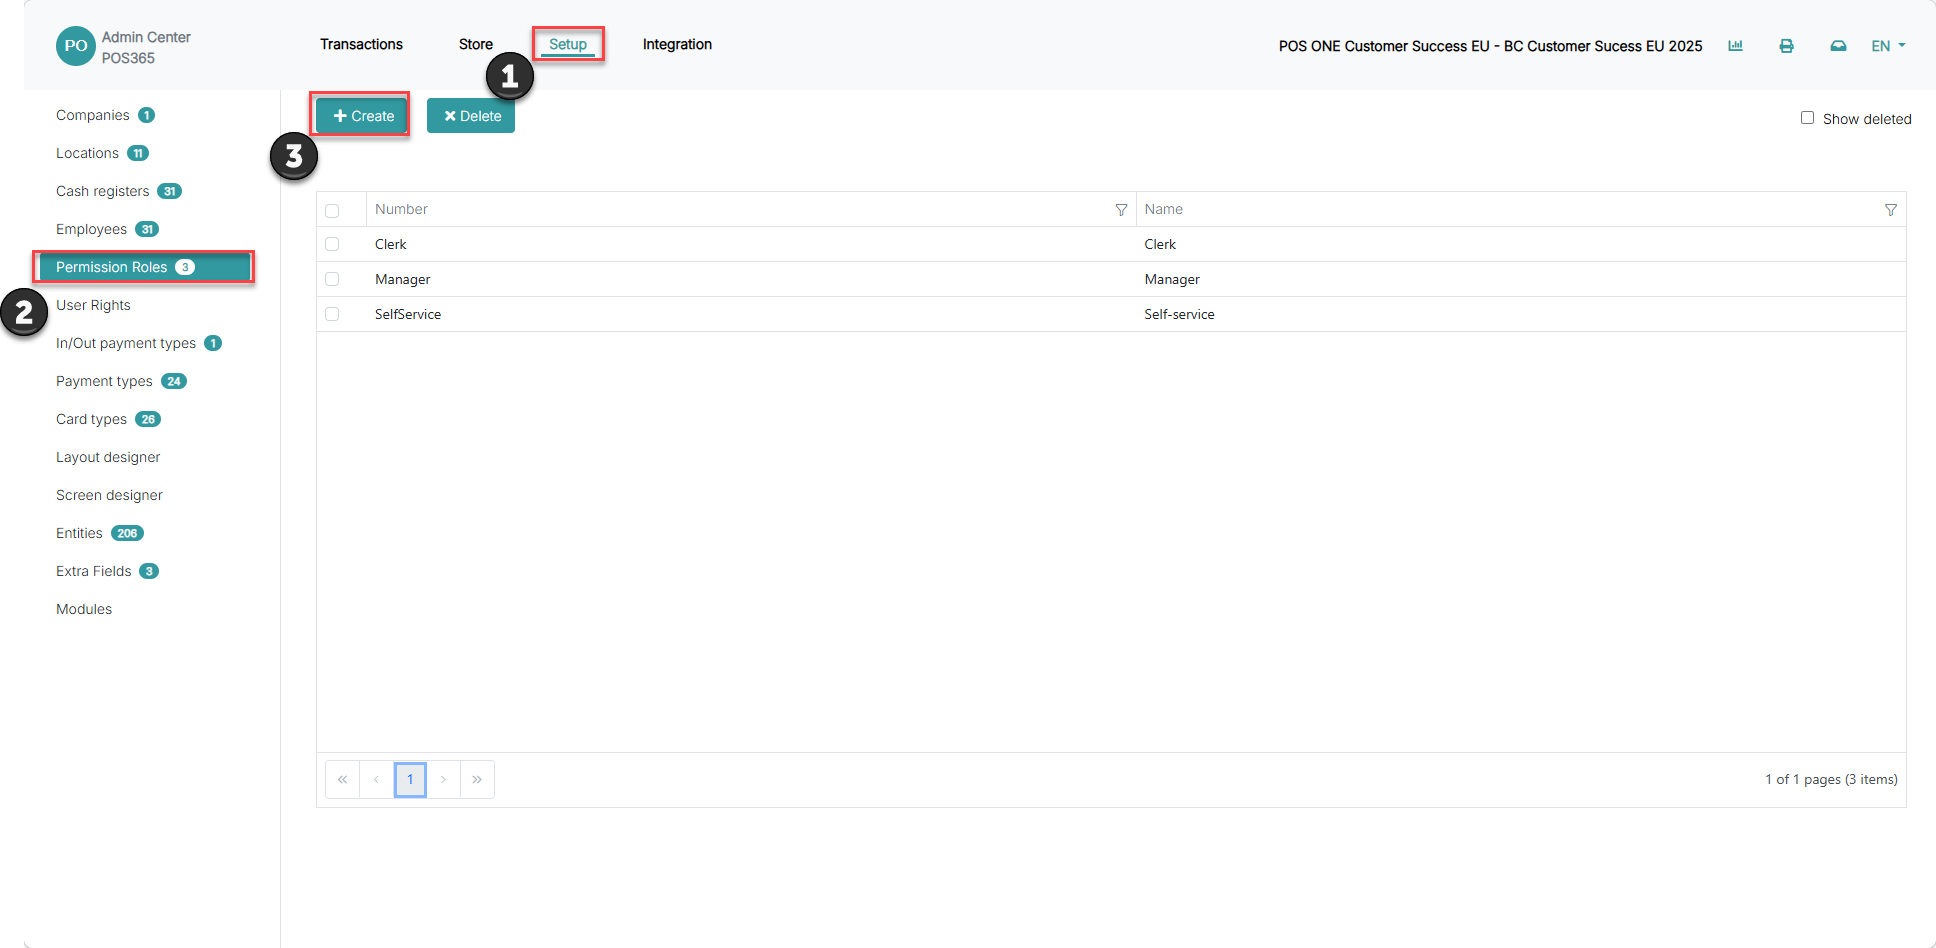
1) Go to 'System'
2) Open 'Permission Roles'
3) Click 'Create'
Step 2:
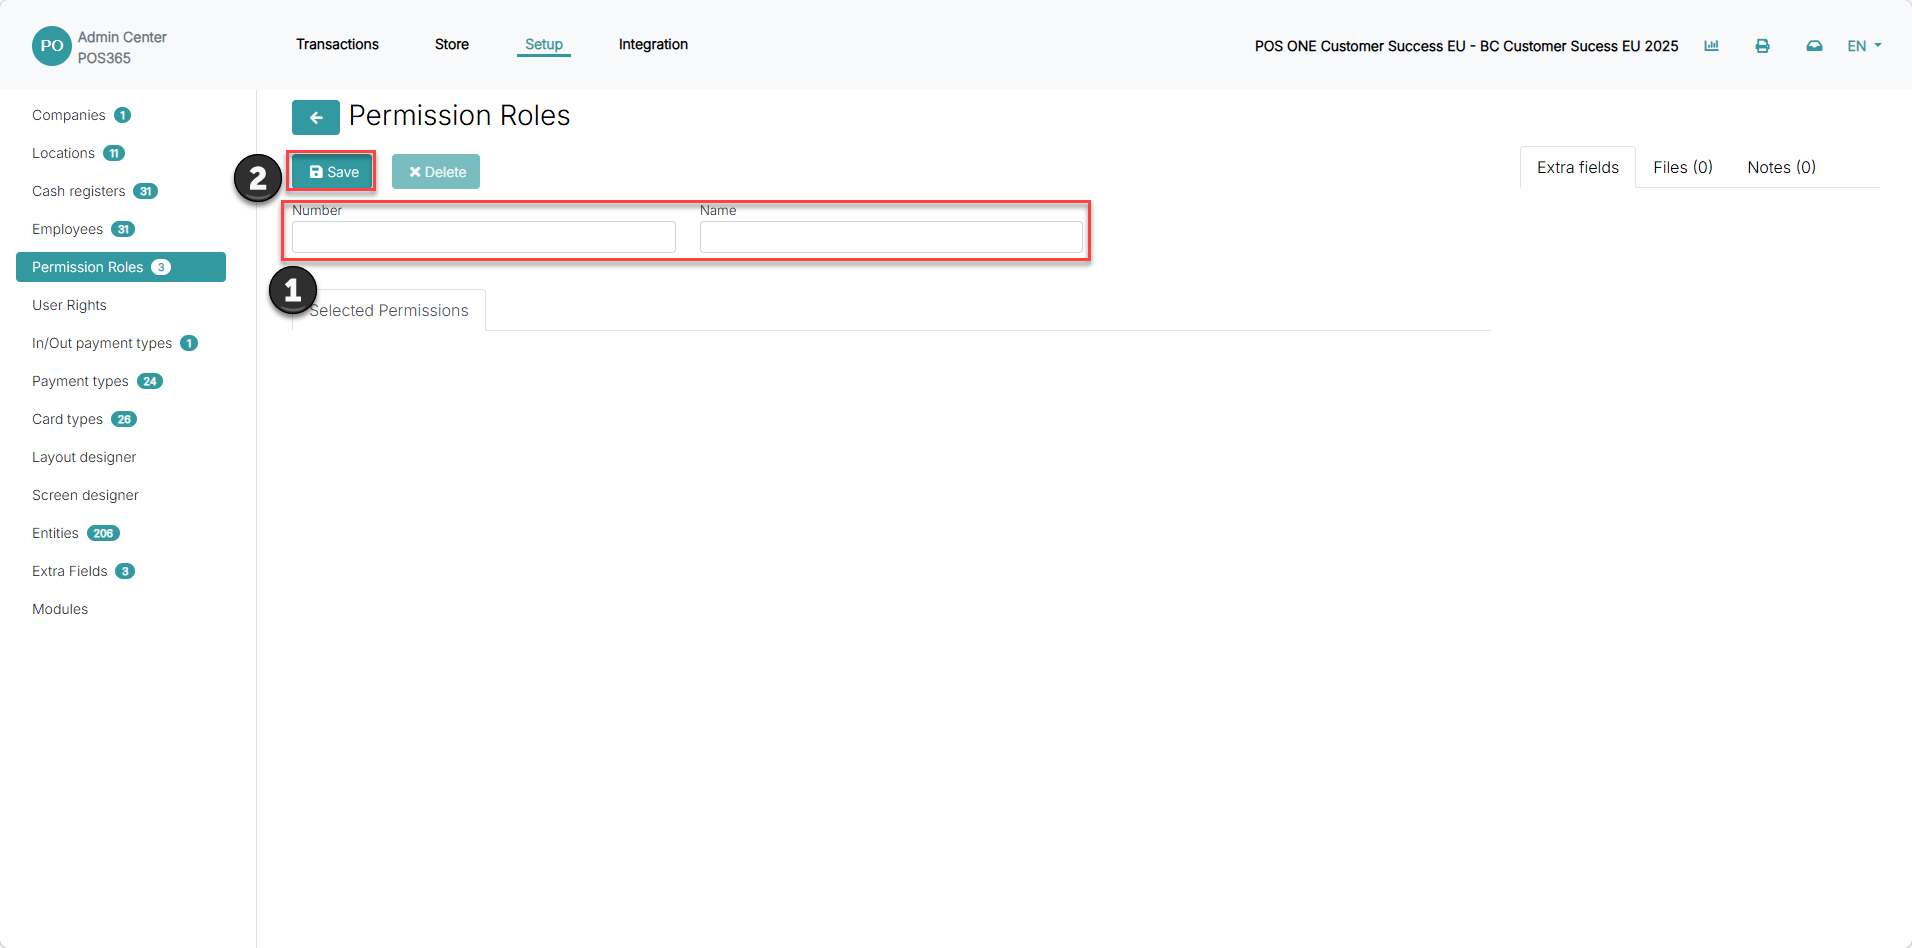
1) Name the permission role and assign a number for easy identification. This is used when applying the role for a staff member.
2) Click 'Save'
Step 3:
1) Click on the created role

Step 4:
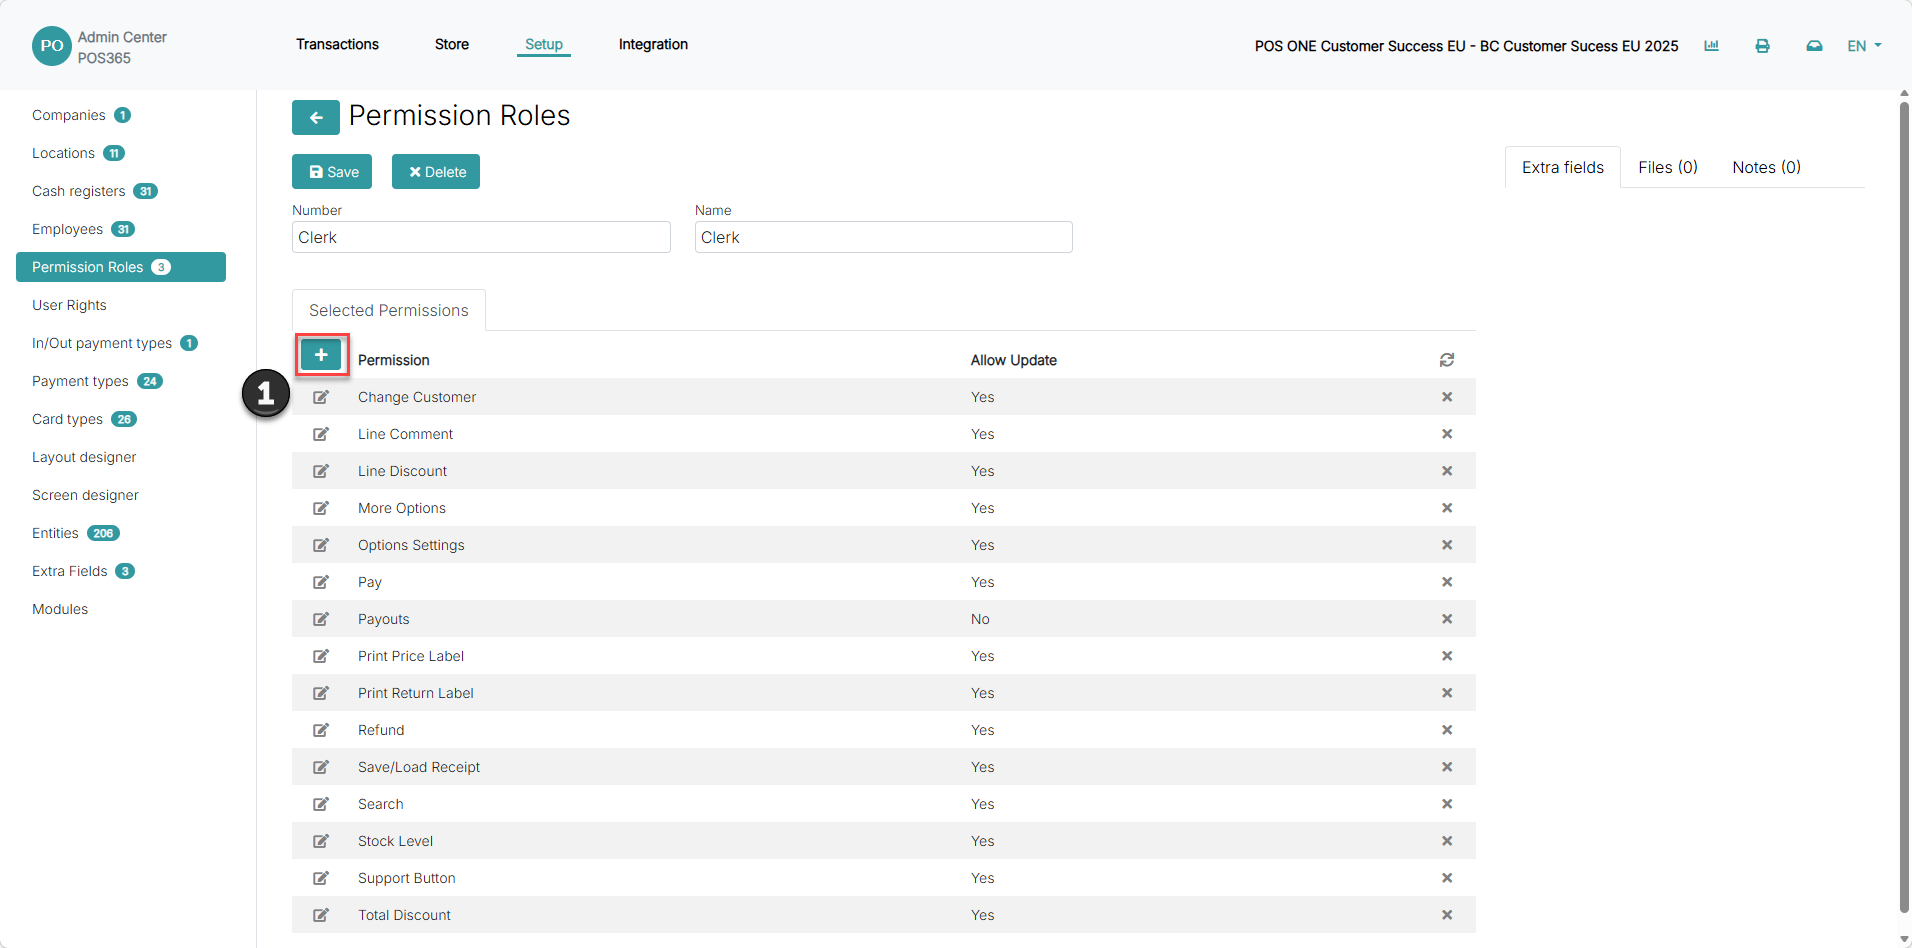
Click '+'
Step 5:
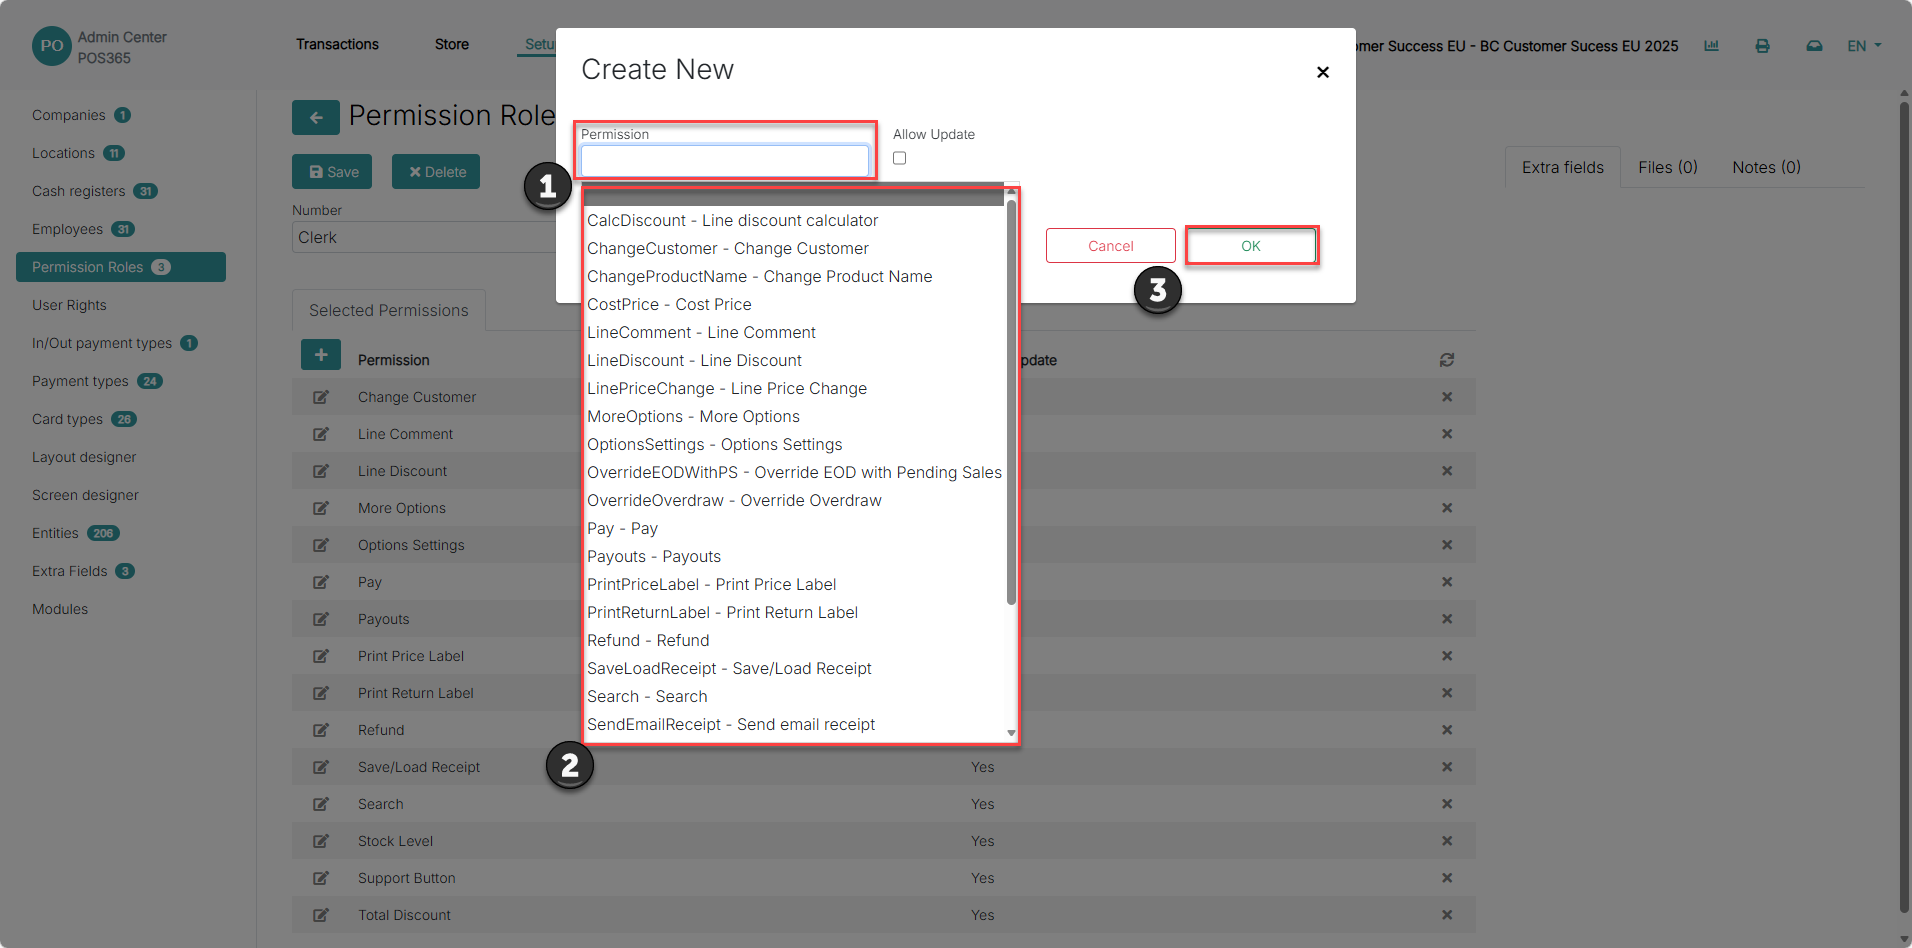
1) Click on the bar to open a drop down menu
2) Choose the permission from the list that you want to assign to the role.
3) Click 'Ok'
Note:
Only one permission can be added each time. Perform step 4-5 for every permission you want to assign to the role
The 'Allow Update' button defines whether the employee has access to change an input or needs a supervisor to do the change
Step 6:
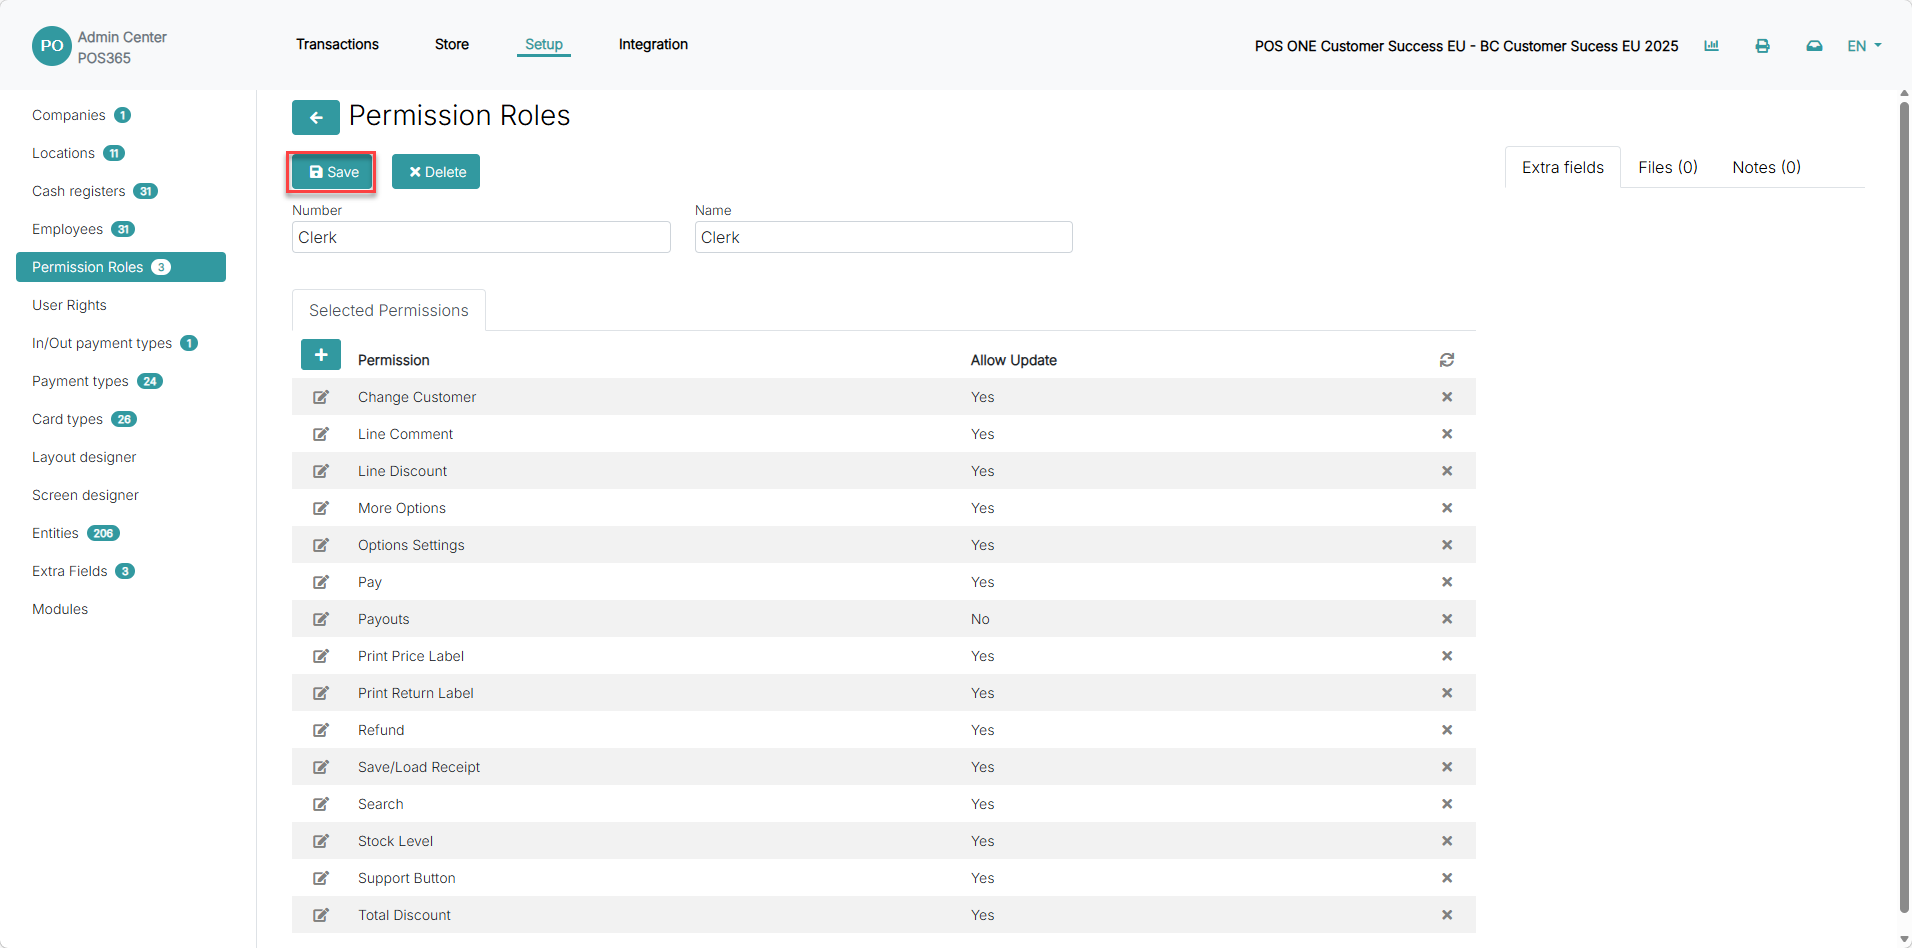
Once you have added all the necessary permissions, click 'Save'
When the permission role has been created, it can be assigned to any staff member.
This can be done by following this guide: How to - Change permission roles