This guide explains how to add a customer to a receipt in the POS365 app. Customers are synchronized directly from Business Central.
Step 1:
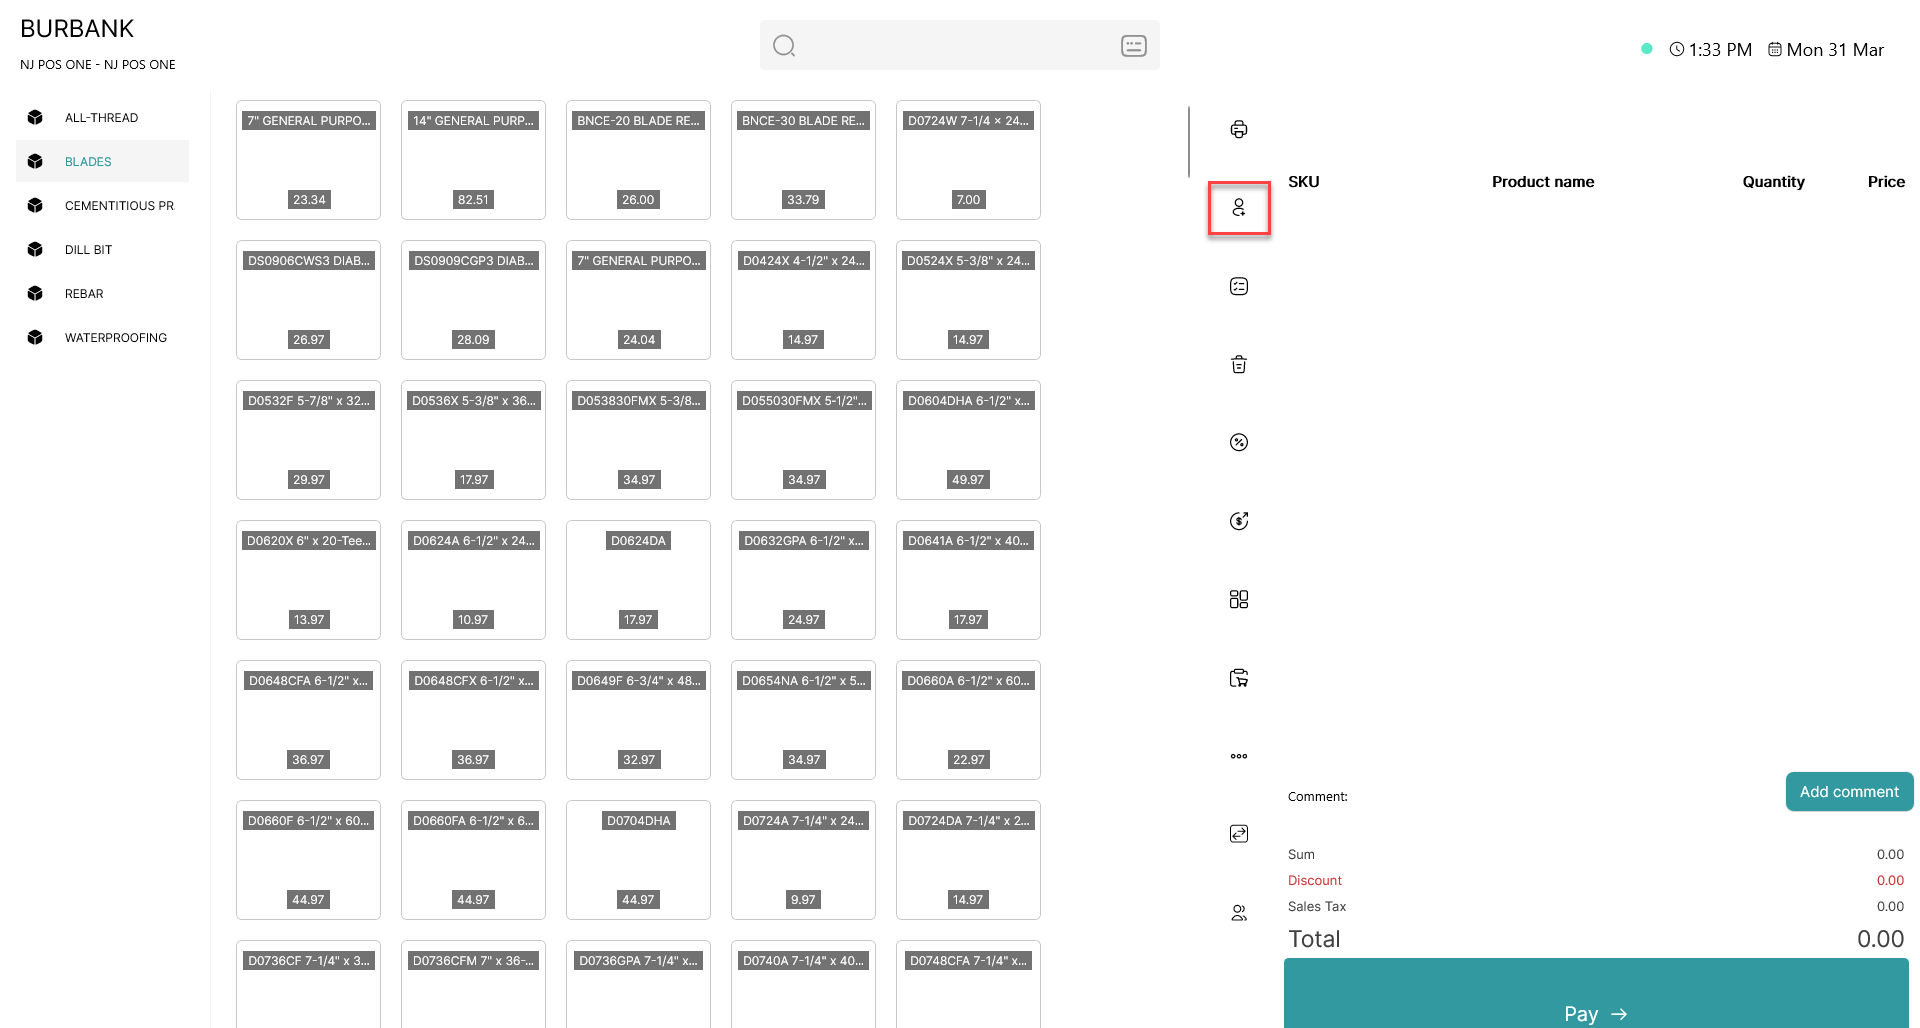
Click on the ![]() - button
- button
Step 2:
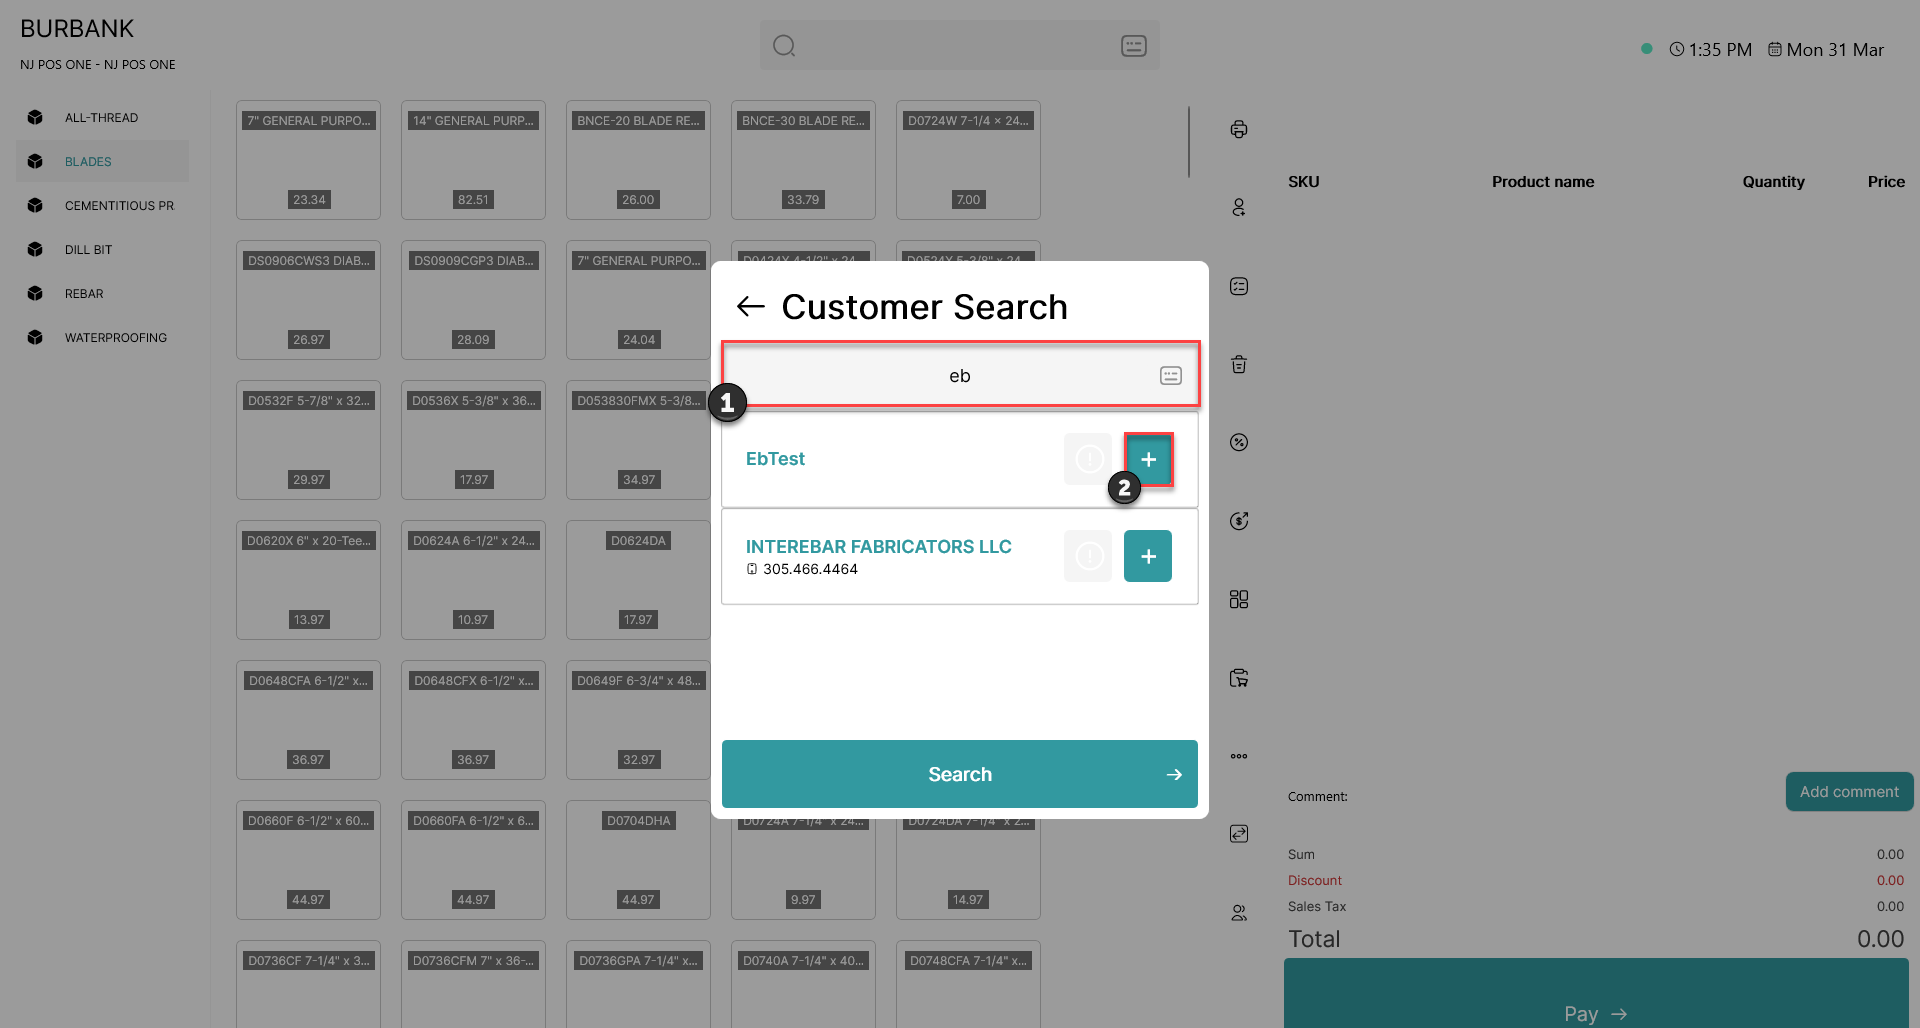 1) Search for the customer you want to add. You can search for their Name, Phone, Email. VAT number and EAN
2) Click on the blue button marked with a +
Step 3:
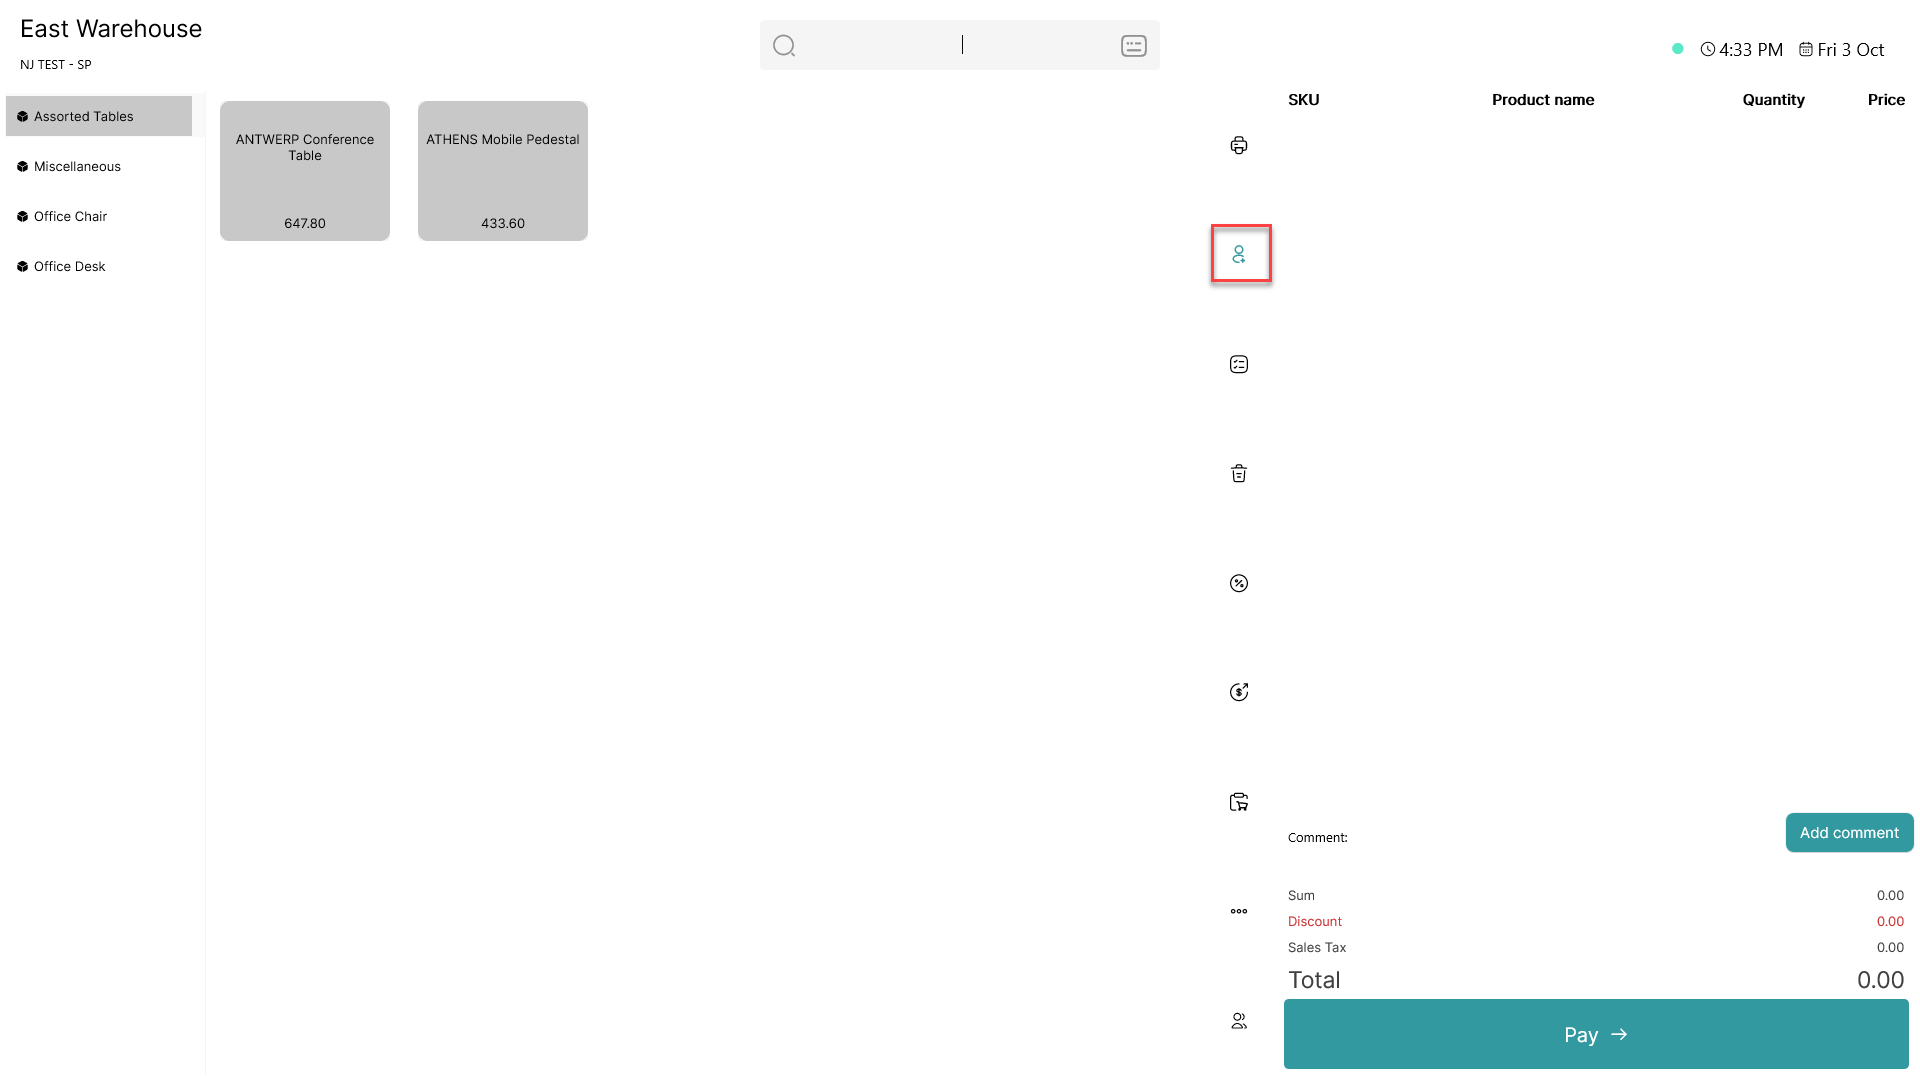
When a customer has been added, the button will turn blue
If you need more information indicating the added customer, see step 4
Step 4:
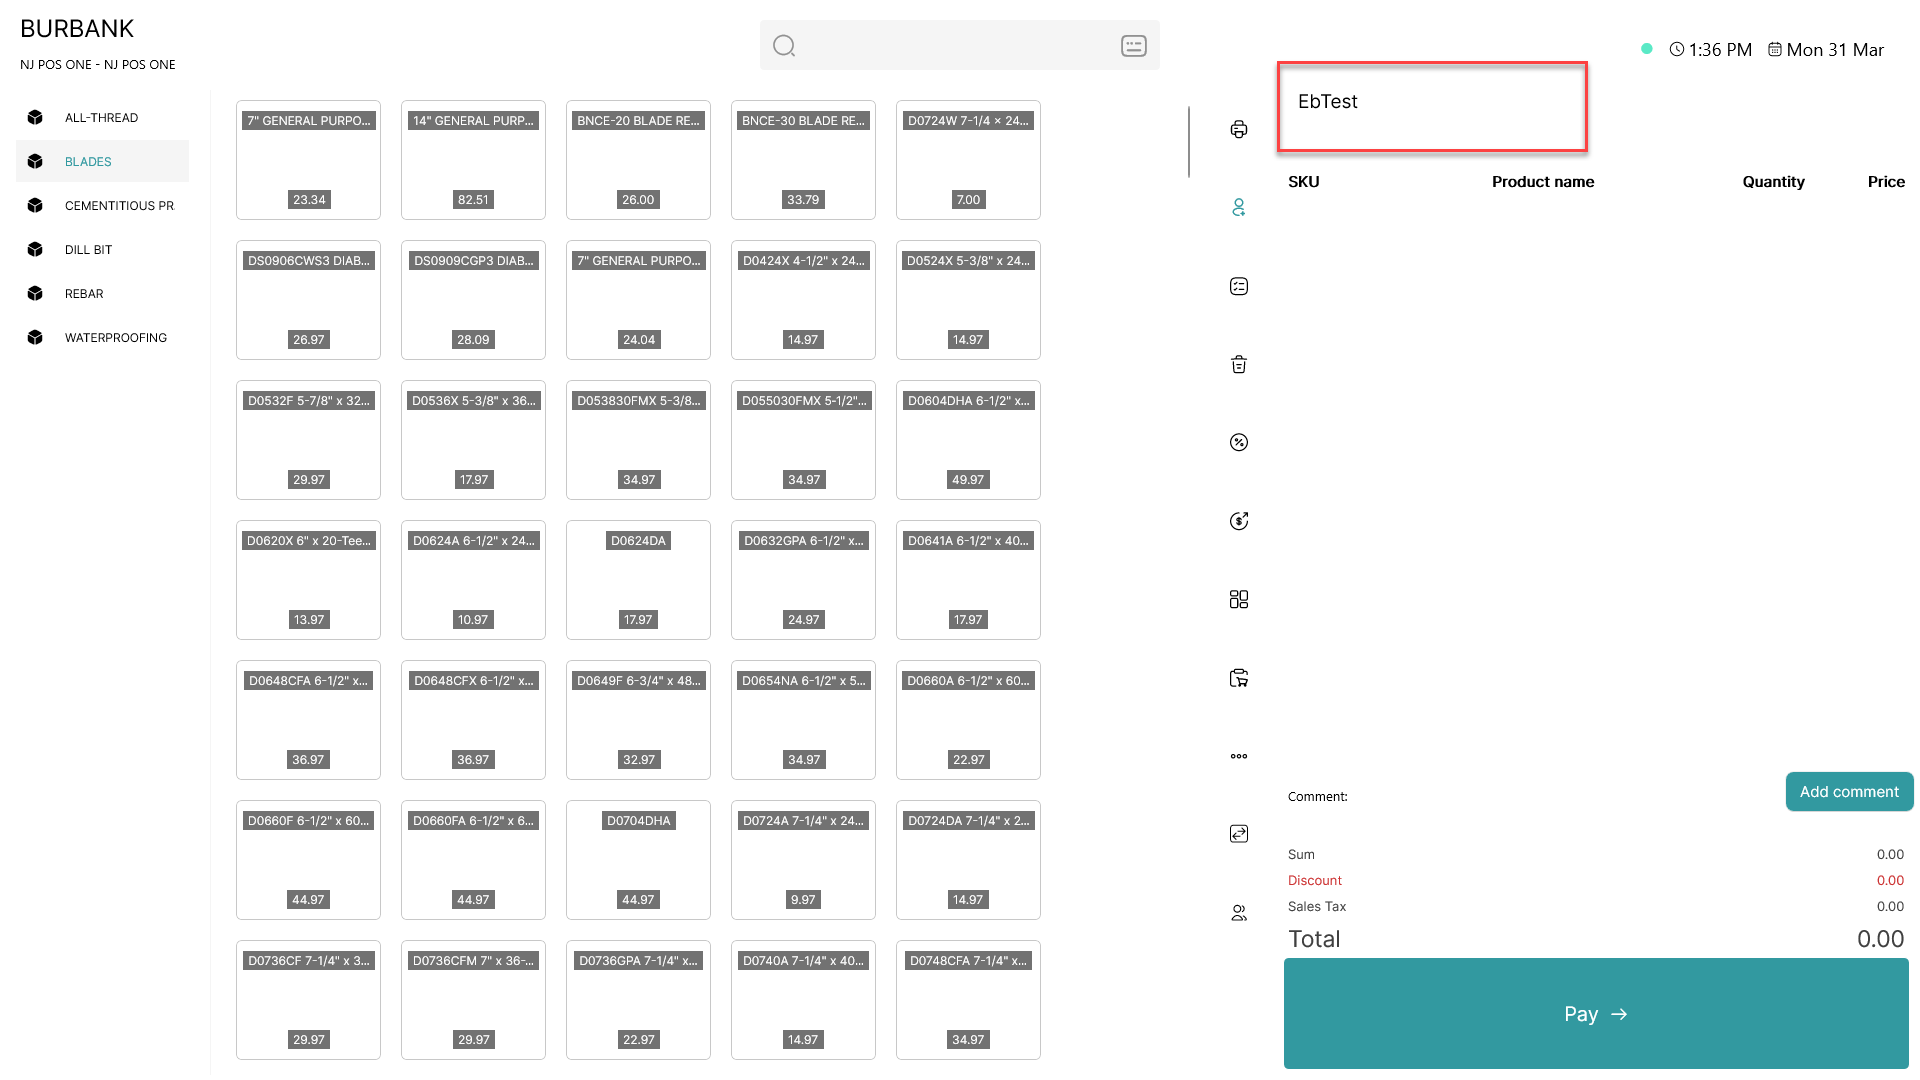
It is possible to add a field on the POS displaying customer information from Business Central. This can be added through the screen designer in the Admin Center